


 copy")

A few years ago, I converted my SUV to a camper by building a platform bed in my 2009 Honda CR-V. It’s still a super popular post on this blog– see the original post here. Every so often, folks reach out to me with their own stories and how-to’s on how they converted their car or SUV, so I decided to start featuring them… and they’re even better than my original post!
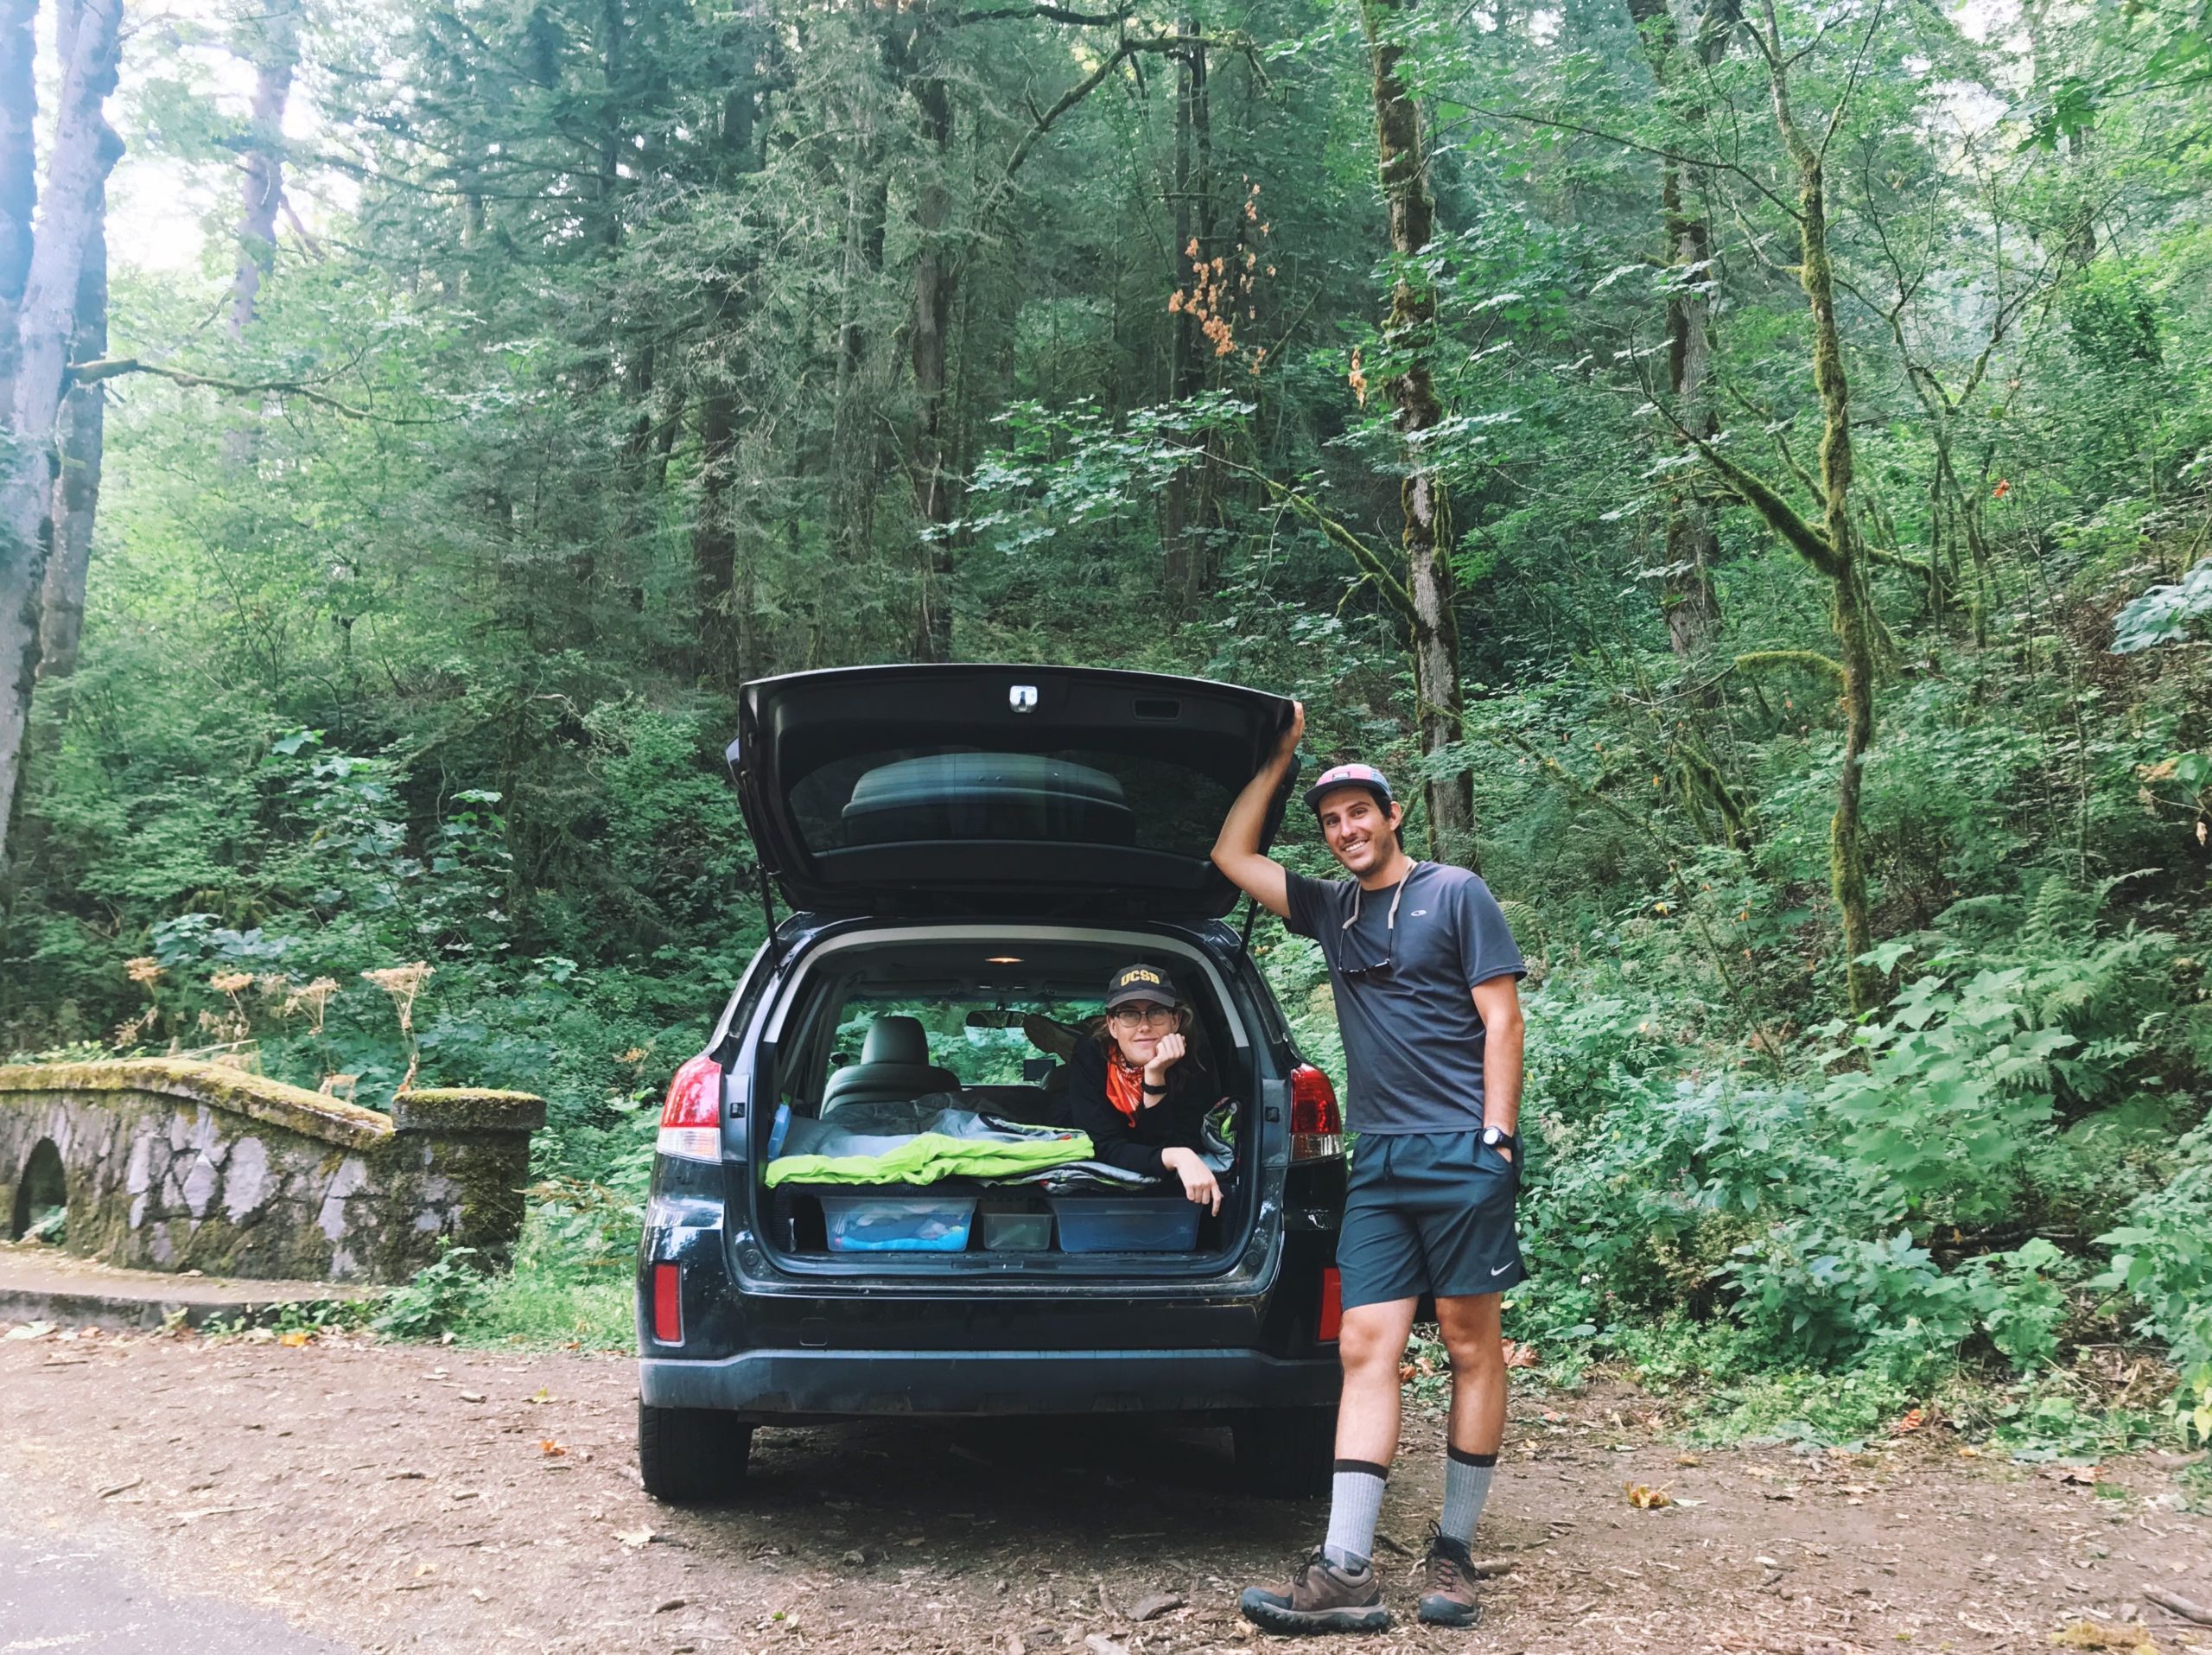
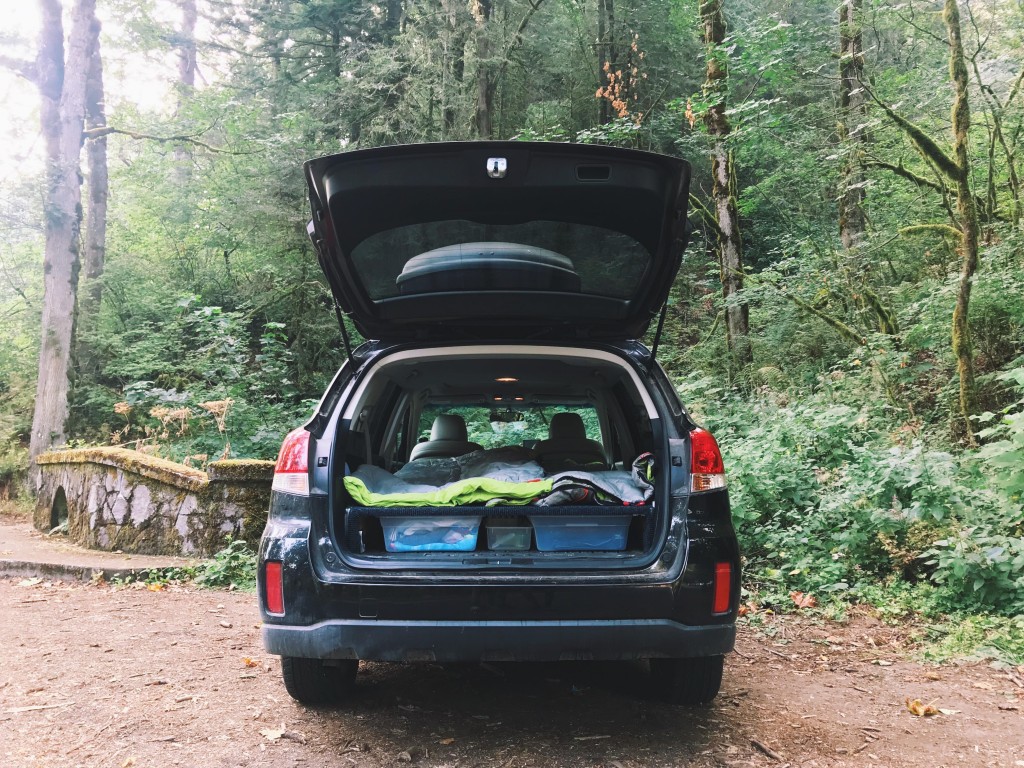
Here’s Nicole Aichele on converting her Subaru Outback into a camper. All photos courtesy of Nicole.
After a year of health issues leaving me unable to camp, hike, or do many of the outside activities I love, I became deeply depressed and frustrated about my future. As I slowly regained my mental and physical strength, I found both a new gratitude for my health and a new determination to set my old dreams into motion… one of those dreams is to car-camp the entire western US.
After many months of researching, planning, and saving, I finally set the wheels in motion (literally) this past June. Here’s how I did it.
DECIDING ON DESIGN
Ideally, the design of your bed set up should reflect your own personal needs and preferences.
I also will say that if I can leave people with one thing when it comes to building a bed in your car, or really building anything, it’s the importance of taking good measurements. As my dad says: “Measure twice, cut once.”
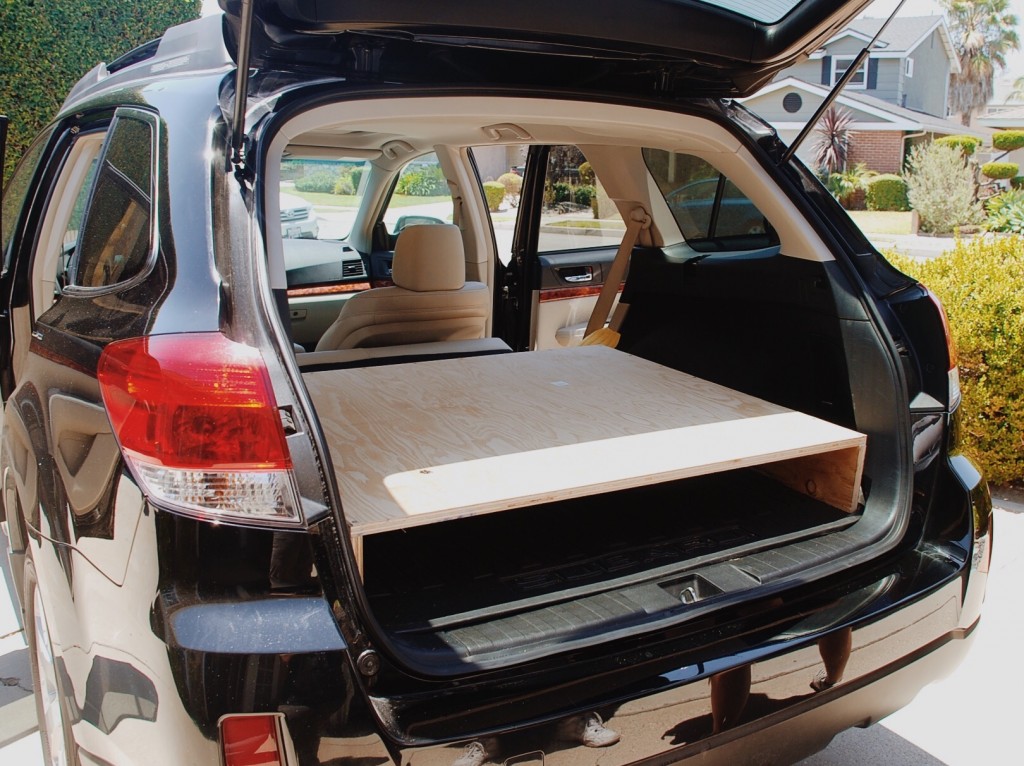
The first thing to figure out is how long you want your bed. Having a long bed (6’2) was a top priority for my boyfriend and I because we are tall…but everyone is different. If a bed can fit without pushing the front seats forward that’s great, but in our Subaru Outback it would be impossible to have the length we wanted without having the front seats forward.
We also chose not to remove the seats since the car is new and we didn’t want to risk ruining it, and found it unnecessary anyway.
The second thing to determine is the width you want your bed. For us this meant measuring wheel-well to wheel-well. We made the bed platform flush with the top of the wheel well, so in reality there is a bit more space (roughly 5’’ on each side) beyond the platform. In total we have about 51” of space (almost exactly the width of a double bed) which snuggly fits our two large single Therm-a-Rest Mondo King mattresses, side by side.
The third element of the design is determining the height. We wanted to raise our bed as minimal as possible in order to avoid being completely cramped against the ceiling while sleeping, but still allowing for storage underneath. Raising the platform to 6” fits the under the bed storage containers, but also leaves room to have our legs up while sitting in bed, (just over 2 ft. at the tallest point and just under 2 ft. at the lowest).
The last thing to determine about your design is whether or not you want the bed platform to be foldable. We had no choice but to make ours foldable because we couldn’t keep the bed straight and drive at the same time, because the seats are completely forward.
THE BUILDING PROCESS
Supplies:
- ¾” plywood, 42” wide x 74” long $33.00
- Wood Glue $8.00
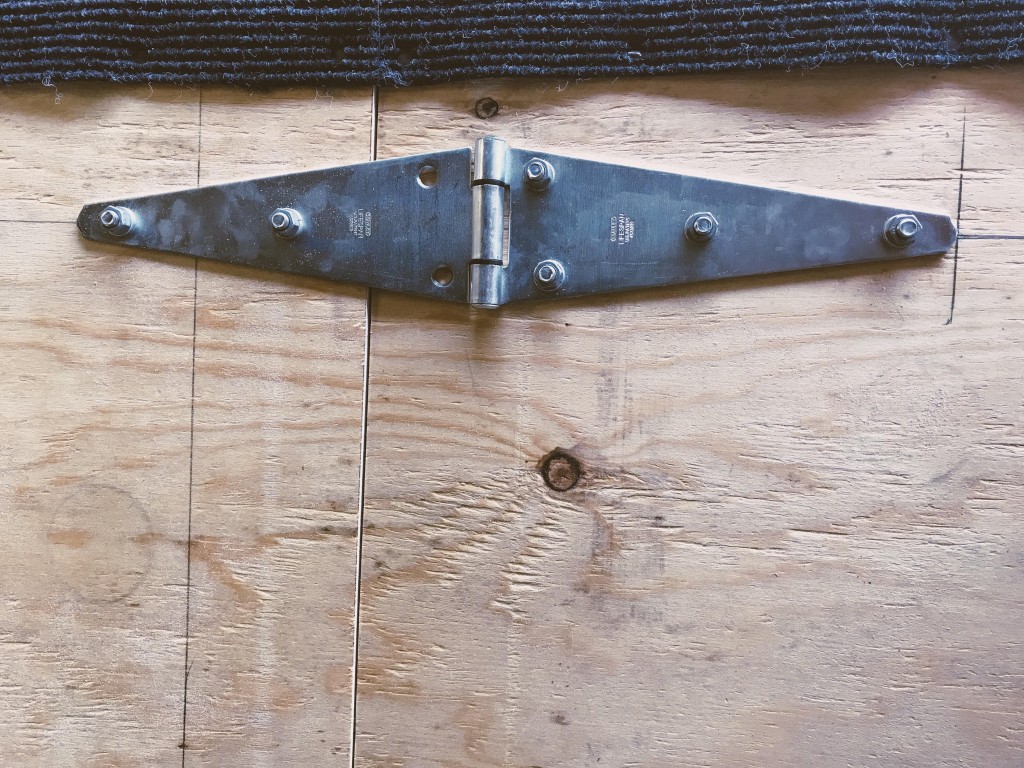
- 2 Heavy duty hinges $16.00
- Nuts, bolts, large washers, lock washers $15.00
- Outdoor utility rug $20.00
- Multi- floor adhesive $5.00
- Legs (two 2x2s) $20.00
- Pins and Brackets $5.00
- U Bolts $6.00
Total: (NOT including our mattress) $128.00
For wood we used a ¾” piece of plywood that was over 74” long. The pros of using ¾” plywood is that it’s sturdy and can hold 2 adults without bowing, and also very easy to work with. However, it’s heavy and can be cumbersome, so if you’re making a bed for one, definitely not as necessary.
We had the wood ripped (cut) to fit the width we had previously determined to be 42” (distance from wheel-well to wheel-well) to simplify all the construction at home. However even so, we completed a lot of additional cutting and drilling at home, because we have the equipment. If you don’t have access to a skill saw or other tools, then you’ll have to go back and forth to the hardware store, which is not uncommon. Some hardware stores even let you rent tools.
Step 1: Construction of the box platform
The box component is 42” wide x 36” long x 6” tall and has 3 sides. It purposefully takes up the entire back area of our car before the seats start (which is also where a slant starts). It maximizes storage and sturdiness while remaining level. Building the box was straightforward: we cut wood for the 3 sides, (2 sides are the same and are 6” tall x 35 ¼” long, and then there is a back piece which is 6” tall x 42” wide). We then glued the wood pieces to the 36” plywood piece and screwed them for ultimate stability.
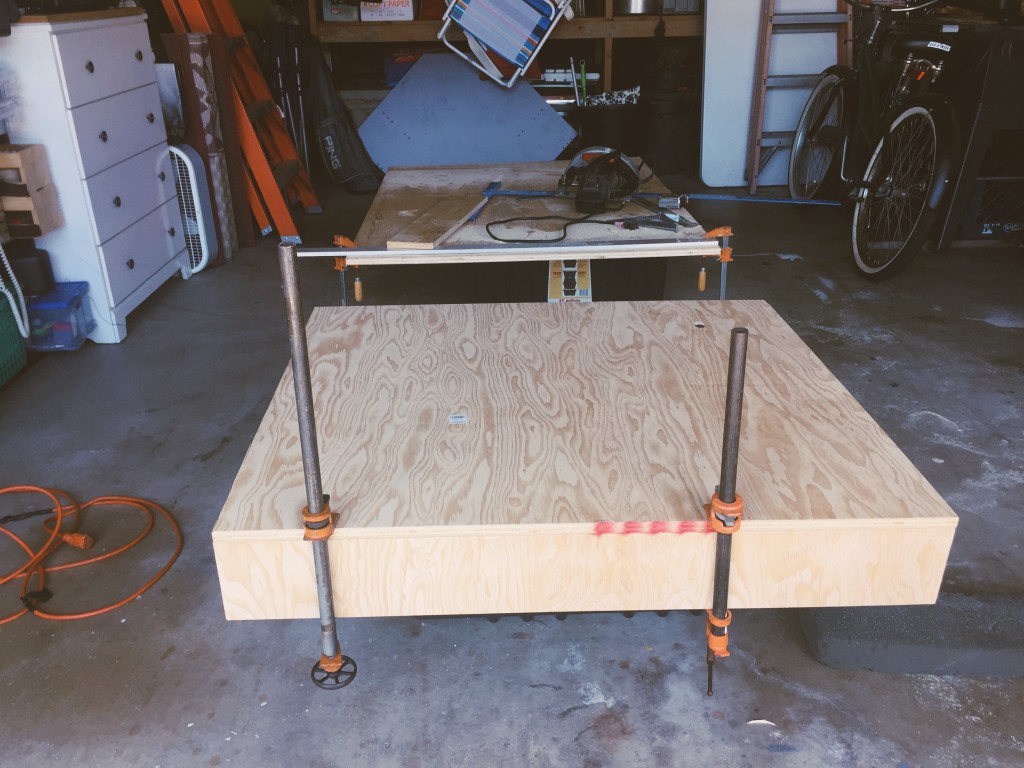
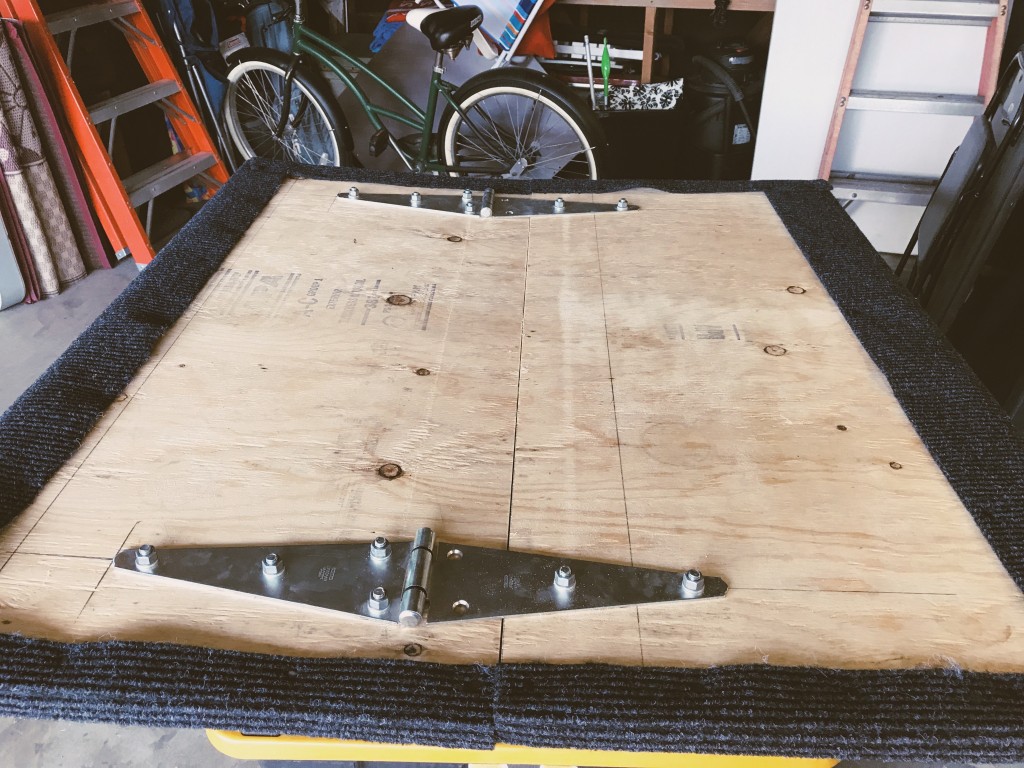
Step 2: Construction of the hinged component
The hinged component is two pieces of 19” long x 42” wide plywood, hinged together. When hinged together the piece measures 38” long in total (38” plus the 36” of the platform box is 6’2”). We offset the hinge, in order for this component to be weight bearing. If the hinge is not offset, it would literally bend in half the moment enough weight was applied and would not work as a bed. In addition to offsetting the hinge, we reinforced it with oversized washers and lock washers along with the nuts and bolts. It’s important to note, the hinged component rests on a ledge that we attached to the box platform. We attached a 3” x 42” strip of the plywood, ¾” down from the top of the platform, on the back edge of the box.
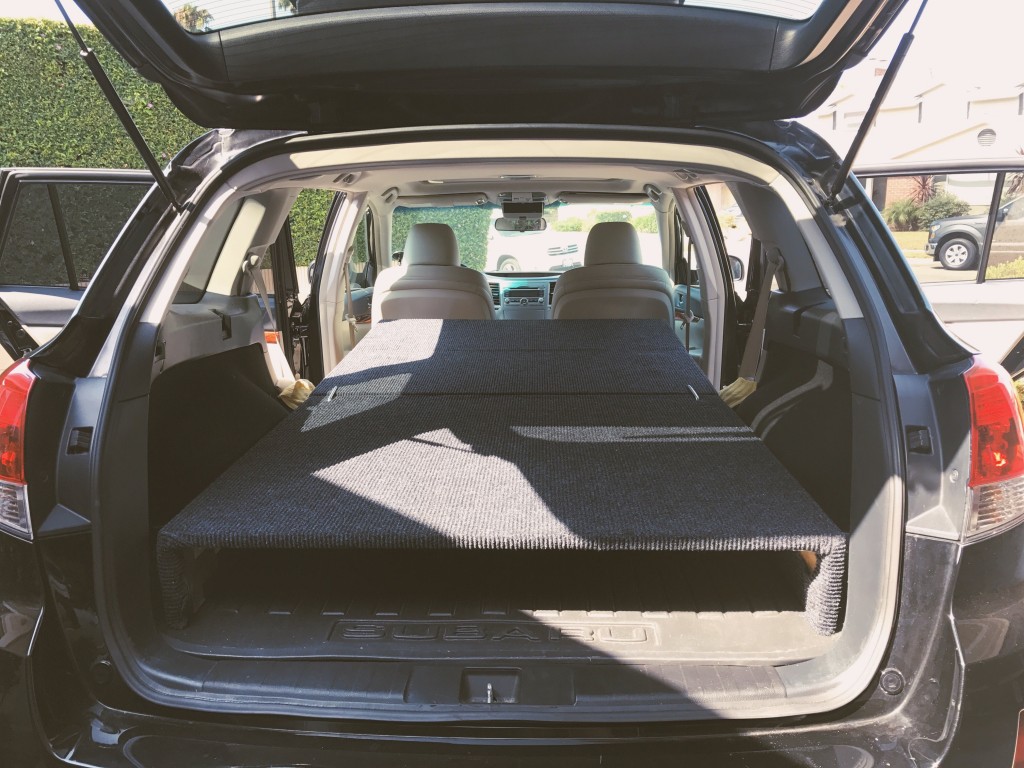
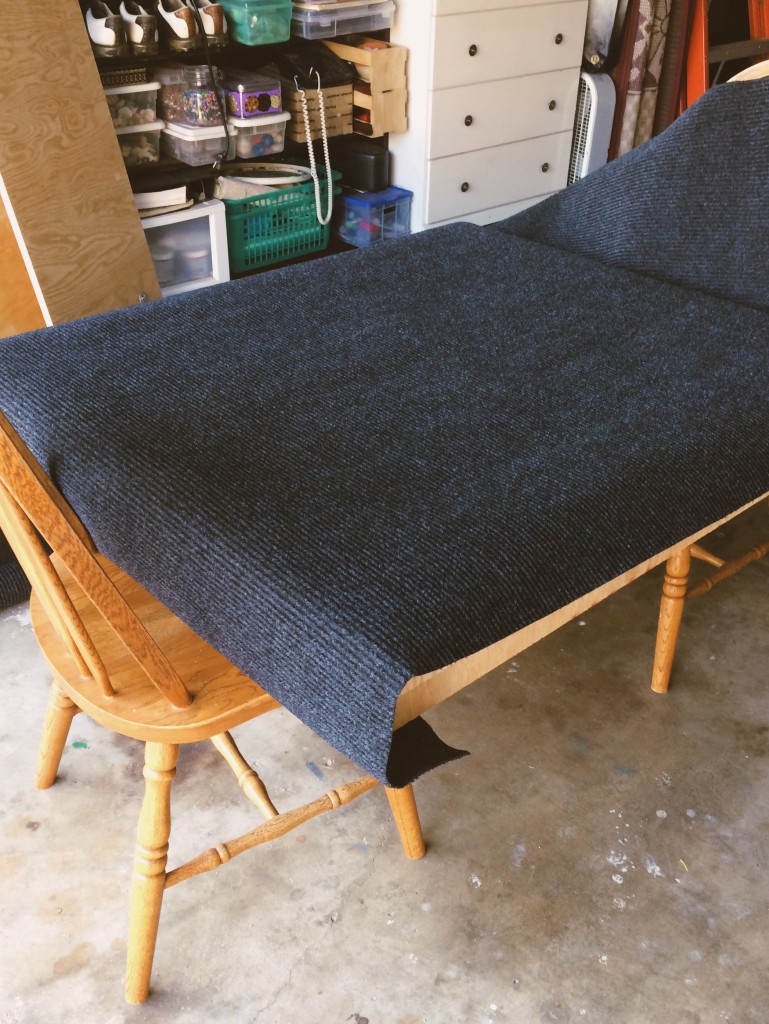
Step 3: Applying the carpeting
The main reason we wanted to carpet the entire bed is to eliminate having splinters of wood all over the car, our pillows, and our foam mattress. We didn’t use fancy outdoor carpet, instead we found a multi-purpose outdoor utility rug for $20 at the hardware store and used a razor blade to trim it at home. We glued the carpet using “general use multi-floor adhesive” on the main faces of the wood (although I don’t know how necessary the glue really is) and then we wrapped the carpet around and tacked it securely underneath. Folding the carpet completely underneath the base component is aesthetically pleasing, and also adds a tiny bit of height to the storage area.
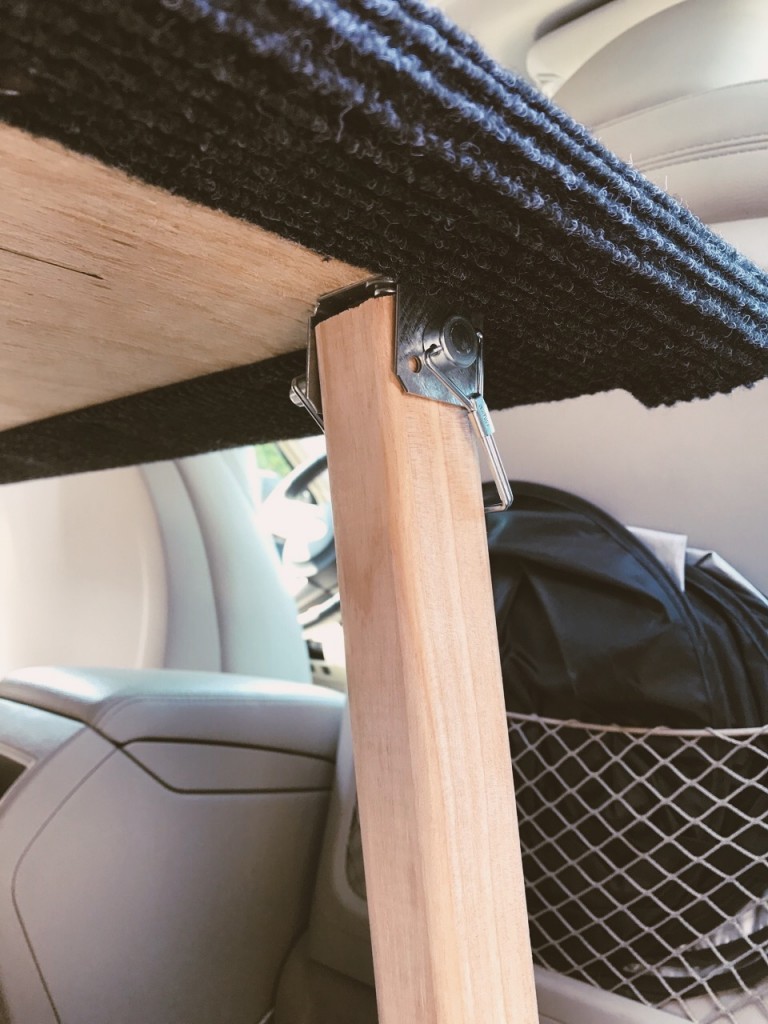
Step 4: Attaching of the legs
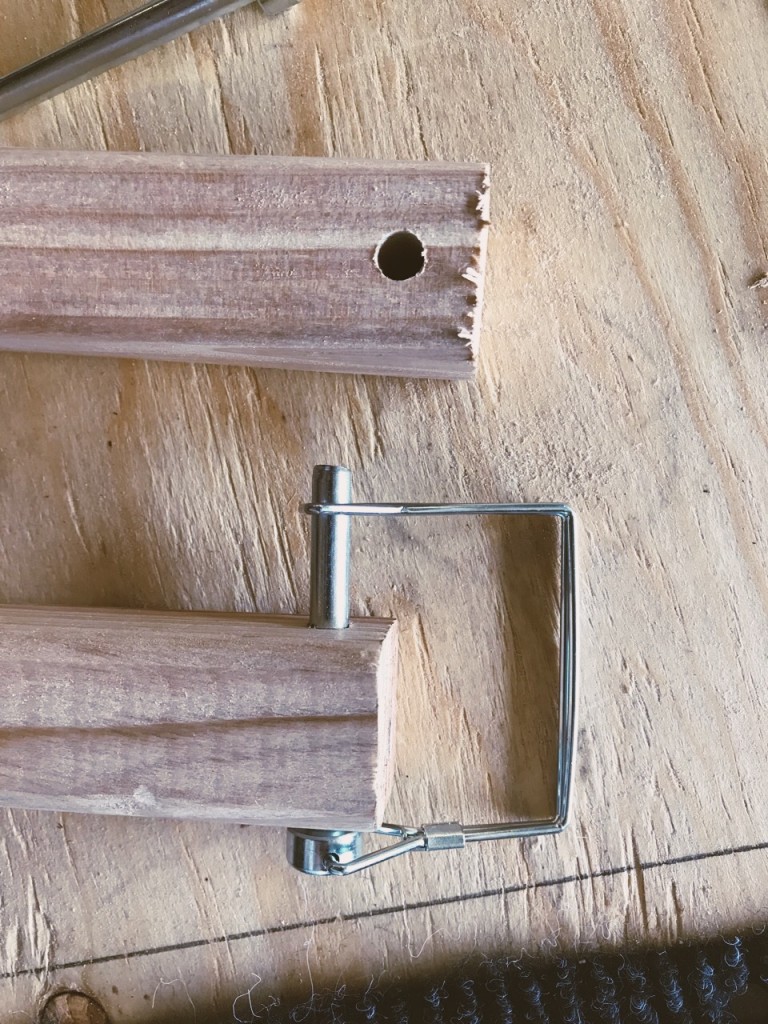
The legs serve as the main support for the hinge component, which supports our heads… so it was really important we made them sturdy and stable. We used two 2x2s and cut them to fit securely underneath the hinged component at 26” tall. They’re attached by a pin, to a bracket on the underside of the wood of the hinged component. We had to drill a custom sized hole through the brackets in order to fit the pins. The pins and brackets are awesome for easy removal, while also making it possible for the legs to pitch slightly forward for some added resistance to bending.
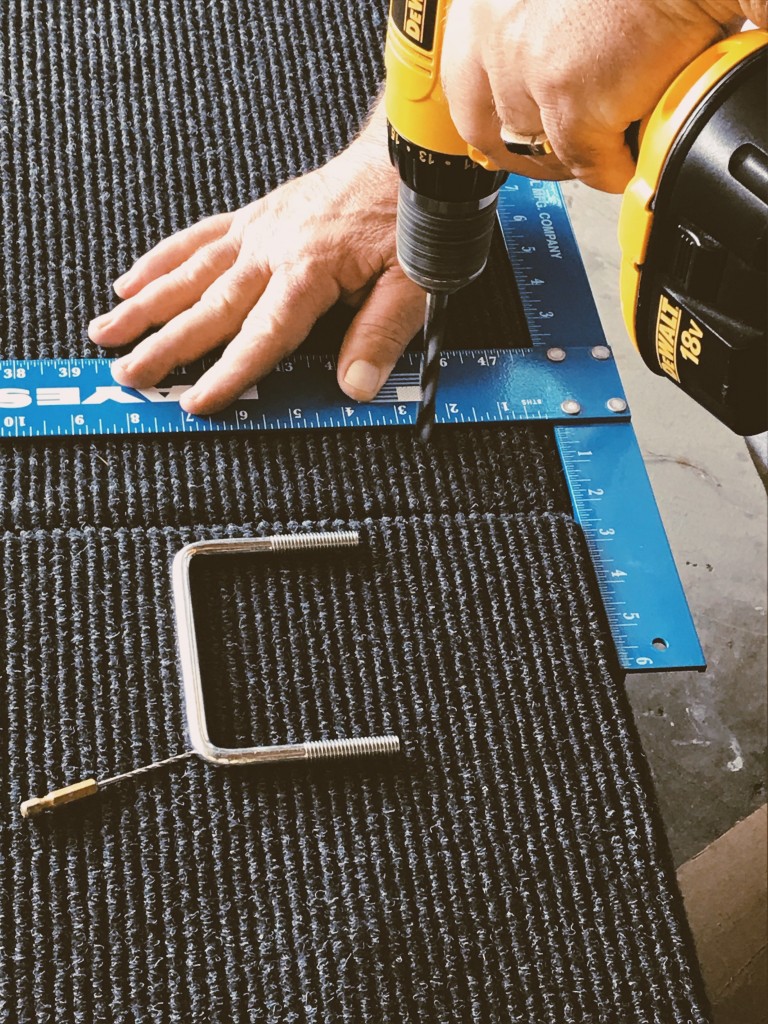
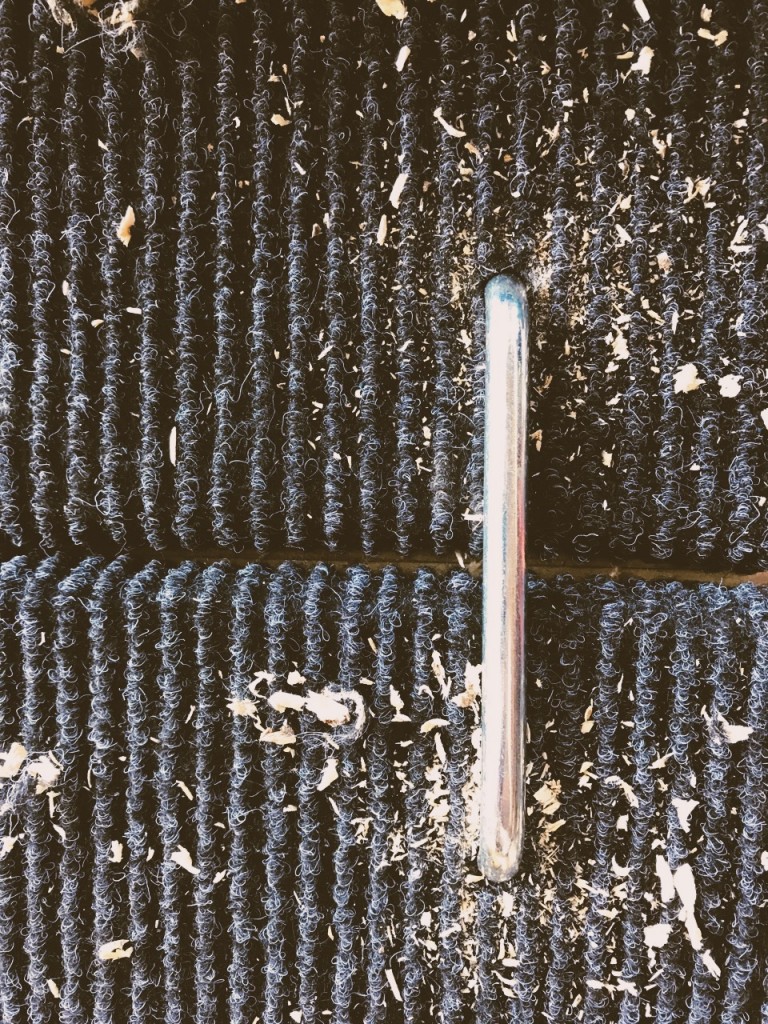
Step 5: Installation of the U-bolts
To secure the box platform to the hinged component we used two 4” U-bolts. We drilled a hole on each side, one through the box platform and one through the hinged component (through both the carpet and wood), 2 ½” from the edge. The U-bolts are then dropped into the holes in order to secure the two components together while sleeping. The U-bolts come out easily when folding the bed platform up in the morning.
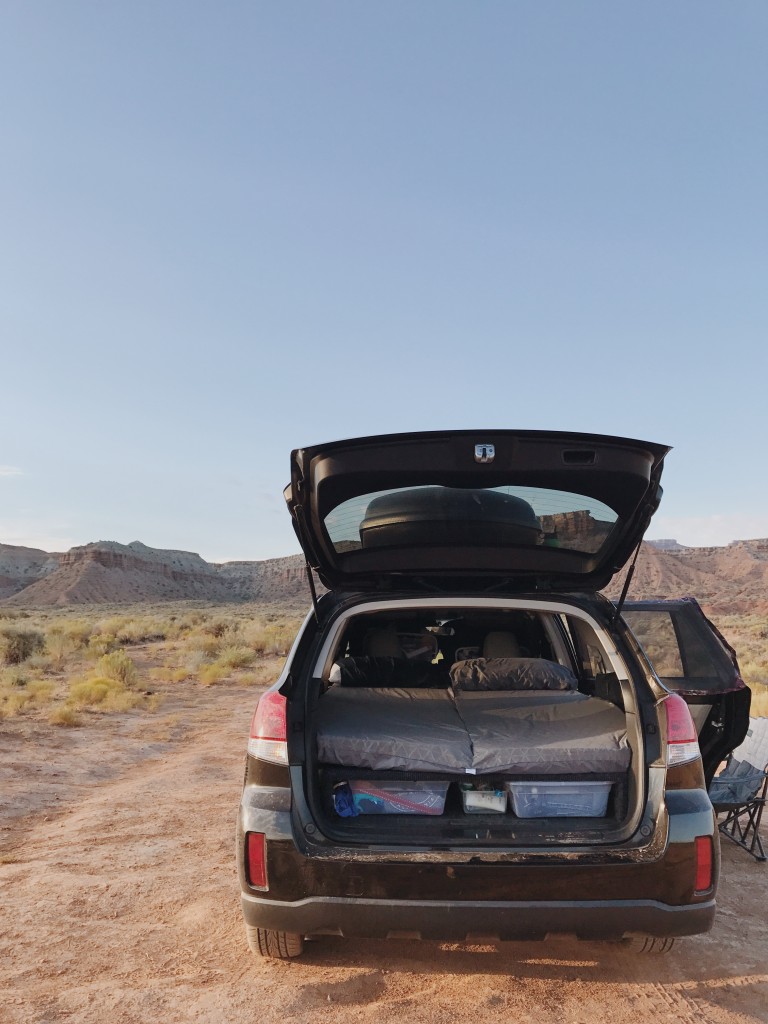
I hope this guide encourages other people to be less intimidated by the idea of building a bed in their car, especially women. As I write this from a campground in the middle of nowhere in Utah, I can assure you it’s worth it.
Also, a big thank you to my boyfriend who traded in his car for this Subaru and then let me build a bed in it…and to Erin for supporting me these past months and giving me the tools to take on risks and adventures like this one.
 I’m Nicole. I currently write, photograph, and live out of the back of a Subaru Outback with my boyfriend. Although I’m only on the road for summer, I’m always looking for rad adventures and new opportunities in the outdoor industry.
Follow Nicole’s adventures on Instagram at @nicole_aichele, and comment here or DM her for any questions on this conversion or her trip!
Please ignore this text box - Recoleta Font


")
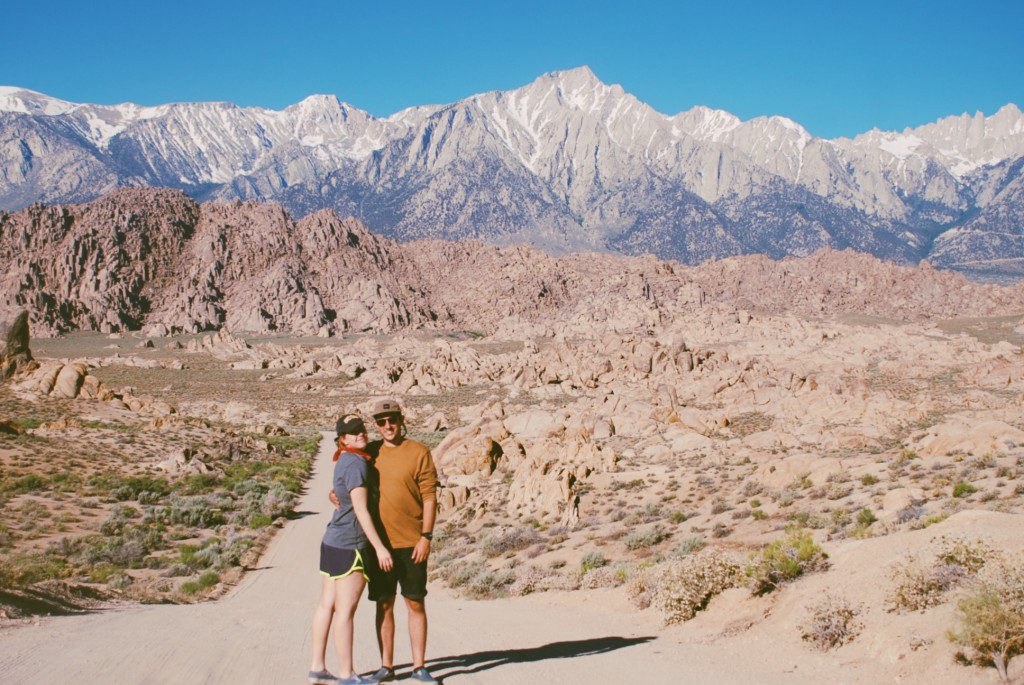
You will find that Subie to be a great vehicle to travel in. Very dependable, good ground clearance and fuel efficient. I use a foldngo memory foam mattress in my OB. Folds to a third it’s size during the day for more room. The aftermarket for these vehicles is booming and I see Subarus every where I travel. I hope you two have a great time this summer and and see many places like the Alabama Hills where that cool pic of you two was taken.
Sweet article!! I thought it would be more expensive for the set up. I want to do with with the subaru crostrek. Should be similar, just smaller dimensions on the plywood.
I just started hiking this year and I have been roading tripping for over a year. I quit my job and now I’m engaged with the biggest sweetheart who follows me everywhere I go.
Im so glad I saw this post… since I moved from Houston, Tx to Las Vegas and I am carless we have been car shopping trying to figure out whats economic and comfortable for traveling (and baby friendly since were trying to concieve, so im looking at the back seats and thinking to myself if its roomy enough for a babyseat). We ran into a Subaru and I thought they were silly cars and then I test drove it and quickly changed my mind. Such a great car. Yet I was worried about how I could custamize it for sleeping… and here I am one day later reading this post.
thank you.
Ray, thanks for sharing! Love your story. Glad this article came to you at the right time. Enjoy your new adventure!
Very good Article! Thanks for sharing. Keep sharing continuous. Thanks!
Thanks Joshua!
I might have not read carefully enough- but can the bed fold so that one can use the back seats during normal use?
I don’t think so – that might be challenging from a logistical perspective! But to be sure, send a DM to @nicoleroams 🙂
Yes, it all folds to a point it could fit behind the back seats in regular use, which is how we keep it on a day to day basis!
Love you post!! Did you try to sleep in the back with the seats folded out without a frame first? What made you choose a frame vs that option.
Hi Megan, so with the seats folded out the area to sleep is relatively short- under 6ft and closer to 5, which is just way too small for my boyfriend or I to fit, especially because we are tall (however in a pinch I am sure someone could sleep like that). In addition, the seats do not fold down completely flat/level, which again makes it very difficult to sleep and just was not an option for long term living! Hope this helps!
In my 2000 Outback, I can pull the backseat up and forward, allowing the seats to fold down flat (with the headrests removed) I’m 6’5” so I feel your pain lol.
Hope that helps some folks out. I am converting mine for temporary housing, rent ain’t cheap in Denver.
I love your project! I’ll definetely do the exact same thing for my trip across canada. Thanks a lot for your step by step process. The only thing is I did’nt manage to find the 2×2 bracket in any hardware store of my city (only 4×4). Is it a special piece? Did you bought it on internet? Thanks again!
Hi Alexis, thanks and I am so excited for you! So the bracket we used was something we found at a hardware store, but I am confident you could find it online as well in the case you are unable to and that might be your best bet. However even if you were to find a 2X2 bracket, we still had to drill a hole through it in order to fit the pin through. 2×2 is only necessary because our legs were 2×2 as well, so if you were using some other shape or dimension on the legs then you could change the bracket accordingly. Hope this helps, if you need more help please DM @nicoleroams and I can go even further into detail 🙂
Where did you purchase the utility carpet? I’ve been looking online, and every thing I see is so expensive.
Perfect story Nicole & Erin, thank you. Have a 2014 Outback & have often thought of overnighting a couple of times. Your story, details & photos will definitely get us started!
>the hinged component rests on a ledge that we attached to the box platform.
I can visualize that. The box platform supports the rear of the hinged component.
The front of the hinged component is a little less clear.
Back seats:
– folded down
– the hinged component rests on them? Clears them slightly?
2×2 posts:
– rest on the floor behind the front seats, yes?
Hey Erin!
Super cool! Wanting to do the exact same thing, what year is your Outback?
Jonny
Is ventilation an issue?
It can be if it’s hot outside. I have seen people make screens with mesh and magnets or velcro, though I haven’t made any personally.
I ordered these sun shades (https://smile.amazon.com/gp/product/B00YI3IGA6/) and they worked well. They didn’t cover the rear windows completely but I oiled keep the windows down about half way without too much concern for bugs getting in.
*could
Ventilation: I have a 2001 Outback with the dual sunroofs, and attached to the roof rack is a massive cheap rooftop box from Pep Boys, which obscures the opening from any UFOs. I open the sunroof all the way on warm nights, and the ventilation is phenomenal.
Thank you for the inspiration! I’ve been looking at lots of people’s photos and I like your plan the best. It’s exactly what I think will work best for me. Quick question, do you find the 3/4″ plywood is still holding up well? No bowing? I’m trying to avoid having any extra support down the middle. to keep the plywood from bowing.
What year was this Outback if you dont mind me asking
Hey Erin! Sweet setup. Where’d ya get those mattresses? They look like they fit in perfectly. Thanks fellow travelers!
Currently using this post to make a bed for my Subaru Outback! This is very helpful! I was wondering what the pin and brackets are called that you used on the legs? I haven’t seen them before so i don’t know what to look for! Thanks Again for this post!
I’m not quite clear on why the hinge is needed. What purpose does the hinge serve?
Rylan, I could be wrong, but I’m thinking the hinge is to allow the that entire hinged component (in my case, 42″ long – 2×21″) to fold to fit over the main component (36″ long) when the seats are up. I’m not mechanically inclined, but also playing around to make the hinged unit a 60/40 split so I can have one or the other seats up separately without having to retract the entire hinged unit. of course, I may just be over complicating something that should be kept simple. I was initially going to forego a platform, but I like the wide storage under the platform to keep a solar panel and folding table, plus a few other storage containers. The 6″ height is a good compromise minimizing the loss of head space. I’m 6’1″ so I wanted the 78″ length for a bit of extra leg room.
Wonderful ideas, and implementation. The new 7-passenger Ascent might work well for you tall people when you’re ready to upgrade, used models become available and to accommodate children. Did you wire a second battery and power inverter? Too, how do you cook meals, hot beverages, etc? Imo, removing the second row seats would increase storage space and not impact resale. Did you consider all-terrain tires and full-size spare? My buddy bought a solar cell and hardware to recharge his batteries for ~$150. Thank you.
I camp in my VW alltrack. One great addition I use is the screen kit from my 10×10 pop up tent. I open all the windows and the rear hatch. I open the front doors and put in the screen and close there door. Wrapping around the back to the other front Doorif I’m at a campground with power I’ll put a fan across the front seats blowing into the back and out the open hatch. This keeps most of the bugs out but still gives plenty of ventilation I want to make screens to go over each door but this also allows for the hatch to stay open which gives a little more leg room. I sleep on a twin sized air mattress with the rear seats folded down.
Thank you for much for post this bed frame blog, I have gave it a try and build one for me and I would like to show you my build. https://www.facebook.com/photo.php?fbid=10156177360911090&set=pcb.10156177361211090&type=3&theater
What year outback is this? I’m wanting to mimic this on the 2015, and noticing that even the box area is at a slight incline.
Was this an issue for you? or is it subtle enough?
Hey Paige, I’m working on this build for my 2015 Outback. It’s not quite done yet, but the box and hinged piece are built. I’m in the middle of tacking the carpet (I’m so bad at this).
I made the following modifications, and since I’m not done yet, I don’t know if it will all work. Still improvising!
– Made the box 41″ wide. I originally made it 42″ per this guide but the box edges would sit on top of the all weather mat in my trunk. I didn’t want to get rid of the mat (I like the waterproofing and protection) so I did a crazy thing and sawed the box down 1″ after it was already done. 🙁
– Made the box a bit over 7″ tall to accommodate a wider range of bins. I actually screwed up my plywood cuts so I ended up using common wood 1×8″ planks for all of the shorter box edges (these are shorter than 8″).
– Added 1.5″ wedges to the trunk-side ends of the box (bottom of the opening) to level the box. I have slept many nights in my Outback with just the seats flat, and one of my main issues is that the back slopes downward. If you don’t add these edges, the box will have the same slope. This is silly to me. I don’t want to build a box that doesn’t end up being a level sleeping surface. In the end, it means that the front of the box is around 8″ and the back is 7″. This had another benefit of raising the box above the mat lips, so maybe it wasn’t necessary for me to make the box narrower.
– Drilled offset holes in each hinge so that the hinged piece will fold flat. If you don’t do this, the screws/nuts on each part of the hinge will touch each other and stop it from folding flatter.
Things I’m unclear on:
– The back lip on the box that the hinged piece sits on. Does the carpet go over this or not? Not sure what to do there.
– Generally the act of tacking carpet. I started doing this today and I’m HORRIBLE at it. I’m also bad at present wrapping, seems related.
BTW, I have the black interior and I ended up with this carpet:
https://www.homedepot.com/p/Foss-Checkmate-Charcoal-Black-6-ft-x-8-ft-Indoor-Outdoor-Area-Rug-C2BWC32PJ3VH/202674701?cm_mmc=ecc-_-THD_SHIP_CONFIRMATION_STS__V1_M1_CA-_-Product_URL
I couldn’t find a totally black carpet to match the interior, I’m OK with this so far. Just gotta be mindful of the grid pattern.
Another note about the height I chose — right now my automatic liftgate will just _barely_ clear the corners of the box opening. I don’t think you could make the box any taller/deeper and still have your liftgate close. It’s so close to not fitting (not 100% sure it will fit as-is) that I don’t recommend going as tall as mine.
I’m so happy that there are smarter people than me out there sharing their experiences. I’ve had my 2000 Legacy Wagon since it was new (omg 20 years!) and have always had issue with space between the wheel wells. It never occurred to me to build a platform to take advantage of the wider space above the wheels. Thank you!
Also, as I travel alone, I’m lucky that I could build it on the passenger side only, just shy of the driver seat, thus leaving that in it’s normal position. That also leaves room for the other part I’d like to add, which is a second battery and the necessary gear on the driver side, so I can connect a portable solar panel for any extra electricity needs. Car charges when driving, solar when stopped and I can have an electric cooler running 24/7.
[…] simplest designs are usually just a raised platform that allows for storage underneath… like this. But the more elaborate build may include built in drawers for storage and even a slide-out […]
[…] View Image More Like This […]
Very nice article. Thank you for this
Did you use pieces of the 3/4″ plywood for the 3 sides of the box? Or did you use extra pieces of wood?
Also, what year is your subaru? I’m planning to build a similar platform for my 2018 outback 🙂
Heh! I just wanted to say thanks for writing this up. I spent the weekend building it for my new outback! We bought it for adventures. The hinges didn’t work for me and I ended up connecting the two panels with 2x2s, but everything else down to the locking pins and U bolts worked perfectly! Now just to cut a matress. My wife and I work in LA and have every other Friday off. We love getting on long vacations and sometimes rent an Escape camper. Now we have our own . Thanks again!!!
This was a super helpful guide. I went with hinges on the one section, similarly offset. The U bolts to hold them together was good. I added a slightly different leg set up for the back seat area, and the ledge from the box section was split in 3 so the other section fits into it and it doesn’t have any lateral movement (the pins between sections allowed that. I also put some braces under the hinges to take the stress off the joint and covered the surface in stick on carpet squares. Really, thanks for sharing thi! It made the project possible, since I wasn’t quite sure how to start. Really awesome.
Very good info thanks
Strong work on the Suby and your life
I really enjoyed this article… currently with my ’20 Outback… trying like mad to figure out whether to keep it and try to camp out of it (full time, heading West on my adventure) or find something bigger. this article certainly showed me what is possible. thank you!