ARCHIVE

BROwSE entire

>

In photography, the “Exposure Triangle” refers to the relationship between shutter speed, ISO, and aperture. It can be confusing, especially if you’re just starting out in photography!

There are plenty of very technical, physics-based, detailed articles out there about the Exposure Triangle. This guide is not that. 🙂 I would prefer you understand the concepts, rather than the math. Here I keep it simple with only the most essential things you need to know to understand the Exposure Triangle, so that you can start applying what you learn in your next photography session.

Overview

You’re working between 3 factors: ISO, aperture (also referred to as f-stop), and shutter speed. These three things regulate the exposure of your image (how light your image is). Shutter speed and aperture both control the amount of light that enters the camera, while ISO refers to the sensitivity of the camera’s sensor. If you are using Manual mode and you change one of these controls, it’s going to change the amount of light in your photograph in most cases, unless you compensate by changing one (or both) of the other two. Each of these factors also has some side effects that are unique to them, which we will discuss in a bit. Think of the Exposure Triangle as a game you play where you need to decide first, how much light you need, and second, which of the side effects work best for the exact situation you are in.

Take a look at the graphic below now, and come back to it once you have finished reading this article (if this kind of thing helps you).

Shutter Speed

the time for which the camera’s shutter is open at a given setting

The camera’s shutter opens and closes to allow light to hit the sensor. Shutter speed refers to how long the shutter is open within the camera.

Shutter speed can be long, like 25 or 30 seconds, which is what a “long exposure” refers to. This means the camera is taking in light for that whole duration. A long shutter speed would be for astrophotography, really dark situations, or if you want to capture motion for something more artistic. But it has to be relatively dark, because if you had the shutter open for that long in a bright area during the day, the photo would probably come out completely white because it was totally overexposed.

If you use a really short shutter speed, like 1/8000 or 1/4000 of a second, that would let in a very limited amount of light. You would use this in a very bright scenario, or if you wanted to capture something in motion without blur (sports, wildlife). When the shutter is only open for that small amount of time, the other settings on the camera have to compensate for it.

Short/fast shutter speed = less light, sharper images for moving subjects

Long/slow shutter speed = more light, blurry subject if they are moving (and any movement of your camera itself!)

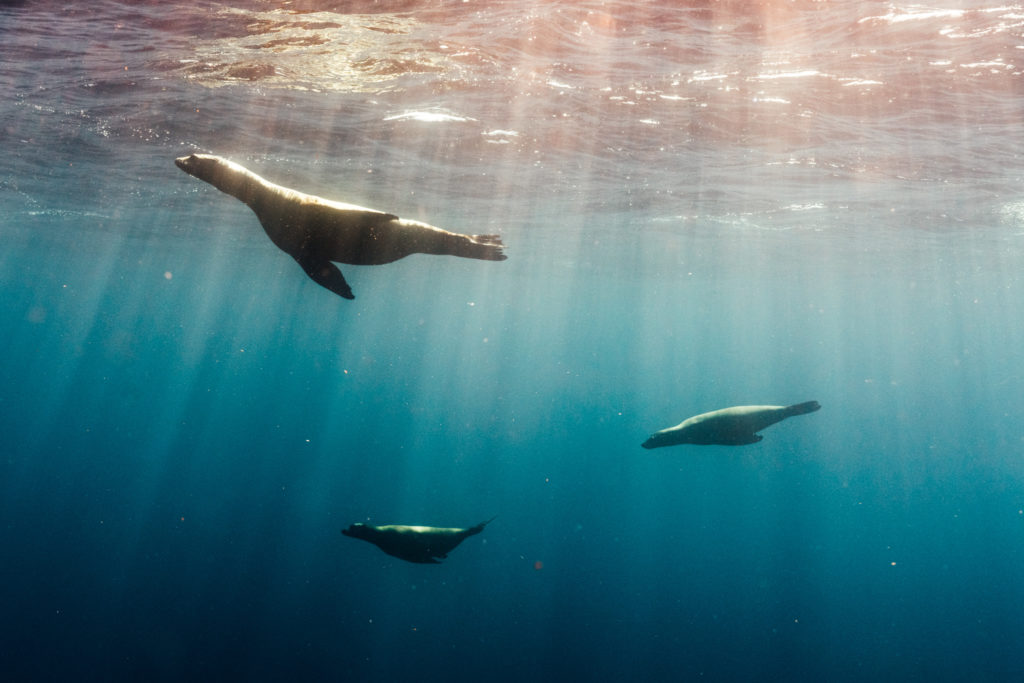
For example, if I am photographing sea lions underwater, I don’t want to go slower than a 1/400sec shutter speed. This is because they are moving, and I don’t want my subjects to be blurry due the motion. But, underwater is not a bright environment! So since I can’t lower my shutter speed, I will need to adjust my aperture and/or ISO in order to add more light to my photograph.

Check out the captions on the photos in this article to see what my camera settings were.

Sony A7RIV with Sony 16-35mm F2.8 GM, F8, 1/800 sec, 35mm, ISO 1000.

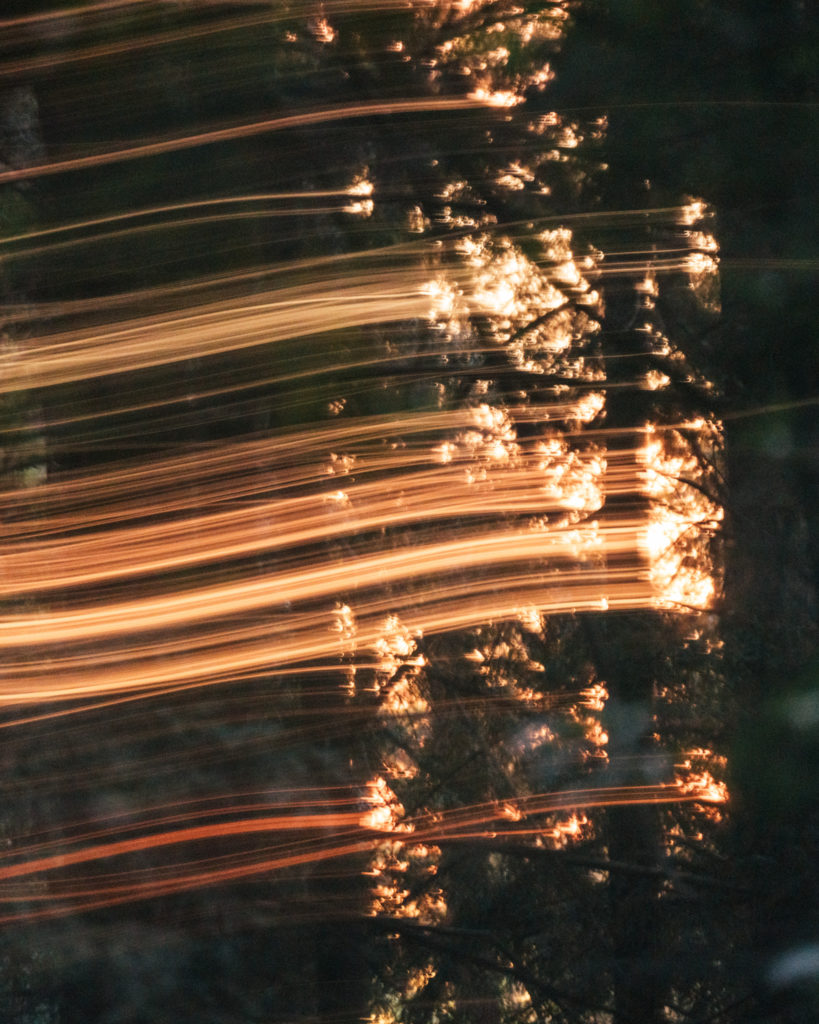
There are also creative ways to work with shutter speed. Below, I used longer shutter speeds and moved my camera while the shutter was open, effectively painting with the light that was peeking through the trees in the forest.

Sony a7RIV & Sony 100-400mm F4.5-5.6 GM, F5.6, 1.6 sec, 400mm, ISO 3200

F Stop/ Aperture

a space through which light passes in an optical or photographic instrument

Aperture is the size of the opening within the lens. Think of this like the pupil in your eye– it can open or close to let in more or less light.

Have you ever seen a cat’s eye in a really dark room? The pupil is dilated to allow in more light. That’s like aperture. It’s the pupil of the camera opening to let more light in. When you look at a really bright sky, the pupil in your eye gets really small, it’s the same with the camera, except that you can adjust it manually.

The part that is a little confusing is that the smaller F-numbers (like F2.8) refer to the wider openings, and the bigger F-numbers (like F22) are the smaller openings that don’t let in as much light.

Lenses commonly go as wide as F2.8 or F4. For example, if you have a 24-70mm F2.8, it’s because it goes down to F2.8. Or if it says F1.4, it’s an even wider lens. Lenses like this are great for astrophotography.

The other thing aperture controls is the depth of field. Wider apertures create a narrower depth of field (less area in focus). For example, if you created a portrait at F2.8 with your focus point on eyes, it is possible that the tip of the nose would be out of focus. This is because it falls out of the plane of focus. You would need to bring your aperture up a bit to increase that area of focus.

If you look at a photo and it has a really blurred out background, that’s called bokeh. You will notice this at lower F-numbers (wider apertures).

For landscapes, F8 is a commonly used aperture because it allows for a lot of things to be in focus, while still letting in light.

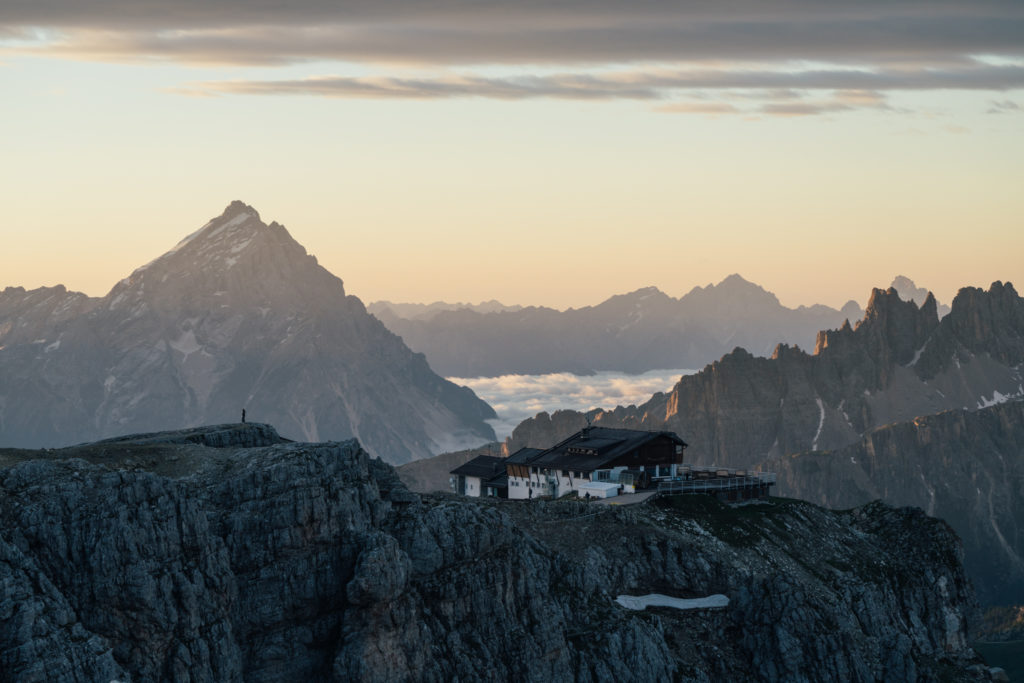
Sony a7RIV with Sony 100-400mm F4.5-5.6 GM, F8, 1/250 sec, 100mm, ISO 400.

In cases where you want everything in the frame to be in focus, you will need to use a smaller aperture like F20, and probably a tripod. (You could also do some “focus stacking” in post where you combine multiple images, but we’re not getting into that here.)

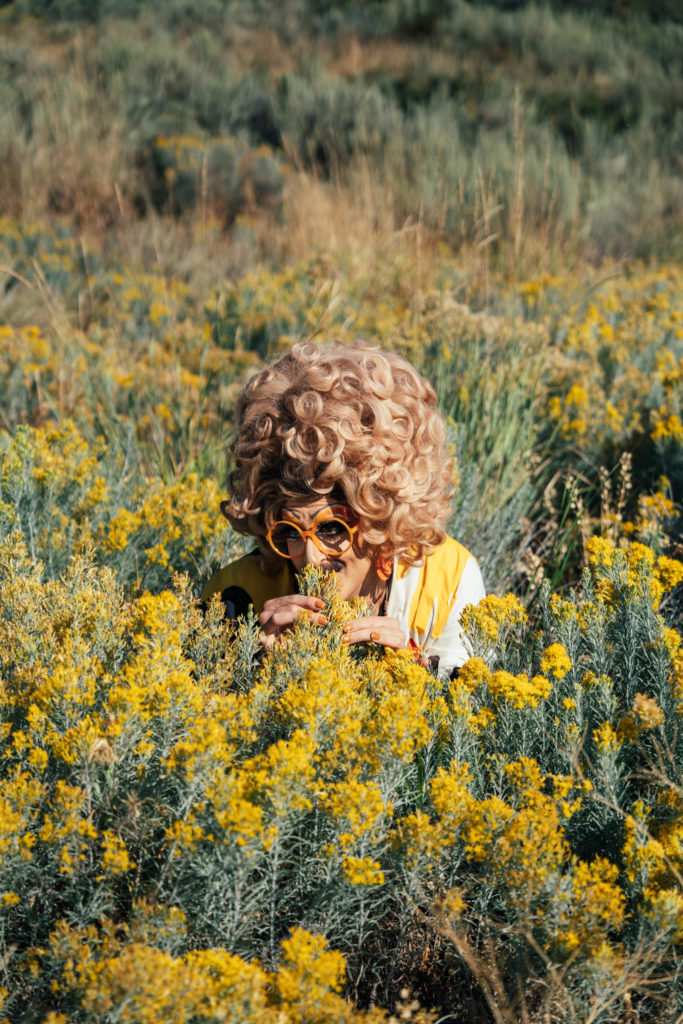
Depth of field in an image is a strategic choice from an exposure standpoint, but also a stylistic one. I typically like to shoot at wider apertures, as I like the sharpness they offer, as well as the bokeh in my composition.

Sony a7RIV with 24-70mm F2.8 GM II, F2.8, 1/3200 sec, 65mm, ISO 100. You can see the bokeh in the foreground and background, framing my model Aunt Carol nicely.

My advice? Experiment to see first what you need in terms of light, and then what you like in terms of style. I often use Aperture Priority mode, which allows you to choose the aperture, while the camera automatically adjusts the shutter speed to compensate. This can be a great way to better understand both aperture and shutter speed, and their relationship. Of course, you have to keep an eye on the shutter speed to make sure it doesn’t drop too low, or that it’s not being overwhelmed by the amount of light.

ISO

International Organization of Standards– refers to your camera’s sensitivity to light as it pertains to either film or a digital sensor

If you shoot film, you have seen the numbers on film stock (Portra 400, Ilford 160, etc.). Those numbers indicate the sensitivity of the film. Same thing here. ISO is the speed standard for digital camera sensors.

Higher ISO number = more sensor sensitivity = more light.

So why wouldn’t we just use a high ISO all the time so we didn’t need to mess with our other settings?

Using a higher ISO impacts the quality of the image– it adds noise. The higher the ISO, the more noise in your image. So in general, you want to use the lowest ISO you can get away with.

So when should you increase your ISO? When you can’t decrease shutter speed or go to a wider aperture (and as long as you are OK with the noise).

One obvious example is astrophotography. When you are photographing stars, you are using a tripod so that you can work with longer shutter speeds without camera shake. For this image, I was using the lens’ widest aperture of F1.4, and I had the shutter speed at 15 seconds. I could have increased the shutter speed, but if I did, I would have gotten star trails (the camera would have captured the movement of the earth), so I wanted to keep it at 15 sec. I brought my ISO up to 2,500 to create this image.

Sony a7RIV with Sony 24mm F1.4 GM, F1.4, 15.0 sec, 24mm, ISO 2500.

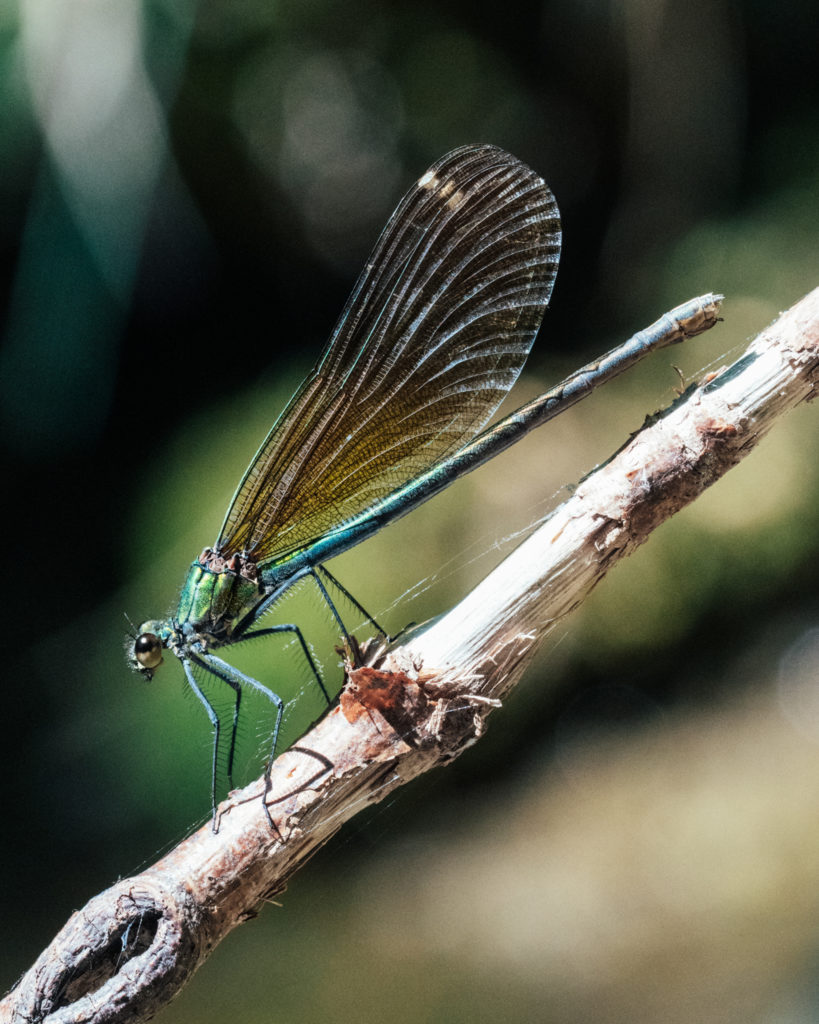
Say you are photographing dragonflies. You’re at F8 and you need your shutter speed fast at 1/1600 of a second because they are flying around. You don’t want to widen your aperture because the depth of field would be too narrow, and you can’t slow down the shutter speed because you’ll get motion blur. This is a situation where you would increase the ISO– probably to somewhere between 3,200 and 5,000 depending on the light.

Sony a7RIV with Sony 90mm F2.8 Macro G lens, F8, 1/1600 sec, 90mm, ISO 5000

In this photograph, the damselfly is still, so in theory I could have dropped the shutter speed a bit. But you’re not always fast enough for that (I wasn’t)!

Final Thoughts

Remember that your settings are not just strategic, they are also stylistic choices! As you get more comfortable with what each part of the Exposure Triangle does, you will naturally develop your own preferences for your photography.

I recommend taking out your camera now wherever you are, putting it on manual mode, and seeing how each of these factors (shutter speed, aperture, ISO) change the image in your viewfinder. Slow down and really ask, what is happening here when I change the aperture? What is happening when I change the ISO? What happens when I change the shutter speed? Understanding these concepts will help you to better express yourself creatively, because instead of focusing all of your attention on the technical aspect of photography, you’ll be able to do that naturally during your creative process.

I hope this helps give you a good foundation for understanding the Exposure Triangle in photography. Have fun, keep experimenting, and stay open to new ideas!

Canyons, red rocks, juniper in the breeze, and wide open skies– I didn’t know I would find all of these things and more in West Texas. Passing businesses like the “It’ll Do Motel” and “This n That (Mostly That),” we found an abundance of charm during the day and glittering stars at night. Comanche and Kiowa people have stewarded this land for centuries with reverence for its many species of plants and animals.

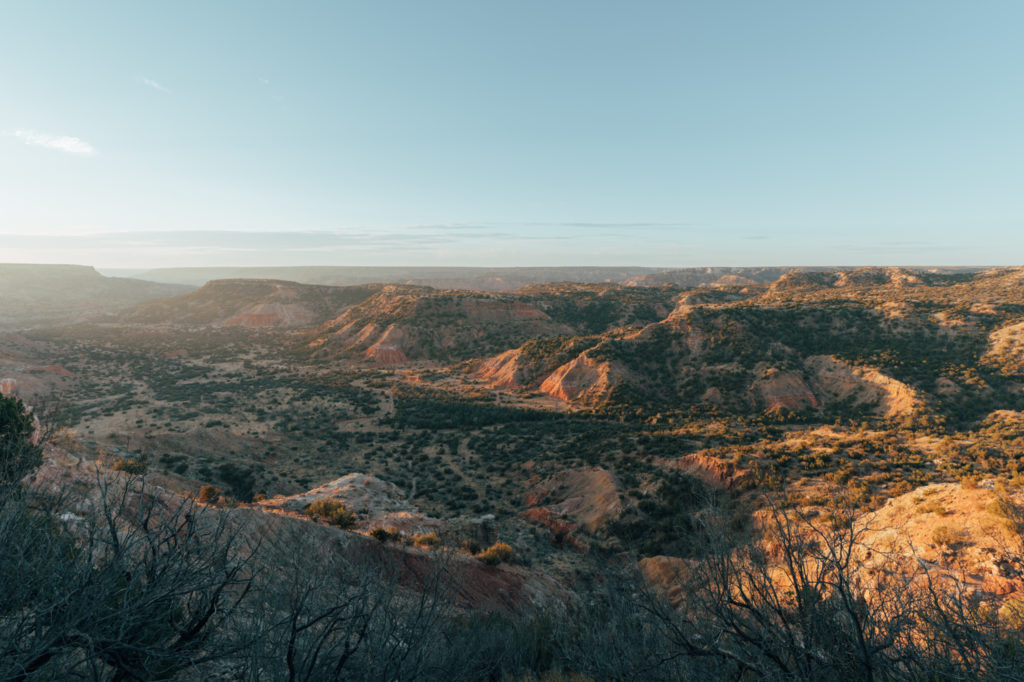
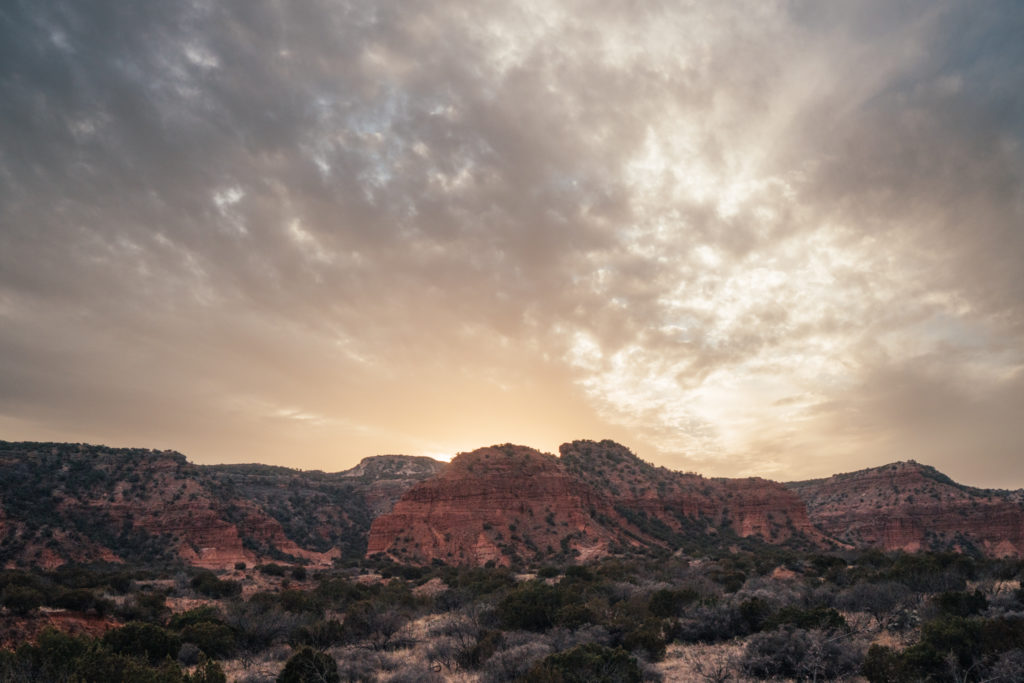
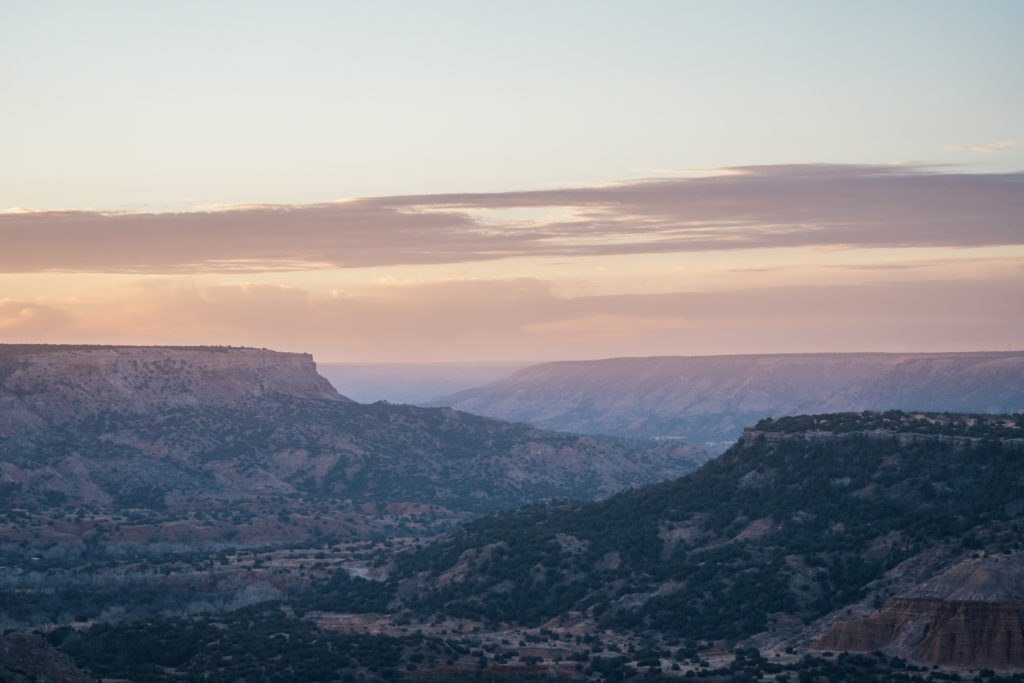
Palo Duro Canyon State Park at sunrise, seen from the Sorensen Cabin.

A couple of weeks ago, I headed to Texas for a stargazing road trip across three State Parks. I’d never been to this part of Texas before, and apart from what I’d seen online during my research, I wasn’t too sure what to expect! I crossed my fingers for clear nights as we boarded our flight from LA to Amarillo.
We arrived at Palo Duro State Park after grabbing enchiladas for dinner at El Manantial in Amarillo. We stayed at one of the cozy cabins along the rim of the canyon built by the Civilian Conservation Corps in the 1930’s. Ours was the Sorensen cabin, which had plenty of space outside to set up a tripod (just make sure to bring a tall one, or plan to put it on the picnic table to see over the chain link fence).

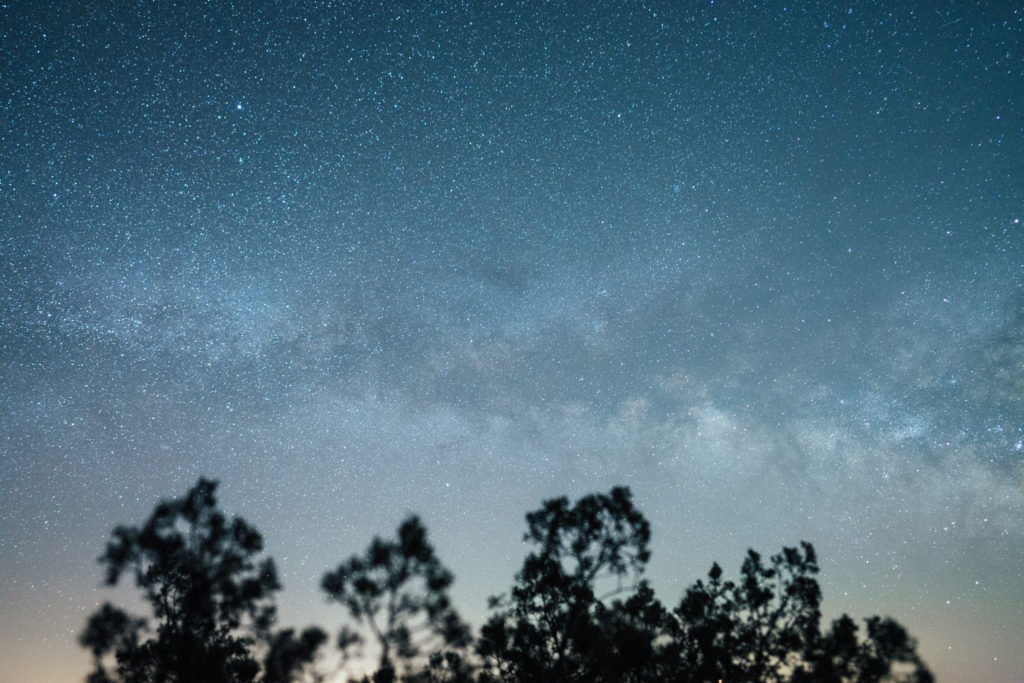
Even though it was partly cloudy, I set up a timelapse just in case. The canyon was peaceful and completely silent, except for an occasional owl call. The clouds cleared just as the galactic core of the Milky Way started to rise, giving me my first real view of the stars in this part of the country.

Dancing clouds outside our cabin
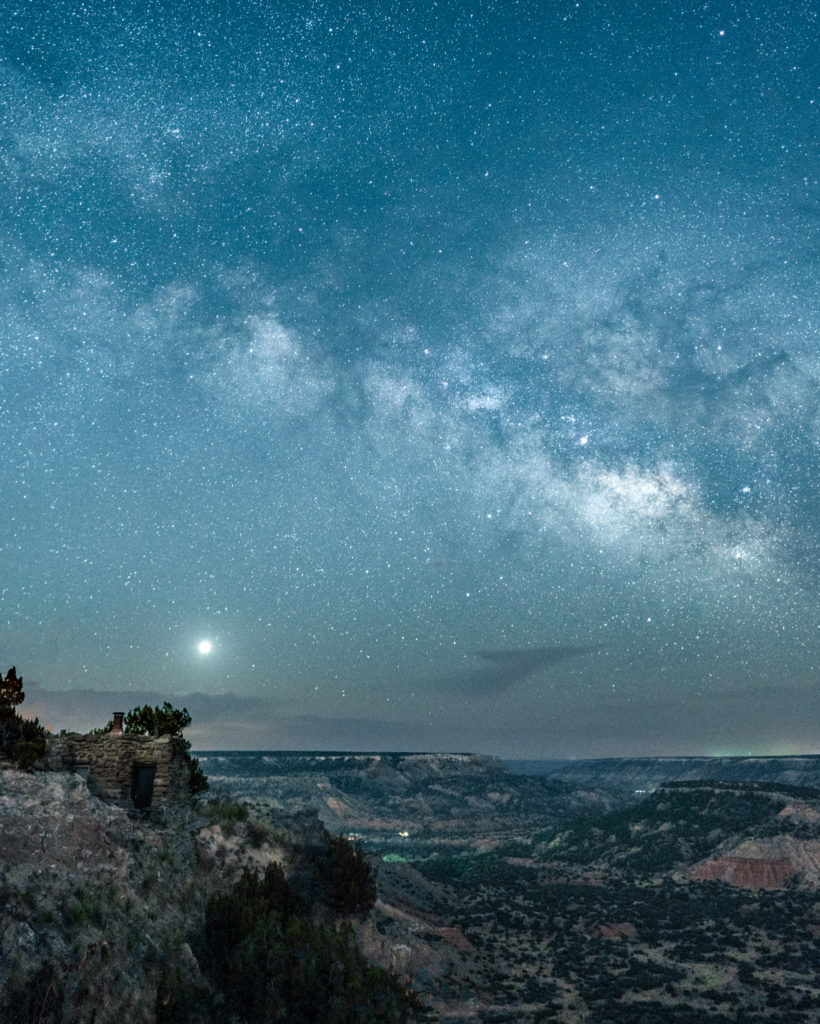
The galactic core over Palo Duro Canyon

After watching the sunrise paint the rocks orange and red, we took a nap for a few hours before heading onward to our next destination. We stopped for lunch at Crush Wine Bar in Amarillo, which had great food and service with vegetarian options (not always easy to find)!

My next destination for stargazing and astrophotography was 2.5 hours away in Copper Breaks State Park. We pulled up in the afternoon to scout the location, and checked in with the Visitor’s Center where a friendly ranger answered all of my questions, giving us recommendations on the best spots to view the stars from. Copper Breaks is registered as an International Dark Sky Park, and they host astronomy and stargazing programs throughout the year. During our daytime visit, I positioned a few photos with my tracking app (I use PhotoPills), and planned to come back around 4am when the galactic core was visible.

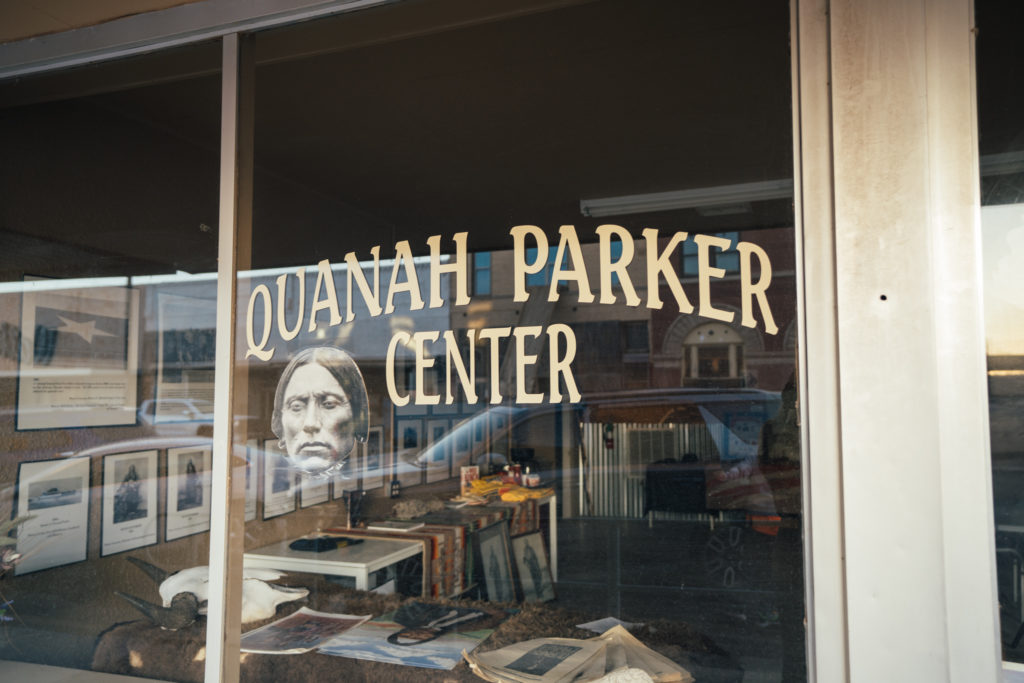
The closest town to Copper Breaks is Quanah. We stayed in the historic part of the town, which felt a bit eerie as we pulled in. We were shocked to walk into the Dixie Star Boarding House, which was fully equipped for a comfortable stay, and completely updated– a sharp contrast to its surroundings.

The Quanah Parker Center – not open during our visit unfortunately!

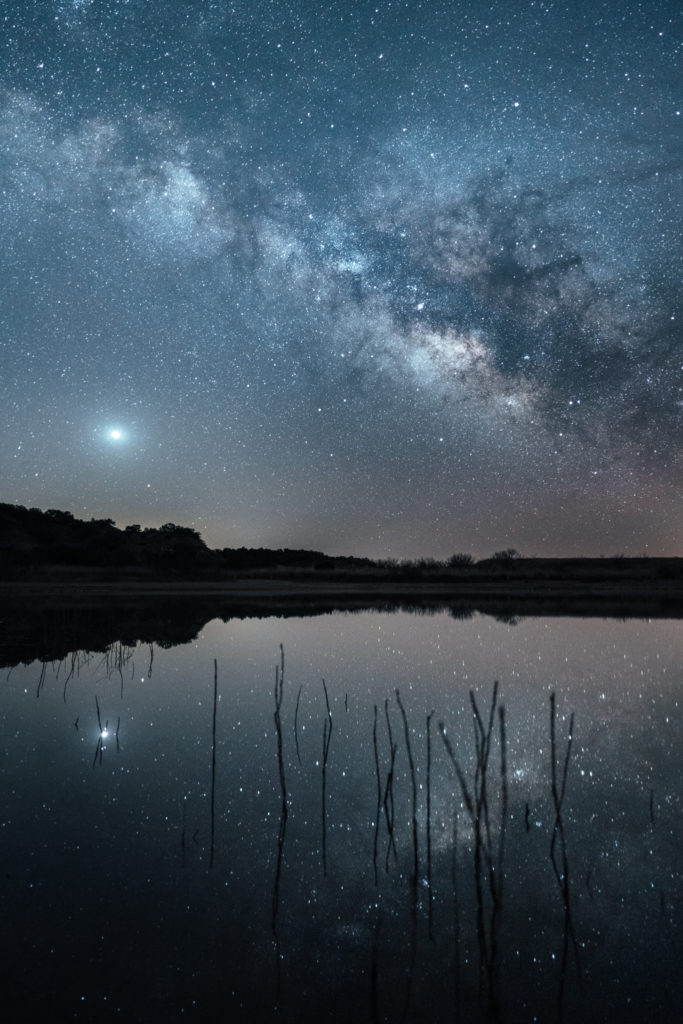
We arrived back at the park at 4:15am, and I began setting up to photograph the core above some of the campsites. We were treated to the calls and howls of coyotes from somewhere across the park, a special soundtrack for such a gorgeous early morning. Eventually we headed down to the lake, which I was hoping would be still so that I could photograph reflections. To my delight, it was! I set up my camera to capture the Milky Way and its reflection in the water, decorated with reeds. The images were exactly what I had hoped to create. I’m grateful for the grounding and connection I feel in moments like this.

Copper Breaks State Park
My favorite image of the stars I captured at Copper Breaks State Park, photographed at the lake.

Through our time at Copper Breaks, we learned about Quanah Parker (who the nearby town of Quanah is named after), a Comanche chief known for peacekeeping and advocating for Native American rights. The Comanche and Kiowa people took care of this land for centuries, and still do.

Feeling satisfied with the images I created, we drove back to the boarding house to take a nap (crucial for night shoots). Mid-morning, we started the drive to Quitaque, a TINY (really tiny) Texas town just outside Caprock Canyons State Park. We stopped into the shops in town (all next to each other on the same street) and had some lovely chats with locals, who were so curious what we were doing there all the way from LA.

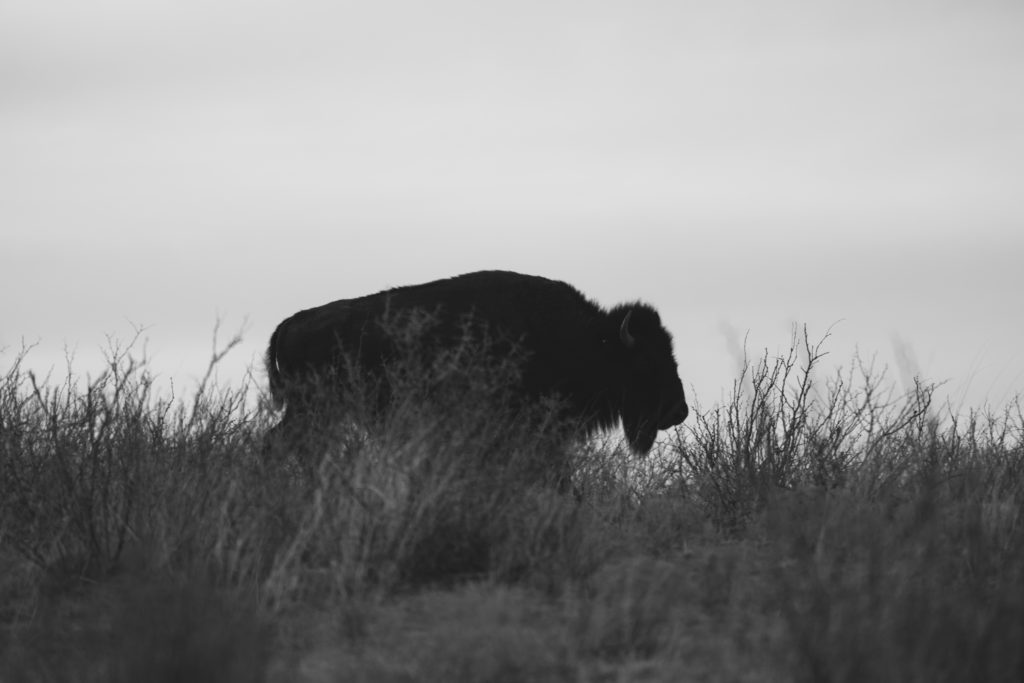
Caprock Canyons State Park was my favorite place we’d been to so far. It was reminiscent of Sedona in terms of the colors and textures of the land, and felt remote and well cared for. We saw bison (the official herd that roams free), prairie dogs, a coyote, deer, and lots of birds. In the afternoon, we hiked a bit of the trail from the south prong parking lot at sunset, the heat of the day starting to cool off. I felt totally engulfed in the landscape. This place is really special.

Bison at Caprock Canyons State Park
A glowy sunset at Caprock Canyons State Park.

It was overcast throughout the night, so I didn’t have the chance to do any astrophotography here. I did hear that the park is working on their dark sky certification though, and they lead ranger programs for stargazing. Astrophotography here would be great, given the many rock formations that could be used as foreground elements.

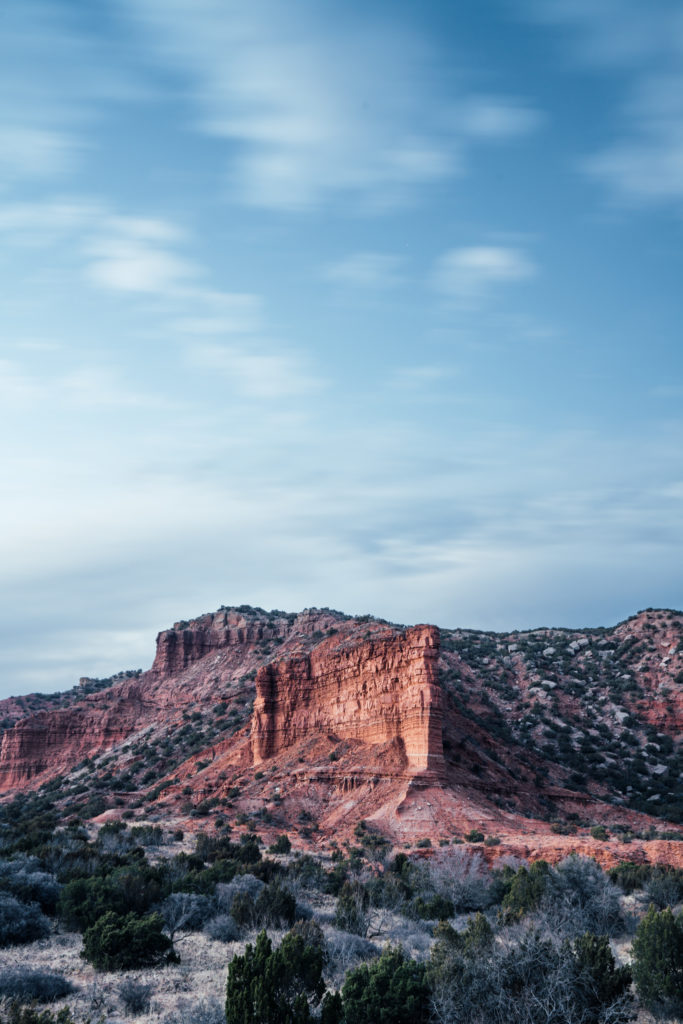
Caprock Canyons State Park at blue hour

In the morning, we drove back to our favorite shop, The Coffee Mill and Mercantile, for bagels and coffee. A local gentleman struck up a conversation with us, offering lots of recommendations for us for viewpoints and interesting places to photograph nearby. We had a few extra hours to enjoy before heading to our next location, so we drove down some of the roads he suggested to admire the views.

Next it was time to head back to Palo Duro Canyon for our final night. We had planned to get there early, but about 20 minutes from the canyon we passed a large yellow sign advertising a western hat store. I swung a swift 180 to go check it out– getting a hat seems like something you should do in West Texas!

West Texas Western Store in Canyon made all of our hat dreams come true, with the owner custom creasing and steaming our new straw hats (after we tried on the entire store with two very patient and hospitable sales girls). I had mine creased in a “west Texas punch”, a style specific to this area. We’ll be wearing our cowboy hats with pride back in California.

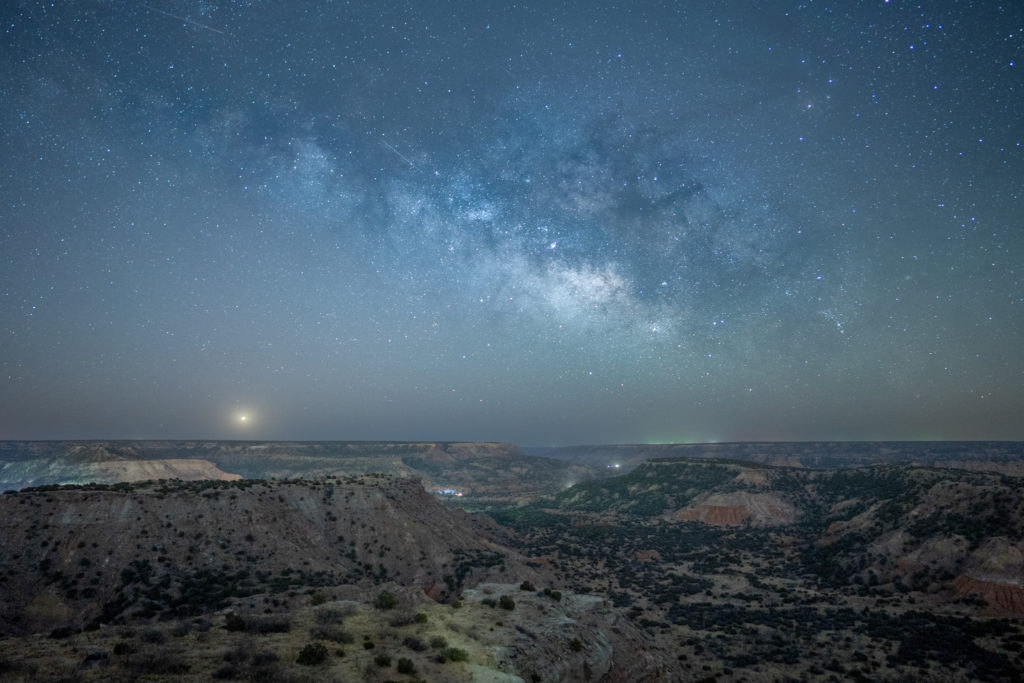
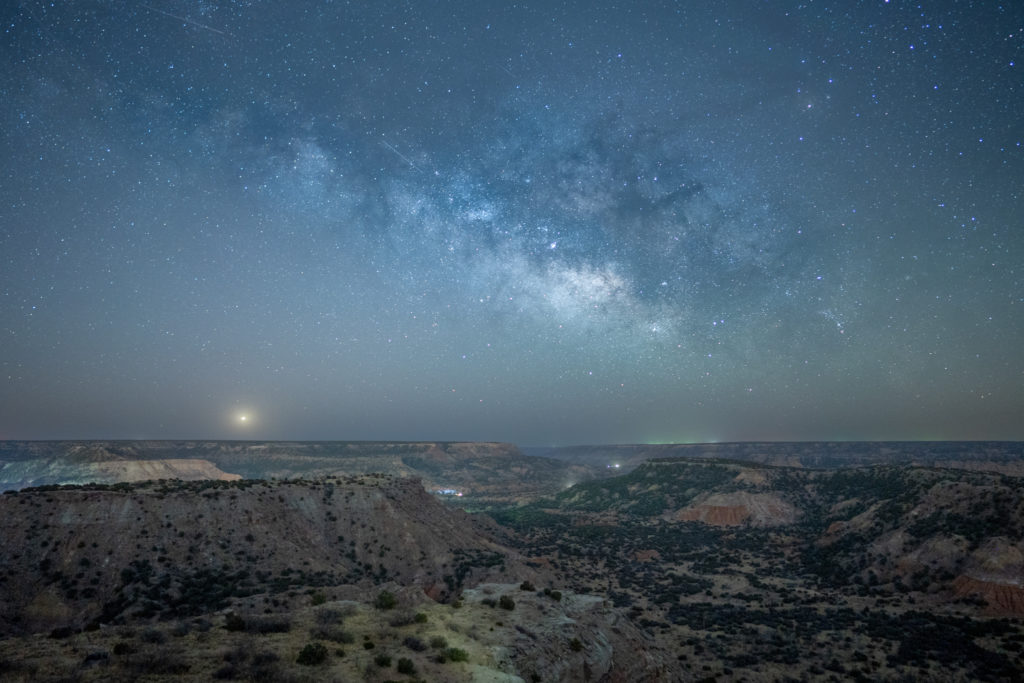
We grabbed a late lunch at Pondaseta Brewery and had a few tasters of their beers (I had the oreo stout and the kiwi IPA)– all really good! Then it was back to Palo Duro Canyon to scout the next photo spot, which we luckily found right away. Outside the visitor’s center, there is a beautiful view of the canyon, and the galactic core was going to be right above it. Sure enough, at 4:30am the stars were shining bright above the canyon and I was able to create this photo.

The core of the Milky Way rising over Palo Duro Canyon, viewed from the visitor’s center viewpoint.

After our morning nap and a great breakfast sandwich at the Palo Duro Trading Post, we headed to the airport for our flight back to LA. I have so much gratitude for the people we met along the way for showing us warm hospitality. Regarding the rugged beauty of these places, I’m reminded of what the man told me in Quitaque – “nobody knows this is here!”. I admit that I didn’t, but I’m thankful for the opportunity to see and experience these beautiful places in person.


This blog post is sponsored by Travel Texas. As always, views are my own.

Thank you to Polartec for exploring the miniature world with me, and for sponsoring this blog post.

In the past year, I have photographed miniatures more than any other subject. I have been meaning to write a blog post about the success of Our Great Indoors– my quarantine personal project, and now a specialization of mine– and I promise, I will soon, but for now I’m highlighting one collaboration I recently worked on in particular. Shooting outdoor-inspired miniatures has expanded my work and my creativity in new ways I’d never considered before. It allows me to explore new places I’d never thought possible. And it has helped to form connections with new clients, brands, and collaborators, one of those being Polartec.

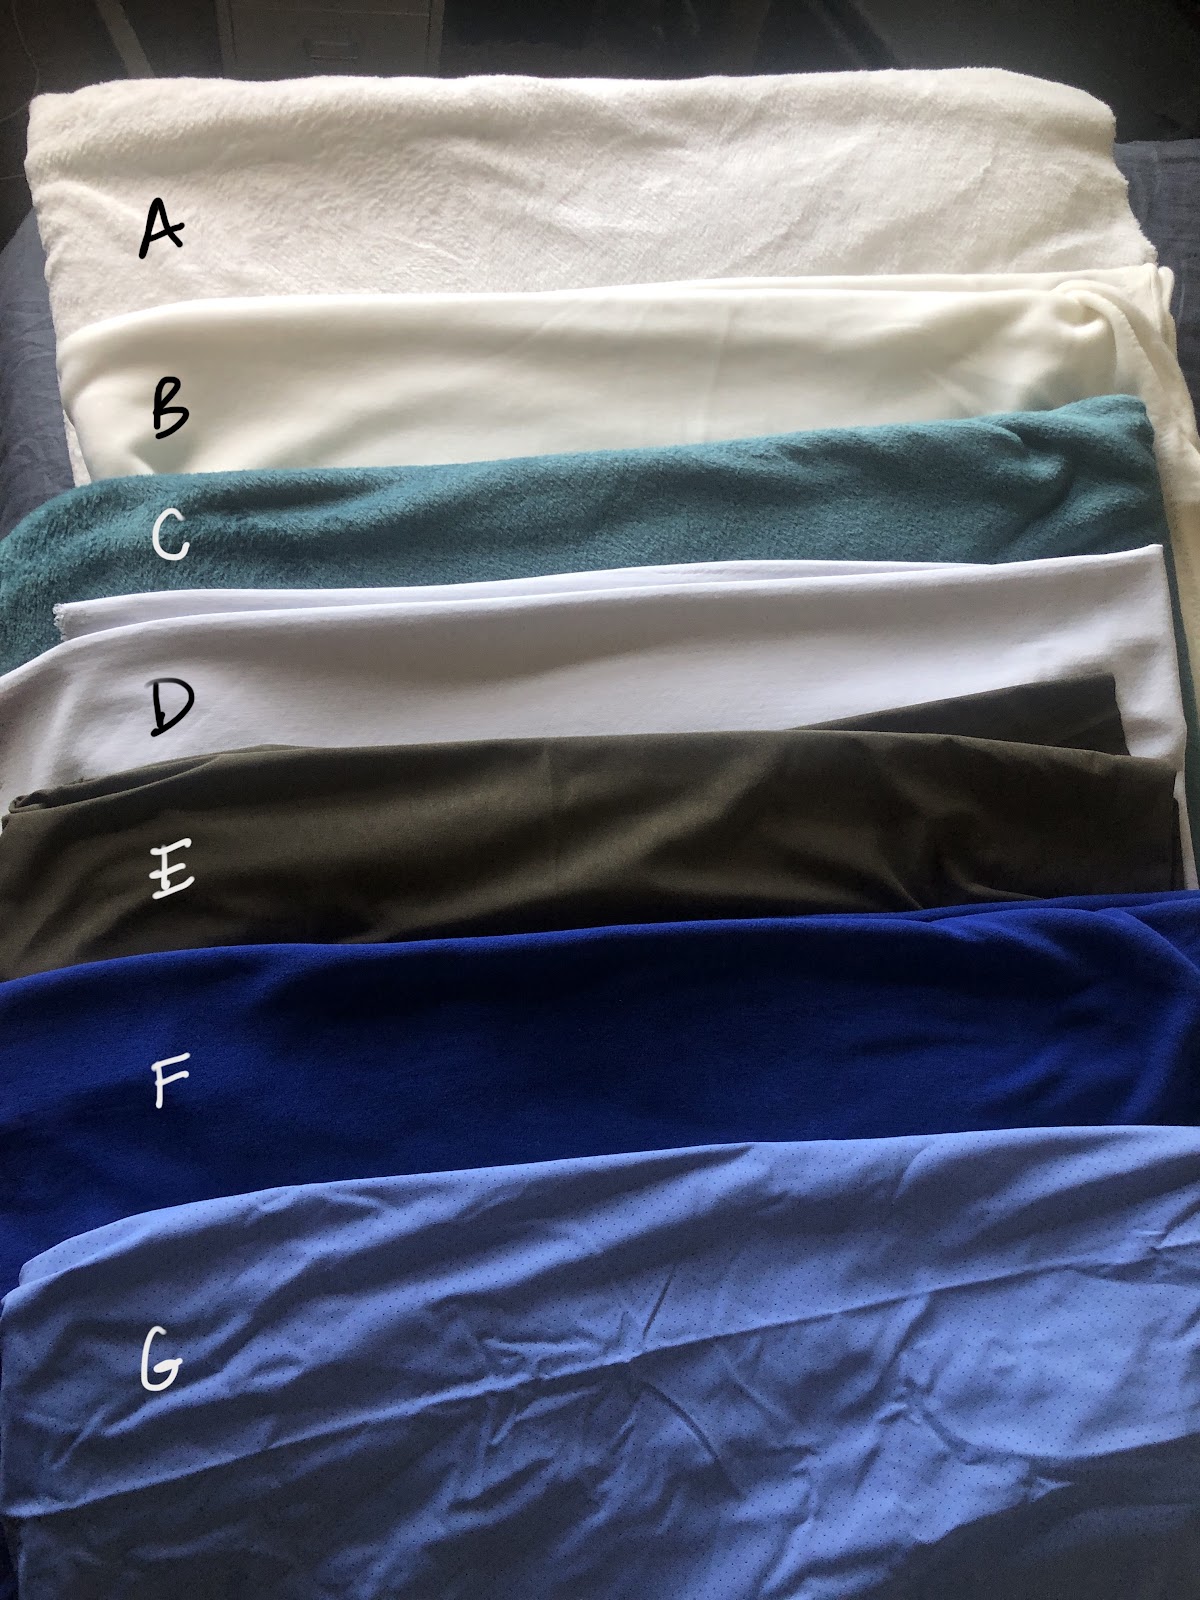
When I think of Polartec, I think of the fuzzy snap-T pullovers I wore growing up, or the cozy fleece pants I never go backpacking without. The Polartec team had seen Our Great Indoors, and was curious what I could do with their fabrics. I quickly saw the potential in a collaboration. They sent fabrics that they felt reflected the “shades of the arctic”, and I began brainstorming some wintry scenes!

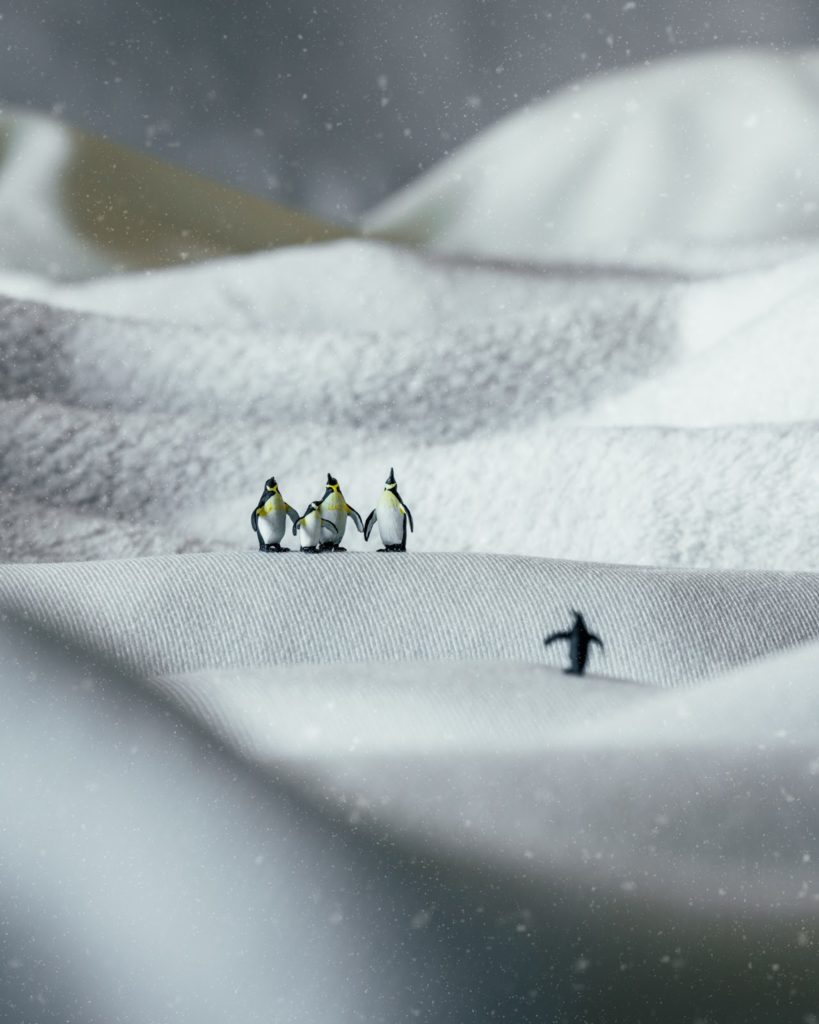
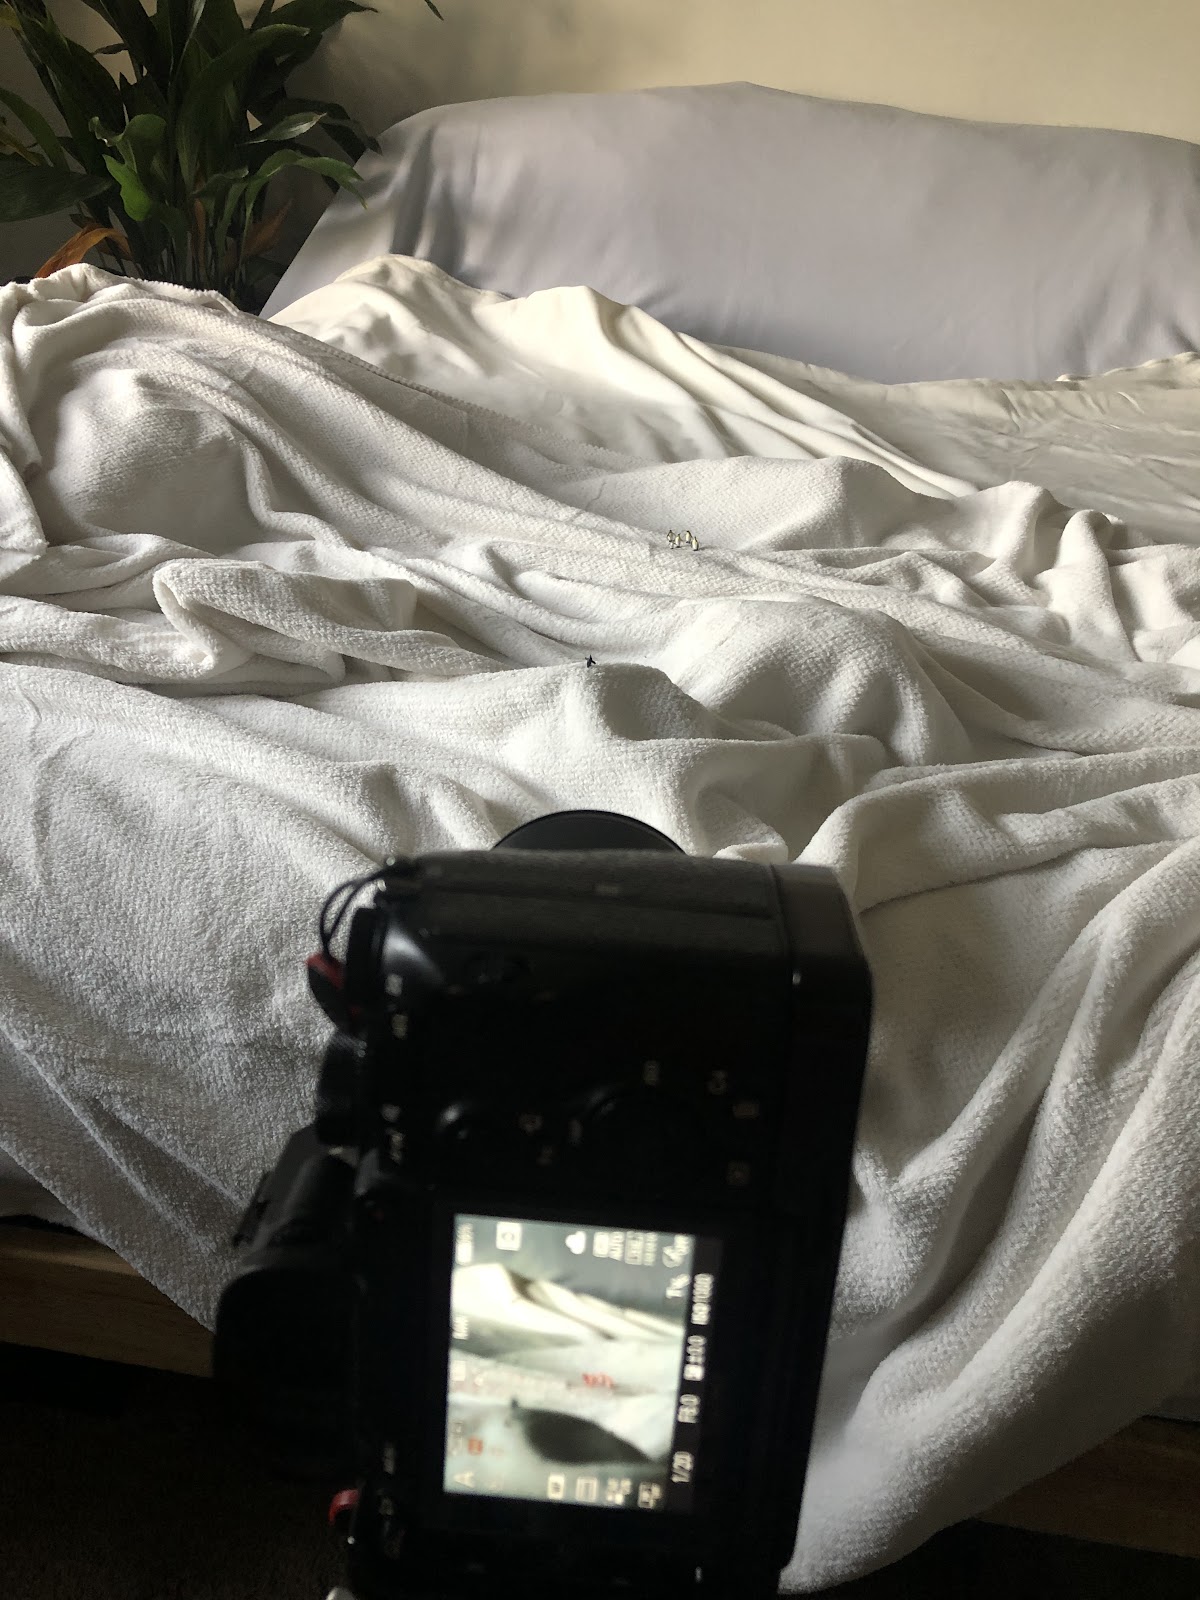
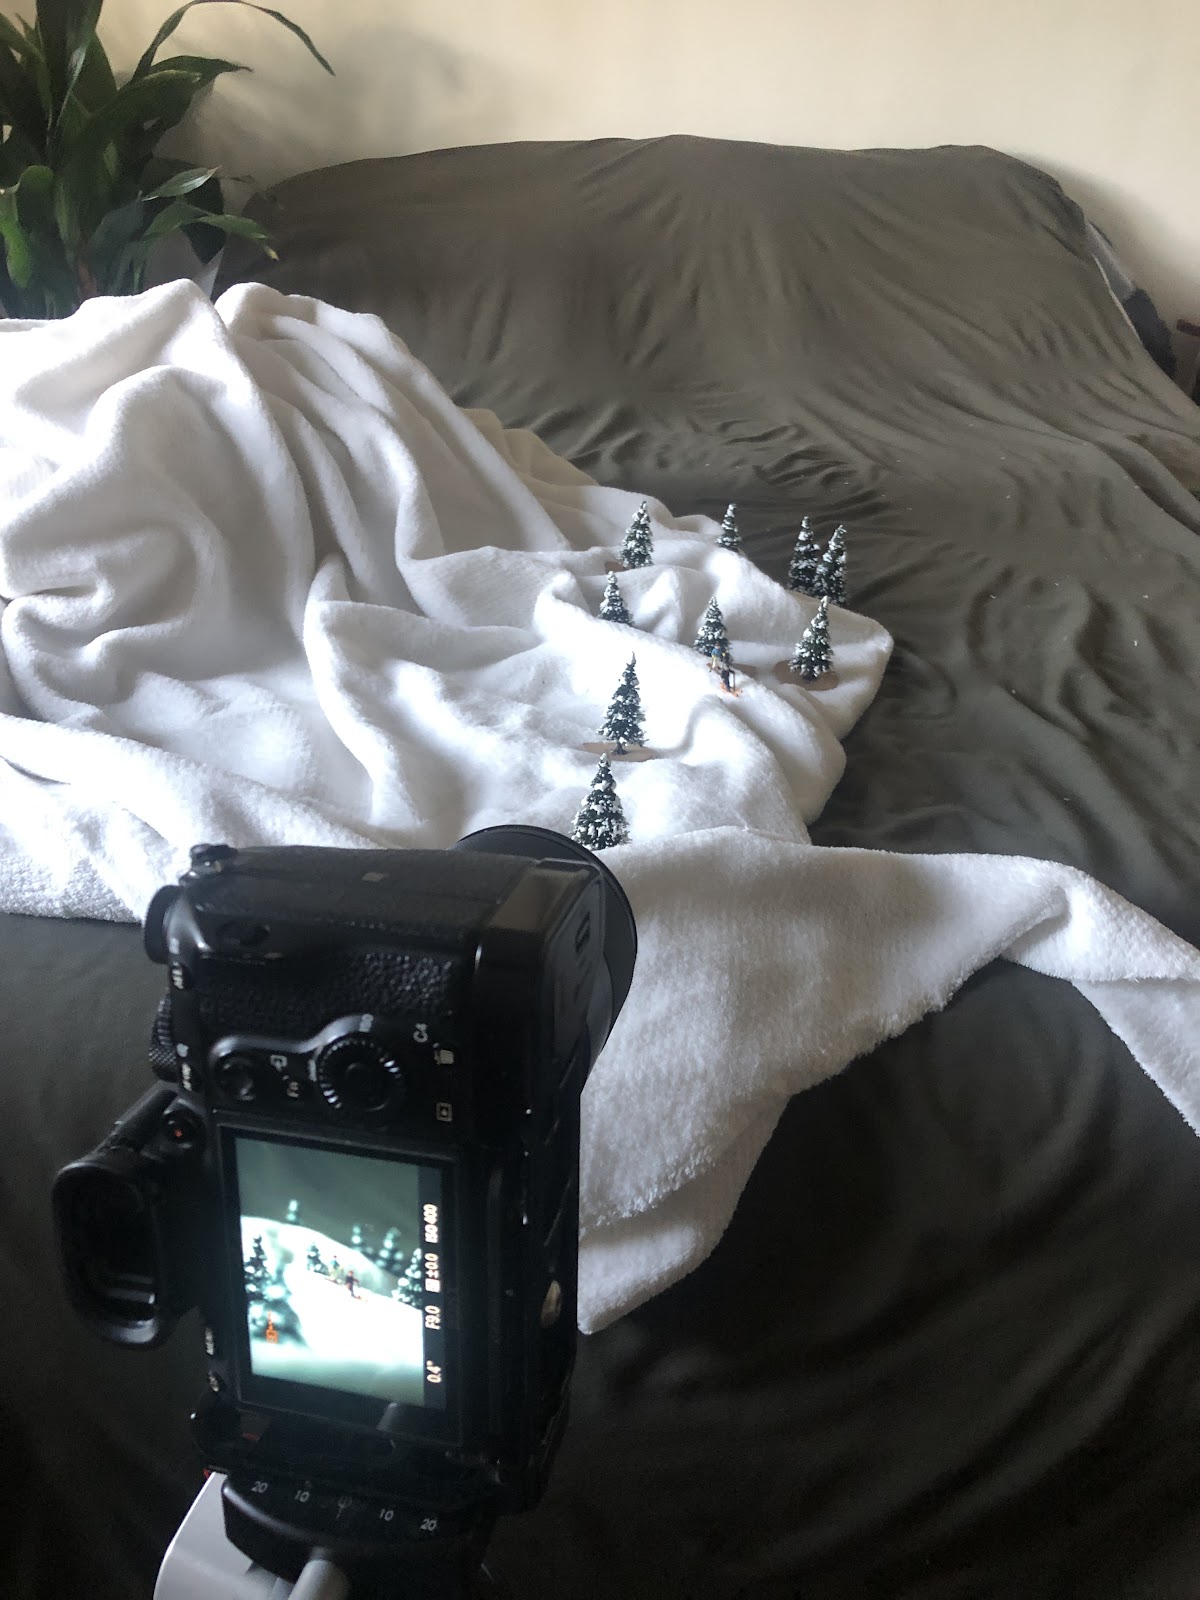
Among my list of ideas and props to use was a set of penguin figurines I had acquired and not yet utilized. The Polartec team embraced & ran with this, and created a character and storyline for the scenes. I began sketching out the scenes based on their narrative, which follows a little penguin on a big adventure throughout four wintry scenes, all using Polartec fabrics as the landscape. Maybe it’s fitting that I shot all of these scenes on my bed… the fabrics were definitely cozy enough!

The fabrics

I went through each fabric and studied it– the textures, the way they held light, thickness, color. While doing that, I also studied images of the arctic, and of the “real life” places I wanted to convey using only fabric, figurines, and optical illusions. I wanted the viewer to do a double-take when they see some of the images, while showing off the textures of the fabrics, and conveying the expansiveness and wonder of Nature.

The concept

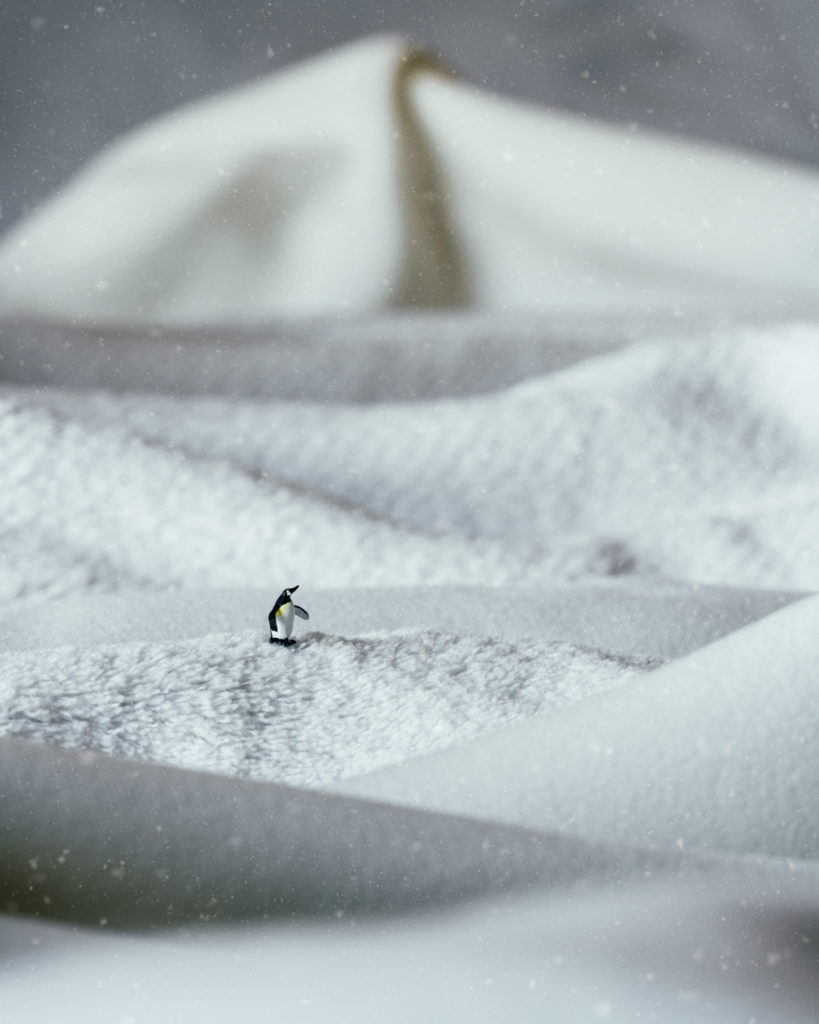
These images tell the story of a tiny penguin– “a small creature in a big world full of wonder. She decides to go on a magical adventure to explore what her arctic home has to offer, meeting snowy acquaintances along the way.” I know you may be thinking that penguins don’t actually live in the arctic… and you’re right. They live in the antarctic (the other side of the globe). But use your imagination. 😉 Now presenting, a penguin’s world…

The images

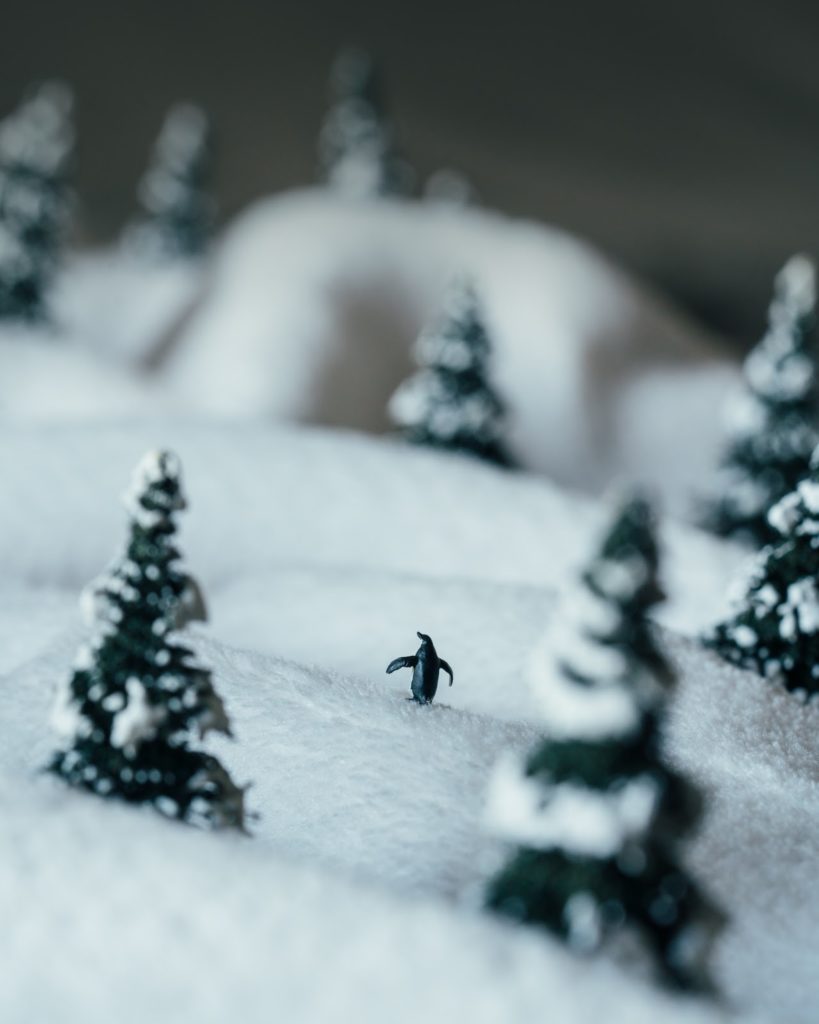
Penguin Family View 

Our little adventurer says goodbye to her family and sets off on her explorations. I used two main fabrics for the landscape here: Alpha and Micro Fleece. I alternated between these to create depth and layering, which is a huge part of making miniature scenes look and feel expansive. Though this scene is obviously part of a cold weather series, I wanted these images to feel warm, because of the family element. I added snow in post, to add to the cozy winter feeling.

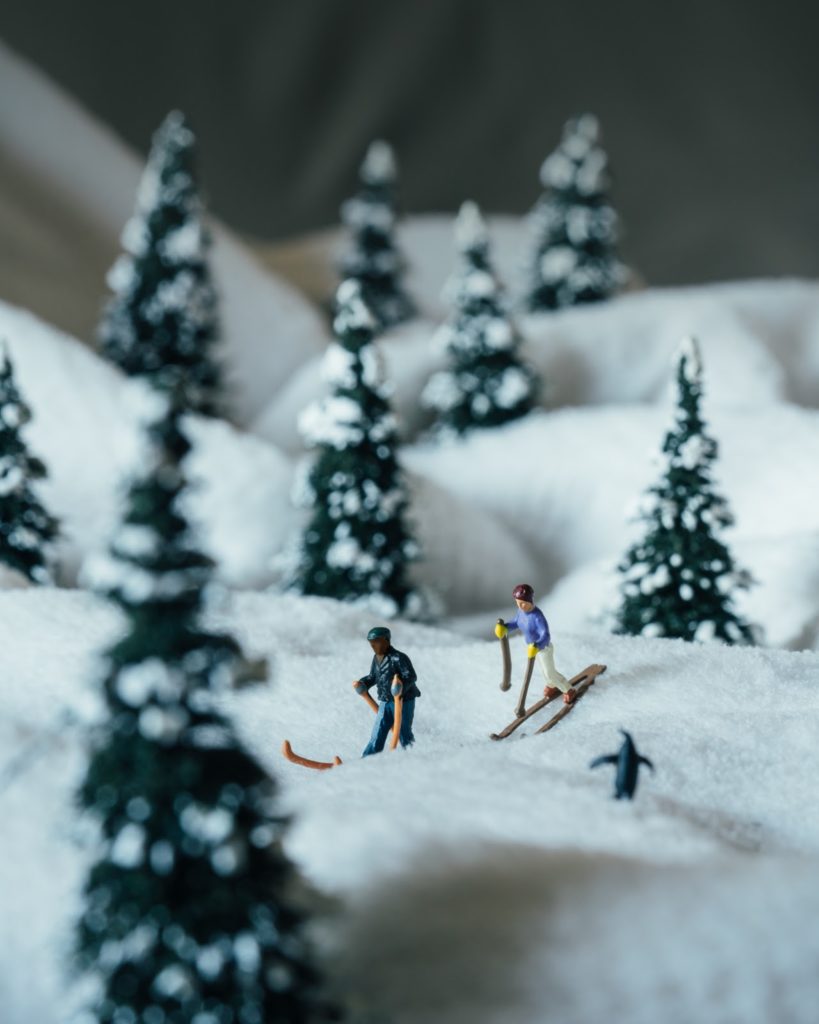
Cross-Country Skiers

The penguin encounters some skiers, out for a day of fresh air. For this scene, I used Alpha insulation for the snow, given how light and fluffy it looks. The background is Power Stretch, and the trees are figurines I have from my (ever-expanding) collection.

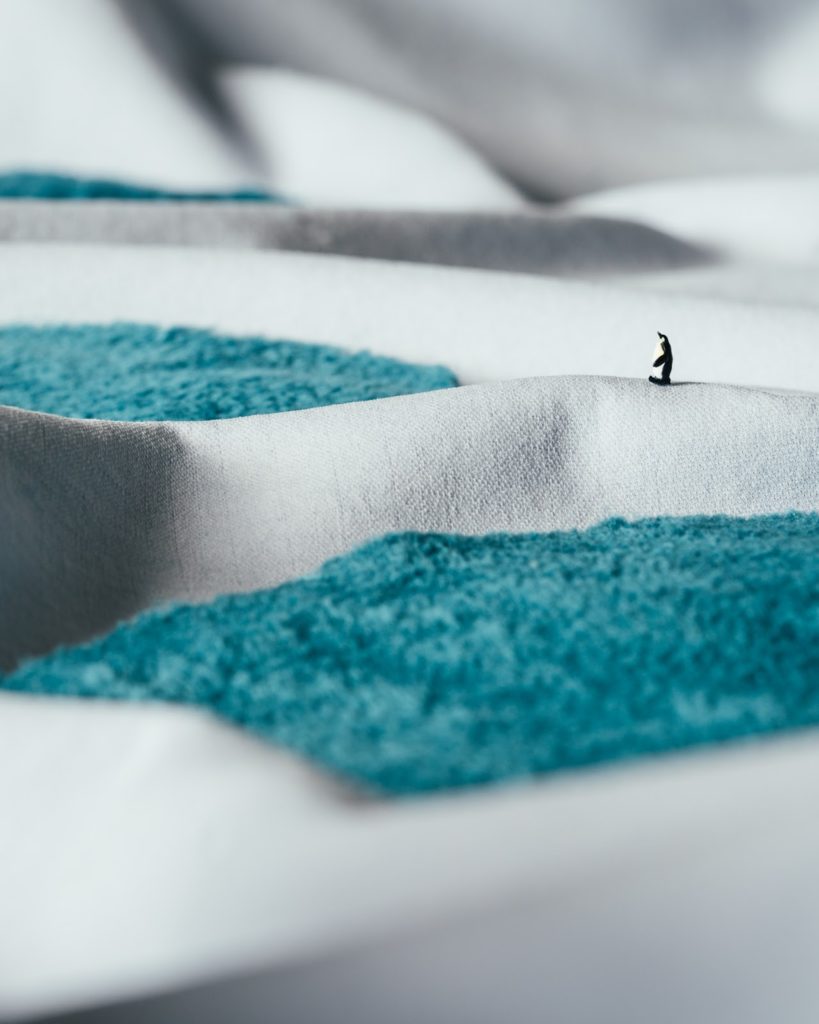
Polar Bears and Glacial Lakes

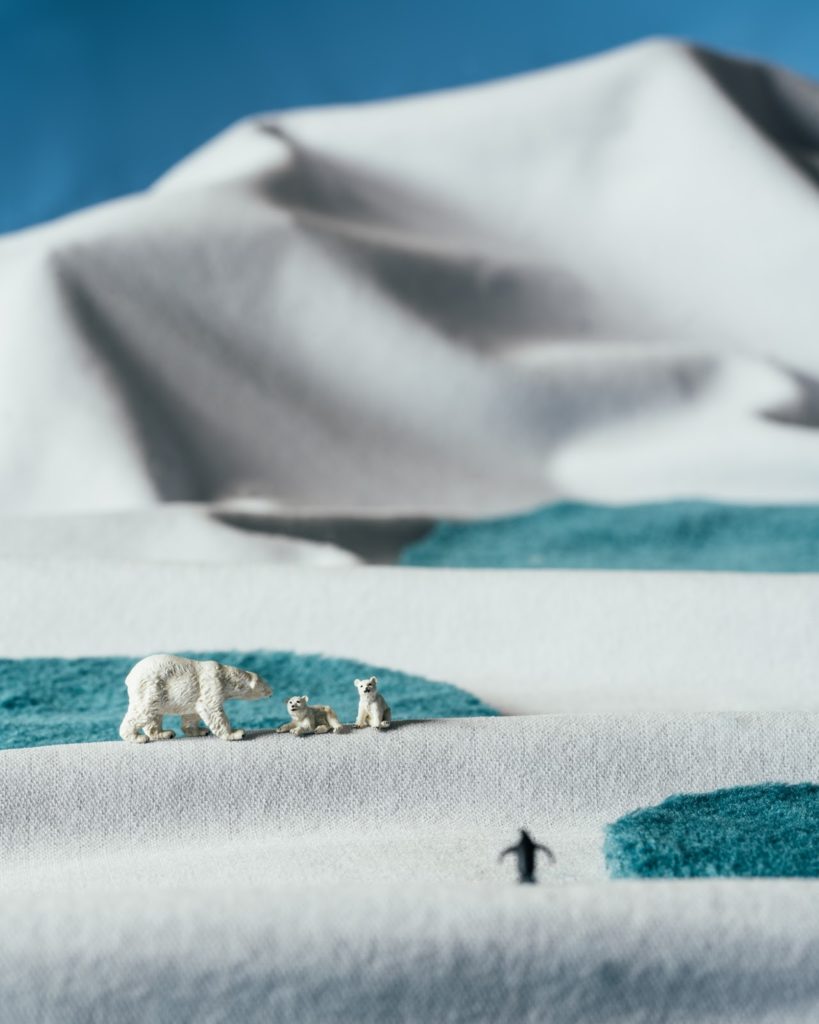
This is the first and, I hope, not the last time I’ll ever photograph polar bears in my life! Though it will probably be the first and last time I’ll ever photograph polar bears & penguins together. 🙂 For this scene I wanted to portray an icy landscape, dotted with turquoise lakes that you would find in glacial areas. I learned to brush out the texture from the Thermal Pro fabric to make it look like there are little waves on the lakes.

The Northern Lights

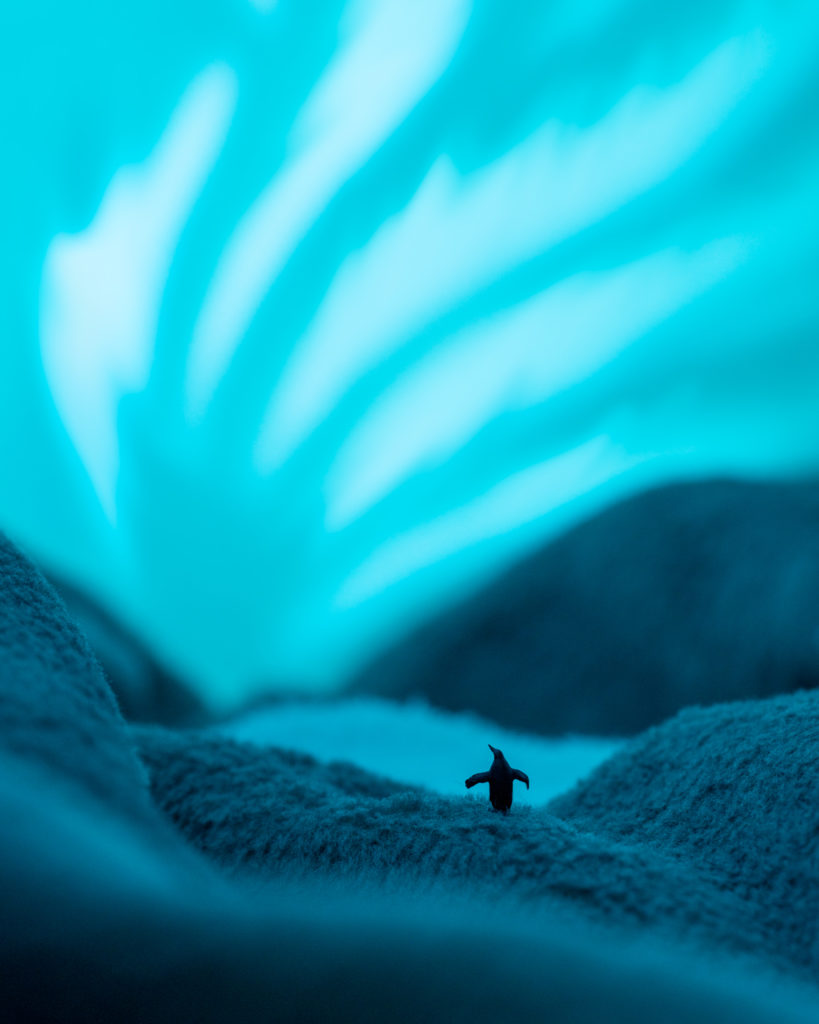
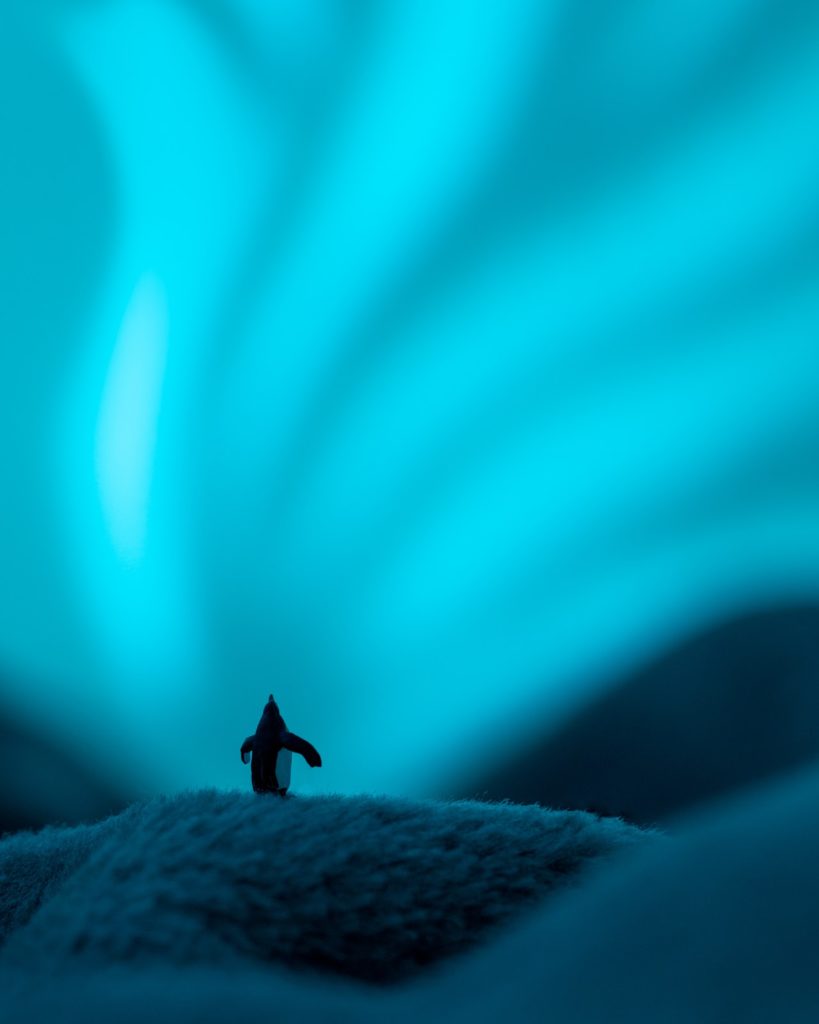
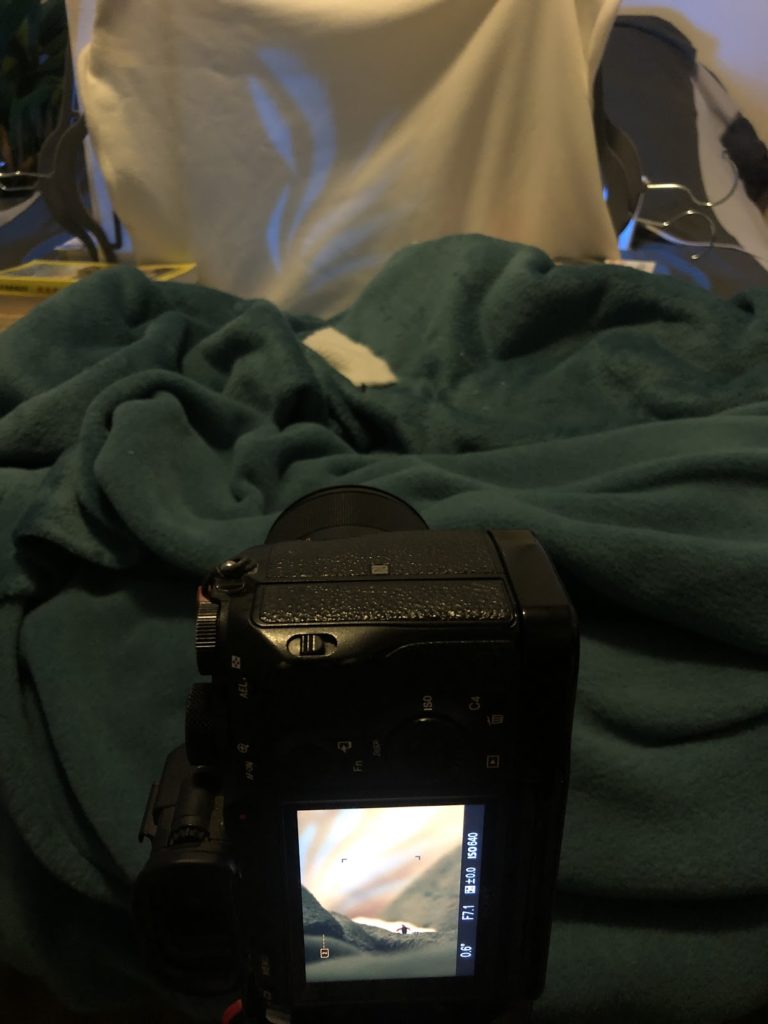
Welcome home, tiny friend! This scene was achieved by using Thermal Pro as the ground, and Micro Fleece draped over paper for the sky. In order to create the lights, I cut strips of paper out of a poster board, and then positioned the paper in front of a colored lightbulb. From there I used Micro Fleece to soften the lines, and a tiny bit of Photoshop (really, just a little) to add some more movement in the sky.

Over the past year, I’ve played with fabrics here and there in creating my miniature work, but utilizing them on this level was a first for me. Another first was using an animal as the main character. I think the images in this set are some of the most playful (and joyful?) images from my whole series. The Northern Lights images stand out to me as some of the most memorable from my entire miniature collection, thanks to how that scene in particular pushed me to create the sky in camera.

This was also the first time that I followed a narrative from scene to scene. As a photographer, I am already always thinking about telling a story in one frame. But in this case, I also needed the images from each scene to go together, and flow nicely into one another (something I wanted to do regardless of what order they were positioned in).

Shooting in macro forces you to pay attention to the details. It also opens you up to a whole new world (just a much smaller one). In these images, I was very aware of the unique textures in each fabric, and how they related to the textures in our outdoor world.

A year ago, I wouldn’t have imagined that I would be creating in this exact way, but I’m so happy that you’ve been along for the ride. And I’m grateful to have collaborators and partners who want to see these visions brought to life, too. Hope you enjoyed this spotlight.

Read more about this project on the Polartec blog here.

And PS – if you want to try miniature photography yourself, I have a free guide of the gear I use (including where I buy the little figurines) here. Enjoy!

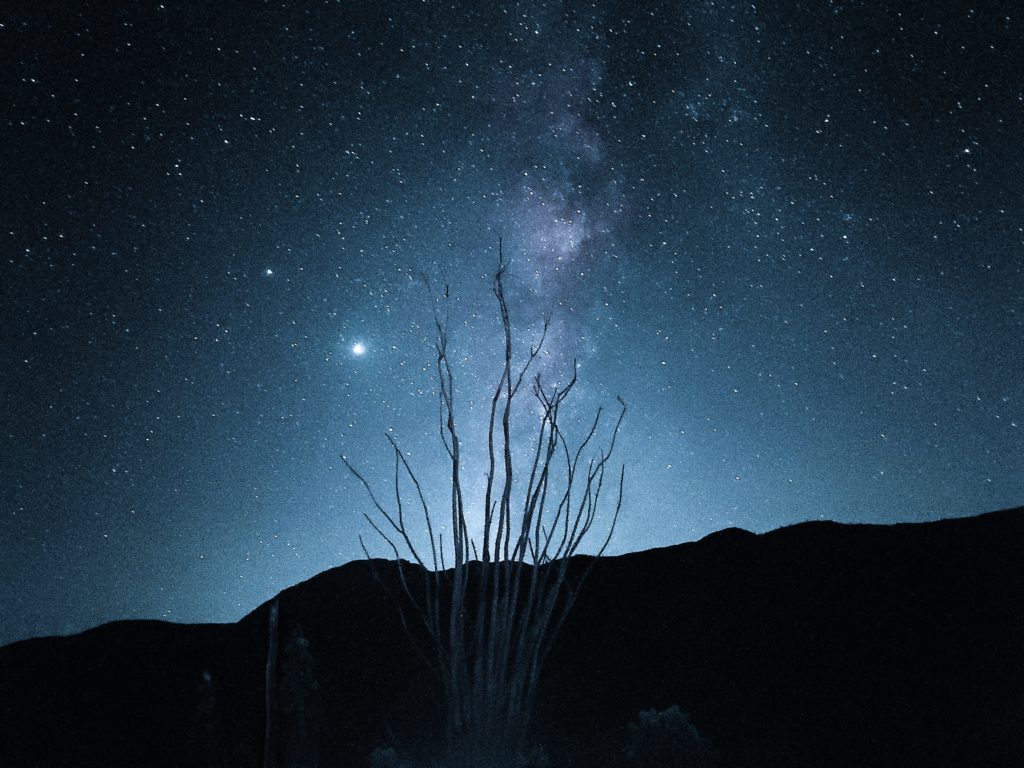
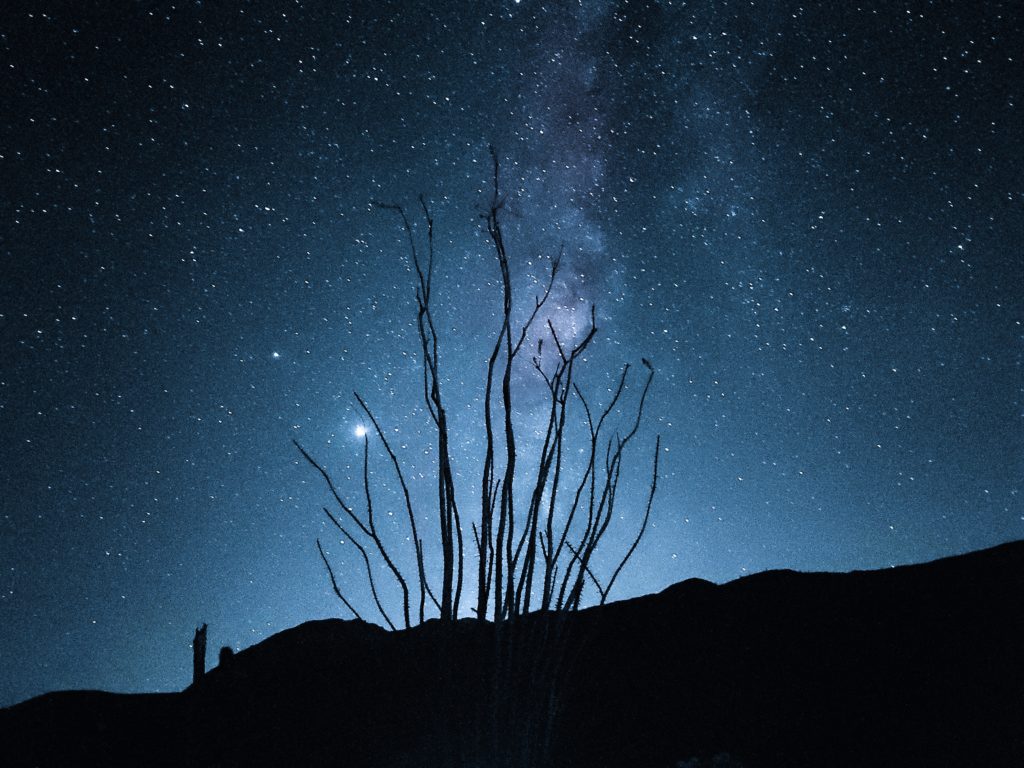
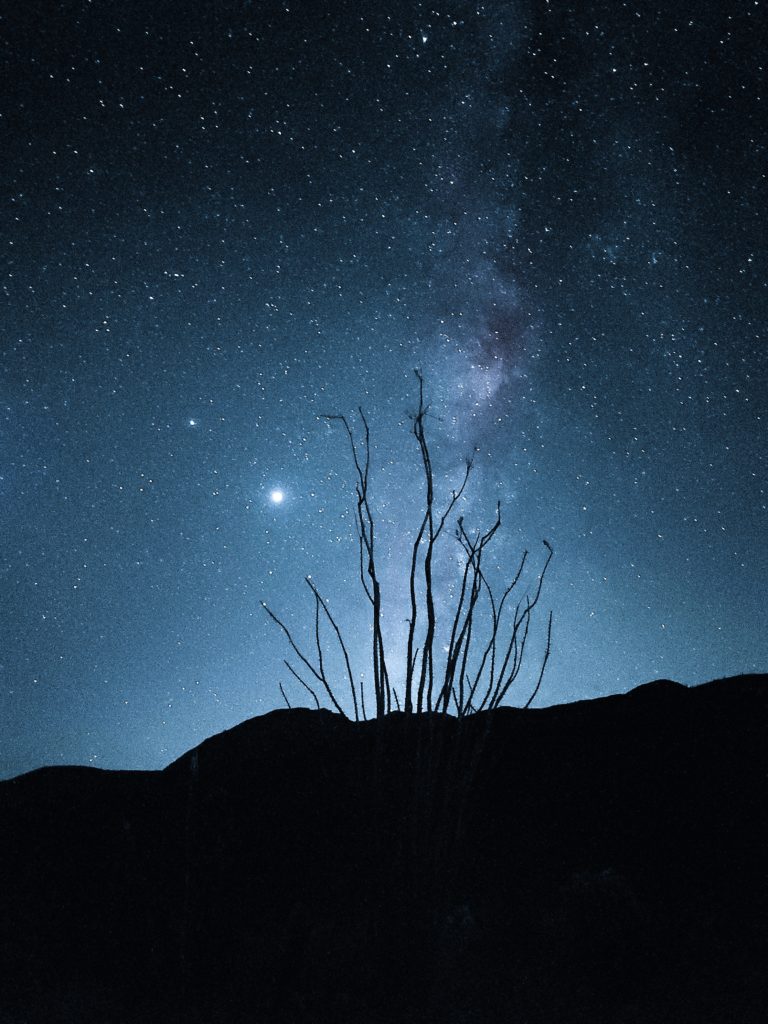
Image of an Ocotillo silhouette in the desert, with the Milky Way in the background.
This post is sponsored by Verizon. As always, all thoughts & opinions are my own. The above photo was created on the Samsung Galaxy S20 Ultra 5G.

If you’ve ever looked at a beautiful photo of the Milky Way and wondered… but… how?!… this post is for you! I know this genre of photography can feel intimidating, but trust me, you do not need to own a fancy telescope or have a ton of technical knowledge to create photos of the night sky. Here, I’m going to cover how you can create beautiful astrophotography, hopefully with gear you’ve got already–– and in my Verizon Techxperts episode, I show you the results. Let’s go!

There are thousands of stars visible to the naked eye from Earth, and the feeling of looking up at a dark night sky is magical and unmatched! But cameras and phones today can effectively see more than our eyes can. This contributes to a stunning image with a TON of detail… more than what we’re able to perceive on our own.

First, let’s go over gear and settings. From there, we’ll move on to location and planning. We’ll wrap up with a bit of guidance on how to edit your images. Remember: you do not need the most complicated gear or extensive knowledge in order to achieve beautiful results!

Astrophotography in Anza Borrego
Shot on Sony a7Riii with 85mm f1.4 G-Master lens. Settings: 85mm, f/1.6, 1.3 sec, ISO 10000.

So you wanna take pictures of the stars…

The gear

  • A picture-making device: Camera & lens, or a smartphone that has long exposure capabilities (like the Samsung Galaxy S20 Ultra 5G, which is what I used to create some of the images in this post)
  • A tripod
  • A dark, clear night sky
  • Editing software of your choice
  • Memory card & battery for your camera (if applicable)
  • Headlamp or flashlight
  • Gear for the weather – dress appropriately and stay safe, friends!

The basics

Let’s begin with your camera settings. Trying to familiarize yourself with these settings, and what they do, will definitely benefit you in this endeavor! Generally speaking, there are 3 big factors when it comes to making photographs. Those factors are Shutter Speed, Aperture, and ISO.

SHUTTER SPEED: This is the measurement of time a camera’s shutter is open to allow light in (and therefore, capture your image). A shorter shutter speed lets less light in, a longer one lets more light (and motion) in. For nighttime photography, you’ll need to use a long exposure.

APERTURE: This is the hole in your lens that light travels through (like the pupil in your eye). The wider the aperture, the more light can get in. To photograph the stars, you will use your widest aperture*, which is the lowest f-number (commonly f2.8). *An important note: technically your lens is NOT at its sharpest when the aperture is widest, so you may want to come up a bit from the lowest f-number. Personally I don’t see this as a huge concern unless you are doing more advanced work. I wouldn’t worry about it for now.

ISO: This is effectively the level of sensitivity of your camera to light. The higher the ISO, the more sensitive your sensor is to light, and the brighter your image will be. For everyday use, you typically want to shoot on the lowest ISO possible, because it gives the best quality image and least amount of noise, but when shooting in the dark, you’ll need to use a higher ISO.

Think of these three factors as a formula that creates your perfectly exposed night-time photo. You’ll need to adjust and balance them out so that you are happy with the resulting image.

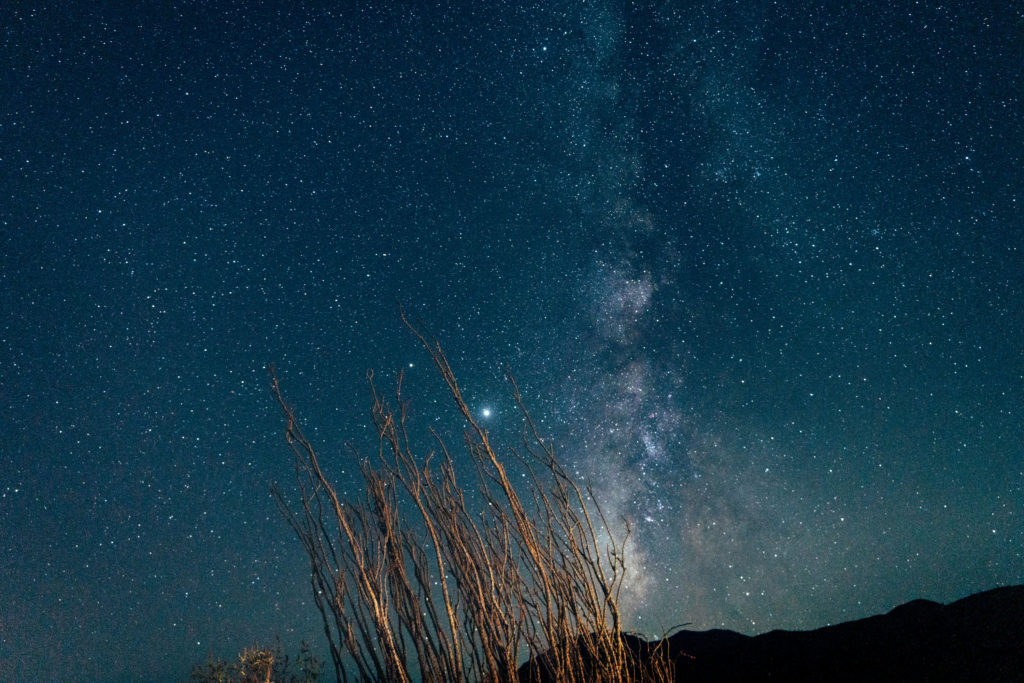
Astrophotography image of the Milky Way behind an Ocotillo cactus.
Shot on Sony a7Riii with 16-35mm f2.8 G-Master lens. Settings: 21mm, f/2.8, 13.0 sec, ISO 3200.

Astrophotography camera settings are not universal. The same settings won’t work for every scenario. But STAY WITH ME HERE! The strategy is to start with some base settings, and adjust from there. Here are mine:

  1. Set file settings to RAW, if your device allows. Shooting in RAW gives you the most data to work with.
  2. Shutter Speed: 20 seconds. In order to capture lots of stars, you’ll need to use a long exposure. I like starting with 20 seconds. Beyond 20 seconds, you may start to see “star trails”, which is when the camera captures the movement of the Earth. This depends on the focal length of the lens you’re using. If you are getting star trails and you don’t want them, you just need to decrease your shutter speed–– 10-15 seconds or less.
  3. Aperture: 2.8, or the lowest f-number your lens goes to. This opens up your aperture to its widest setting to let the most light in possible.
  4. ISO: 3200. I like starting at 3200, because it makes your device more sensitive to light, but won’t have excessive noise. You’ll want to choose the lowest ISO you can, as your other settings allow.
  5. Zoom: switch to manual, and adjust to infinity. If your camera has a digital viewfinder, look to see when the stars get the smallest (sharpest).
  6. Use a 10 or 2-second timer. This prevents you from getting camera shake from when you press the shutter button.
  7. Watch the exposure compensation. I prefer to shoot as close to 0.0 as possible, and slightly overexpose if anything.

When it comes time to shoot, you’ll adjust your camera or phone to all of these settings, set it on a tripod according to your desired framing, and hit the shutter button! From there, you’ll tweak your settings and the position of your camera/phone as you go.

Here are some common adjustments for your settings:

  • If the image is too dark, increase ISO or use a wider aperture (lower f-number).
  • If the image is too bright, decrease ISO or use a narrower aperture (higher f-number).
  • If you are getting star trails and don’t want them, decrease shutter speed.
  • If the image is blurry, adjust the focus and ensure your 2-sec timer is enabled.

The location

As you may have guessed, dark skies are preferred! Getting away from light pollution is ideal. If you’re able to travel, check out this map of International Dark Sky Places. If you need an option for staying closer to home, a backyard, park, or other open space works! The darker the skies, the more stars you’ll see in your images. But even in a city, you can see bright stars, planets, and (obviously) the moon.

I like having some kind of foreground element in my night sky photos. A tree, cactus, tent, cabin… use your surroundings. 

Astrophotography on a phone!
For this image, I used an Ocotillo plant as a silhouette against the Milky Way. Shot on Samsung Galaxy S20 Ultra 5G. Settings: ISO 1600, 30sec.

The conditions

As a fellow resident of Spaceship Earth, you are familiar with things we encounter here like weather, seasons, and moon phases. 😉 These things will impact your photos!

WEATHER: Aim for a clear night! Clouds can be neat for a timelapse, or if you’re above them on a mountain or something. But if you’re going for star photos, you’re gonna need to be able to see them, ya know?

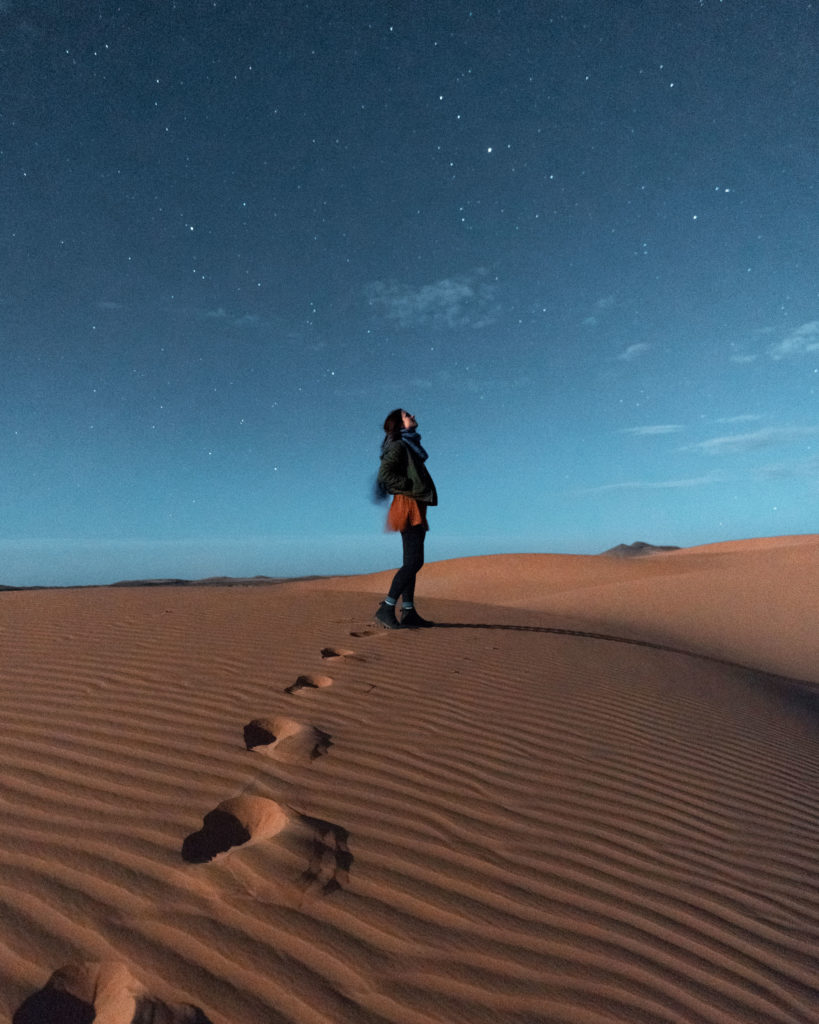
THE MOON: The moon impacts astrophotography in a few ways. First of all, it’s pretty freakin’ bright. If you shoot during a full moon, you will quickly discover this! The brightness of the full moon overwhelms and “blows out” the stars around it. That’s not to say you shouldn’t experiment though–– shooting around the full moon can be great, as the moon lights up the surroundings. Check out this self portrait I took during a full moon in Morocco:

Shot on Sony a7Riii with 16-35mm f2.8 G-Master lens. Settings: 16mm, f/2.8, 1.0 sec, ISO 8000.

As you can see, the sky in this image doesn’t have nearly as many visible stars, but the trade-off is that you can actually see me and the surrounding sand dunes clearly, which is pretty cool.

The “best” time for star photography is during the new moon… that’s in quotations because, of course, this is subjective. How and when you create your art is up to YOU! But if you’re going for a starry sky, planning to shoot around the new moon will give you what you’re looking for.

THE STARS: Preparation is key! You’ll want to have an idea what the night sky is going to look like before it even gets dark. Shooting the Milky Way galaxy is rewarding, but you should know that it’s not visible all night, every night! There are plenty of apps you can download that will give you a full picture of the night sky. This can help you to get an idea where and when the Milky Way (and other objects) will be visible in your area.

Shot on Samsung Galaxy S20 Ultra 5G. Settings: ISO 1600, 30sec.

On the night I made this photo on the Samsung Galaxy S20 Ultra 5G, the Milky Way was visible from about 9:30pm to 1am. I made sure to give myself plenty of time to frame up my shots and experiment with my settings to get it right.

The editing

Don’t worry, you don’t have to do anything toooo wild, but some basic tweaks can give some more depth to your photos! Try bringing up the exposure, increasing contrast, and shifting the white balance. With practice, you will learn what your preferred style for night time photography is.

Shot on Sony a7Riii with 24-70mm f2.8 G-Master lens. Settings: 24mm, f/2.8, 25.0 sec, ISO 2000.

Hopefully, this gives you a solid base of knowledge for your first astrophotography shoot. I know that some genres of photography feel more intimidating than others, and astro is one of them! It’s not as complicated as it seems, and you’ll get more comfortable with it as you practice.

I recently created some images of the night sky using the Samsung Galaxy S20 Ultra 5G, and was super impressed with how they came out. For a walk-through of my set-up and settings on the phone, and to see my results, check out my episode of Verizon Techxperts below. And for more Techxperts tips, check out Verizon’s YouTube channel here.

More questions about astro? Let me know in the comments.

When it comes to learning a new skill, especially if that skill has to do with technology, I’ve found myself easily intimidated. Underwater photography definitely fell into that category for me, and from plenty of other people too, if my DM’s are any indication. 😉

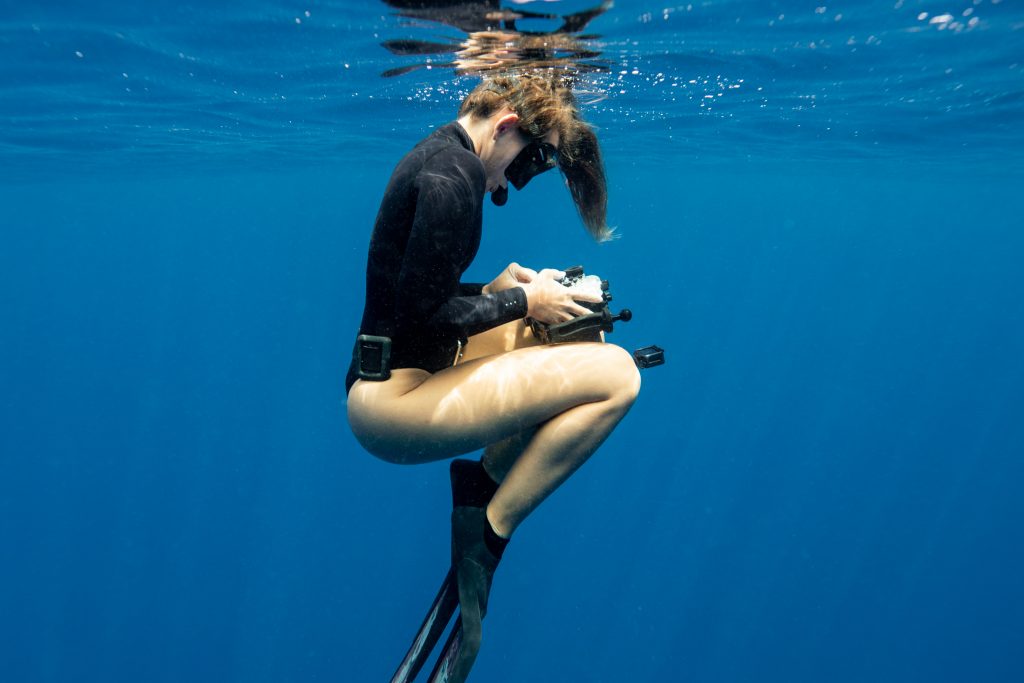
I have wanted to learn to shoot underwater since I “dove” (sorry) back into photography in 2014, but I didn’t really know where to start! Last year, I decided to learn, and jumped in the deep end (heh) by booking a trip to Tonga to swim with humpback whales. The experience was amazing, and a fantastic first experience for me with underwater housing on my main camera body. Camera housing can feel bulky and a bit cumbersome, but you get used to it with time and practice.

I wanted to compile a basic beginner’s guide to underwater photography. This isn’t meant to be 100% comprehensive, but to cover the biggest questions I had personally while I was preparing and learning. Here are my tips for those who might be in the same boat (ok I’ll really stop now), and what I’ll be considering moving forward as I shoot underwater more.

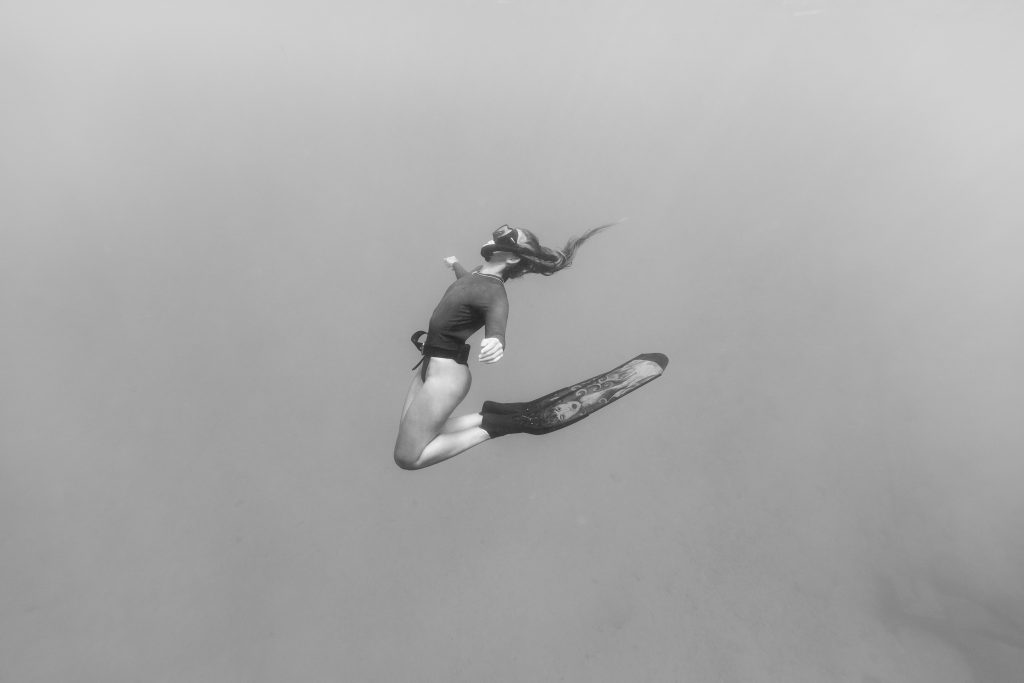
Charyse floats in the water, black & white image
My friend Charyse floating in the shallows.

1. FIGURE OUT WHAT GEAR YOU NEED

First, let’s talk about your camera. What do you normally shoot with? What kind of images are you looking to get underwater?

Before getting into specifics for underwater camera housing, if you’re just looking for something that will do a decent job at capturing your adventures underwater, you can save lots of money by opting for a GoPro or a waterproof camera like the Sony RX0II. Keep in mind that these are wide-angle, and not necessarily the best for wildlife or macro. But they get the job done in many cases and may be worthwhile to consider, depending on your needs!

Another option is using a compact camera like the Sony RX100VII, and getting housing for it like this. Housing for compact cameras is smaller and less expensive, and it’s less bulky underwater. Make sure that the camera itself has a full manual mode, and that there is underwater housing available for it in the first place.

Overall, I found that it’s unavoidably expensive to get into underwater photography. The cost of the gear adds up so quickly! I’d recommend considering your needs and thinking about what aspect of the experience or the result is important to you, and go from there. There isn’t a one-size-fits-all answer. I ended up choosing Ikelite housing with a dome port for my Sony a7RIII and 16-35mm f2.8 lens. Since I was only shooting in shallow water, I didn’t use strobes, but for low-light or Scuba diving, look into these.

One of my first shots underwater.
One of my shots from my first real swim with housing.

Let’s talk about housing. Underwater camera housing is a watertight case that holds your camera. Unless your camera itself is waterproof, you will need housing.

Surf housing is made for surf photography and shooting closer to the surface. It is made to be lightweight and withstand the waves. Surf housing units do not have much button functionality on the back panel, which means you can’t change many settings in the water. Brands include AquaTech, Liquid Eye, and SPL.

Diving housing is made for going deeper, and has more button functionality so you can change settings underwater. It’s also bigger, heavier, bulkier and can get pretty darn expensive with all the extensions, ports, and strobes. Brands include Ikelite and Nauticam. Generally more expensive than surf housing, though of course there are exceptions.

One part in particular worth pointing out: the port is the part of the housing where the lens goes. Underwater, a flat port will result in a zoomed in image (usually not ideal). A dome port will avoid this, as it accounts for the refraction of the water. A dome port also allows you to get over/under shots (bigger dome = easier to get those types of shots). Depending on the housing unit, you may have to order the port separately, so it is good to know which kind to look for. The housing manufacturer should have some kind of documentation listing the extensions/ports that fit certain camera and lens combinations. Be sure to get all the parts needed for the camera & lens you are wanting to use.

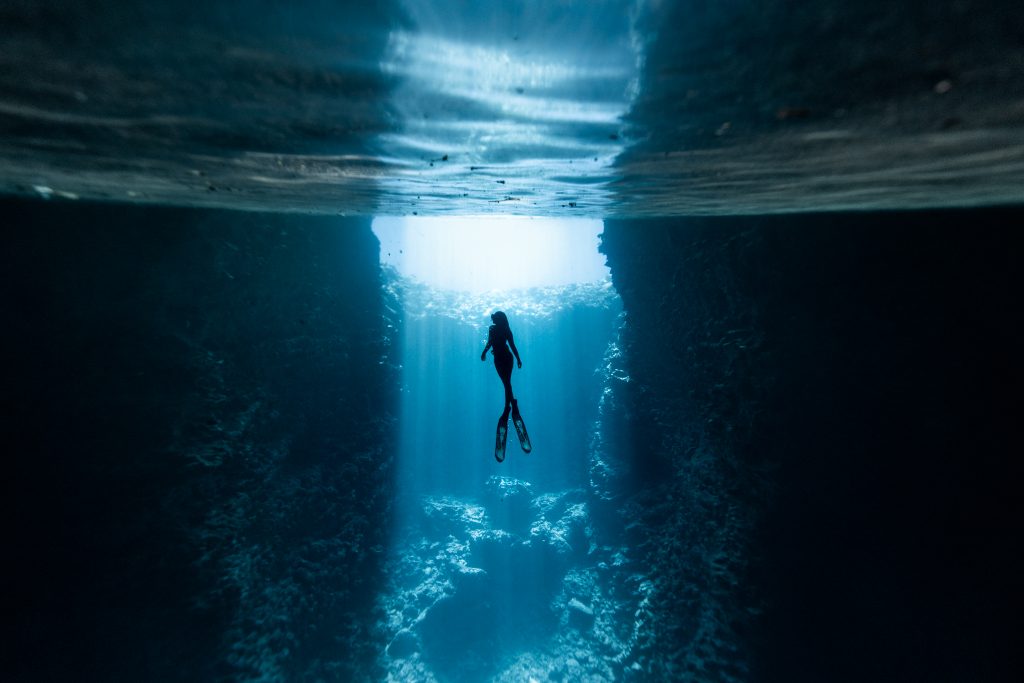
freediver underwater photography

What about a mask, snorkel, fins and wetsuit? You probably need at least some of these items, and will want to buy backups if you are planning on going somewhere remote! The gear you buy totally depends where you are going and when, and of course, your budget. When it comes to buying a mask, the important thing is that you get something that fits your face. The best thing to do is go to a dive shop in person to try on masks, and to make sure you get a good seal. Snorkels can come with a few bells & whistles; some have valves to prevent water from getting in during wavy conditions. I bought a couple of flexible snorkels (with valves) from a local dive shop when I bought my masks.

There are plenty of fins on the market, varying in length, weight, and color. Find something that fits you well, and ask lots of questions in the dive shop. My fins are negatively buoyant, meaning they don’t float. There are also tons of wetsuits available in different styles and thicknesses to account for water temperature. When shopping for a wetsuit, be aware that neoprene is not particularly environmentally friendly–– it is often made using petroleum (unless it is specifically limestone-derived neoprene, and even that is nonrenewable). If this matters to you (I hope it does), buy from companies that prioritize eco-friendly practices. Patagonia makes Fair Trade Certified wetsuits from renewable natural rubber, and may be worth considering.

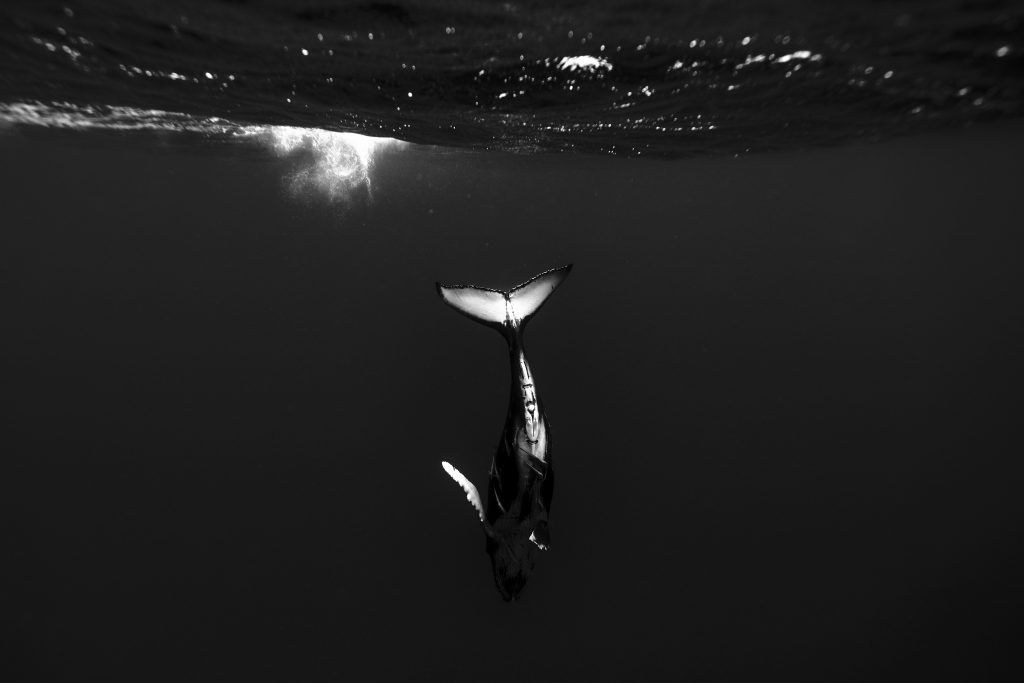
juvenile humpback whale diving down

2. LEARN YOUR GEAR

Upon opening the box of my Ikelite housing, I felt like I was looking at a robot that I had to assemble. Luckily, it got easier. This is one situation where you should definitely read the manual and follow the directions that come with the product! Set aside some time and be patient. It’s easier than putting together IKEA furniture.

With my camera in the housing, I felt like I was learning how to use a whole different device. The buttons I was accustomed to using were all in slightly different places, and it felt like a different camera altogether at times. I took on the mindset that I was learning a completely new craft, and it helped me tremendously along the way. Giving myself a clean slate from which to learn from was very helpful.

In putting together my housing for the first time, I learned that one of the most important parts of my set-up was also one of the smallest: the O-rings. O-rings are rubber rings that seal the housing together, preventing water from getting in. They have to be lubricated with special lubricant (the brand matters). If the O-rings get dirty with something like sand, hair, or lint, a gap can form which could cause flooding.

I’m lucky to have a specialty shop (BlueWater Photo) where I live, and the specialist there told me that there is some debate when it comes to O-ring strategy. He, an avid diver, uses a kind of “set it and forget it” method, where he sets up his O-rings at the beginning of the trip and then tries not to mess with them much. When I was in Tonga, I cleaned and re-lubed my O-rings a couple of times. Whatever method ends up working for you, the #1 rule is to take care of your O-rings!

You also want to have a good understanding of how to change the camera battery, should you need to do that on the water. My Ikelite housing required that I detach my lens in order to access the battery compartment (very inconvenient). I did find that with more practice, I learned how to do this more quickly and with less fumbling.

Once you’re ready to try out your housing in water, submerge your housing in your bathtub (with no camera in it at first) and see if you get any bubbles. Afterward, inspect the housing and see if any fog develops, which is a sign of a leak.

showing how to review images underwater
Reviewing images on the surface of the water

3. CHANGE YOUR SETTINGS

Part of this is personal preference, but I’m going to share the settings I used.

I always shoot RAW, and for my trip to Tonga, I shot on Shutter Priority mode most of the time, set at 1/400 sec. I set my ISO to Auto, with a maximum of 6400. I used Continuous Auto-Focus, and used a Zone Focus Area. I set the burst mode to the middle setting. I use back-button focus so that my focus button is separate from my shutter.

What do all those settings mean? They mean that the camera prioritized the shutter speed first, and adjusted the aperture and ISO to make up for that. I find that the Continuous AF is pretty good at shooting what I want it to on the a7R III, but it would occasionally focus on the particles floating in the water, so I always shot multiples to be safe.

If you shoot mirrorless, you need to turn off the Electronic Viewfinder so that the screen is always on (that’s what you’ll see underwater). This uses more battery, so I made sure to only have my camera on when I was actually using it.

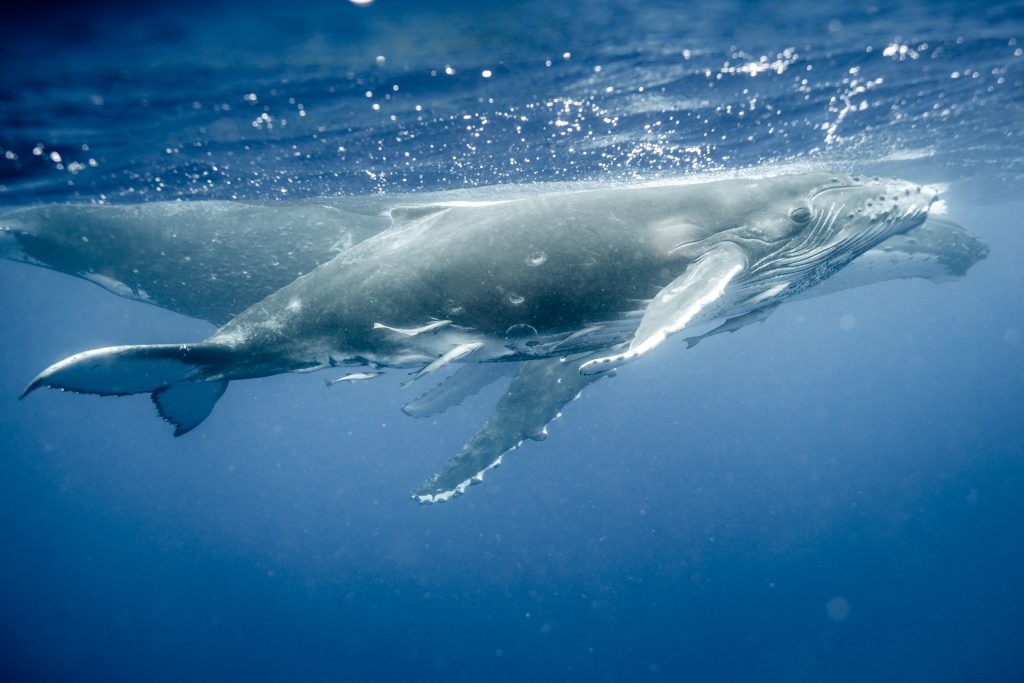
humpback whale juvenile swimming alongside its mother

4. PRACTICE

There’s only so much you can learn in your bathtub. Eventually, you have to get in the water with your gear. And it will be terrifying the first time. I was so paranoid when I actually used my underwater camera housing underwater. You know, for its intended purpose and everything. 😂

When you’re shooting underwater, it will probably feel like there is just… a lot going on. You’re breathing out of a snorkel or regulator, or maybe you’re holding your breath, and you’re wearing fins, and you might be fighting against your own buoyancy… there are just more factors to think about than when you’re on land. It might be awkward. Remember, you’re learning something completely new! Embrace a beginner mindset.

On one of my first swims with my housing, I had my friend Charyse model for me. I also worked on diving down to get closer to different sea life. It was helpful to have a variety of subjects to play with. Going on a few practice swims was very helpful and helped me feel more prepared once I got in the water with the whales. I was able to get comfortable with my settings on my practice swims, and develop muscle memory fairly quickly.

Keep in mind that the light, water, and weather conditions are not always going to be ideal. Work with what you’ve got, and make sure to treat the water itself as a subject too. You can create beautiful shapes with just the water and the light. Remember that art is experimental! Play with the water as it moves across your lens.

bubbles in the water

5. POST PROCESSING

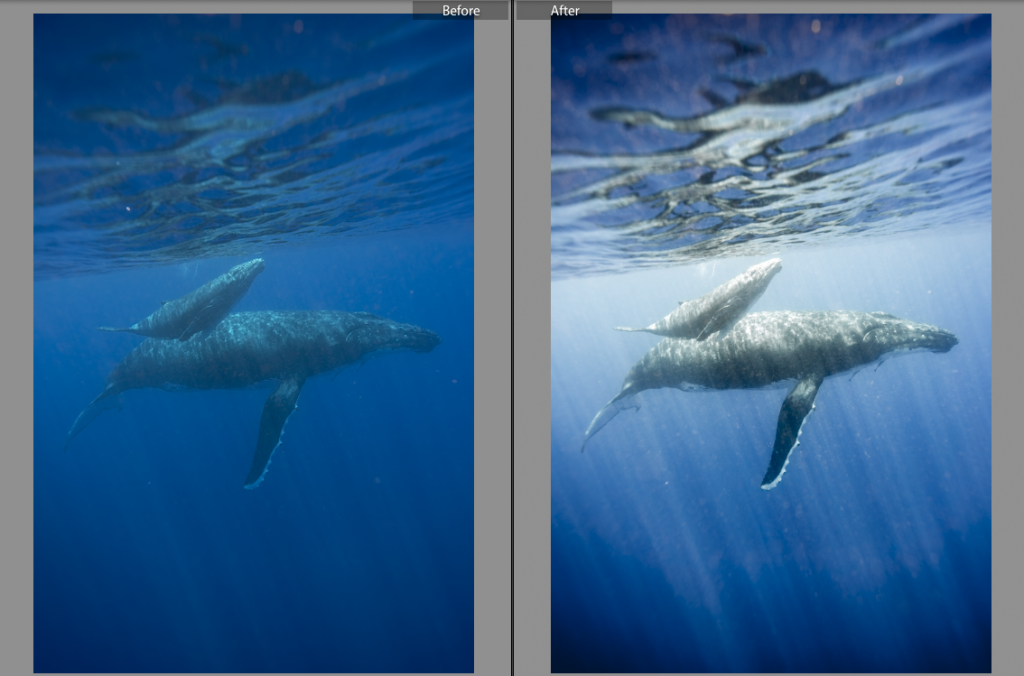
One difference you’ll notice between your underwater photos and all the others, is that the white balance is particularly wonky. Though it is possible to capture a near-perfect raw image, there will usually be a blue/green tint to your images. Get super familiar with the white balance panel in your editing software (I use Lightroom). You also find it beneficial to adjust colors individually in the HSL panel, especially Blue and Aqua.

Editing my underwater shots, I found myself hitting some of the sliders pretty hard! Depending on the water clarity, the weather, the depth and the light, you may have a lot or only a little editing to do.

An example of one of my images before & after. I increased the contrast, adjusted the white balance, and brought down the saturation in all colors.

My first experience with underwater photography was ridiculously fun. Of course, I was swimming with whales, and that’s a bucket list experience in and of itself! But beyond that, having a new way to practice my craft was very refreshing. If you have the opportunity, even if it just means borrowing a friend’s gear and getting in the water for 20 minutes, I’d highly recommend it.

Throughout this learning process, I found that preparation is key. I am typically someone who jumps and builds the plane on the way down, meaning I figure it out as I go. This is not a situation where I’d recommend that! Not knowing how to work your housing could result in destroying your camera gear! Make sure to take the time to understand the basics of how your gear works before you leave for a trip.

Underwater photography may feel daunting. My advice? Let it be fun! Don’t beat yourself up if you don’t understand your housing right away, or if you aren’t nailing your first edits. You’re learning a new craft. Let your previous knowledge of photography help you out instead of judging yourself for not being perfect right away.

If you have any resources to add, comments that expand on any of the above, or questions, feel free to leave them in the comments below. Hope this was helpful!

FURTHER READING & RESOURCES

Though I knew I wanted to, I haven’t felt ready to write this post for a while.

I hinted at this in my 2018 wrap-up blog post. A year ago, I was having a tough time. In addition to chaos in my personal life and a nonstop travel schedule, I was dealing with depression and anxiety that was becoming unmanageable. I’ve dealt with both anxiety and depression for most of my life, but this time it was a big signal that something was not working. I had seen so many incredible things throughout the year, worked hard on my craft, and built valuable business relationships. But looking back on it, a lot of the exciting things I did in 2018 were at the expense of my physical and mental well-being. My depression made it difficult for me to even get out of bed, and my anxiety manifested as constant, uncomfortable chest pressure. Nothing felt easy, not even simple tasks.

I started 2019 with a new plan. It involved doing less, being super intentional with my priorities, and taking a hard look at how I was spending my time.

Before I could take a step back, I had to look at an important factor: money. How much could I really afford to hit pause, if that’s what needed to happen? It can be challenging to look at your finances in a normal state, and I was super depressed, so this wasn’t exactly on my list of super fun activities! I made an agreement with myself that if this period of time meant I needed to get a part-time job to supplement my income, I would. I had to get over my own ego, and the stories I was telling myself that this would equate to failure. Doing what you need to do in order to take care of yourself is not failure, it is the opposite of that.

Before we continue, I’d like to acknowledge that being able to take a step back and prioritize your mental health is a privilege. Some of the services available to me are not available to others because of a wide range of barriers: money, time, and location, just to name a few. This blog post is not meant to be prescriptive, or sound anything like “if I can do it, so can you!“. Everyone has a unique situation and I encourage you to seek out the right help for you personally.

For me, this period of time was a clear ultimatum where I had to separate what was working from what was not. I knew I had a big hole to dig myself out of, and my first step was to hit pause. I put getting better at #1 on my to-do list and looked at my options for professional help.

I started weekly therapy, treatment for depression and anxiety, and fellowship in the form of an ongoing program. We’re not just talking bubble baths and face masks (no hate to those things), but professional, regimented, weekly and daily support that was sometimes expensive, and often inconvenient. I cannot overstate how grateful I am for all of these things.

Sometimes I would leave therapy surprised at how completely physically exhausted I felt from it. I’d come home and sleep for a few hours, dealing with feelings of guilt and shame, blaming myself for resting instead of working. I felt like I always needed to be doing something “productive”, and had to focus on re-wiring my brain to really absorb that my value does not come from my work, or what I “do”. Over time, I started to feel better. The fog lifted and I slowly got back to work. I began thinking about how I wanted to structure my life moving forward.

I started paying acute attention to what made me noticeably anxious. One of my biggest triggers was spending too much time on social media. I noticed that I was comparing myself to others, experiencing jealousy, and noticing an impulse to be combative because of it. When my anxiety would take hold, I’d become avoidant with things like friends, family, business, and finances. Because of this, I choose to limit my time on social media and practice mindfulness daily to maintain a healthy relationship with my time online.

I was writing again, but not for an audience. I wrote down what I wanted my life to look like in the future, and I tried to get specific: 5 years, 3 years, 1 year–– what did those look like? I asked myself what energized me, and what things in my business totally deflated or exhausted me. I looked at what kind of life I wanted outside of my business, and what creating that would mean. I observed my relationships, and my boundaries within them.

Over time, I put all of this into practice and restructured my life in a way that makes me feel supported and empowered, and I am unapologetic about making changes as they are necessary. 

What surprised me the most about my choices this year is how much my business has improved as a result. I’m not only talking about my income here, though that grew, too. As I got clear on what I do and what I don’t do, what I can and what I can’t participate in, the quality of my projects and clients improved. I felt more fulfilled by the work I was taking on. I gained confidence and initiative.

When I made space first for rest and my mental health, I found that I was able to get clear on the direction I wanted for myself and my business. Because of this clarity, I saw the projects that were a right fit for me immediately, and said no the others without getting anxious about it. I was then able to outsource and delegate tasks to people that can do things better and faster than I can, while I focus my attention where it is better for the business, and for my well-being.

Taking care of yourself is imperative. You cannot do everything, and you cannot do it all alone. Nothing replaces sleep. Your body has limits.

Because of my decision to pause and re-prioritize, I was able to produce better work. I was able to be more present with my clients and collaborators. My mental game got stronger, and believe me, you have to have a strong mental game if you have any kind of internet presence. And ultimately, I was able to pursue and attract better, bigger opportunities. For example, I gave a TED Talk this year at TED HQ… there is absolutely no way that would have happened if I had not slowed down to re-focus.

This is not a story of a big traumatic event, or my life falling apart. What I experienced is something I believe to be very common. I was on a train headed straight to burnout, and I’m lucky to have found the help I needed. Where I had fear, I now have peace. It’s not perfect, it’s a process.

Wherever you are in your life and career, I encourage you to check in on how you’re feeling, and to do it regularly. If you are going too hard and too fast, your body will literally stop you eventually and force you to slow down.

When I worked as an adventure guide, I had to go through training manuals for each organization I worked for. There is a line from one of those manuals that I’ll never forget. Among the logistics, procedures, and directions, the page read: If the plan sucks, change the plan. I try to apply that same guidance to my life. If something isn’t working, change it. Take care of yourself. There is no replacement.


Photos snapped by Nicki Whittum, Joe Henderson, and Rachel Jones Ross.

Five years ago, after spending a year on a working holiday in Australia, I headed to New Zealand for a few months of camping and spending time outdoors. I was hoping for mountain views, gorgeous beaches, and rugged adventures, and NZ sure did not disappoint. The country left a big impression on me and I fell in love with it. Over the course of four months, I drove around both islands, worked on a couple of farms (and a vineyard), explored caves, mountains & waterfalls, learned about Maori culture, and slept outside most nights (yes, on purpose). I have wanted to go back ever since, and unsurprisingly, my second impression of New Zealand was just as incredible as my first. But this time, I was able to travel a little differently.

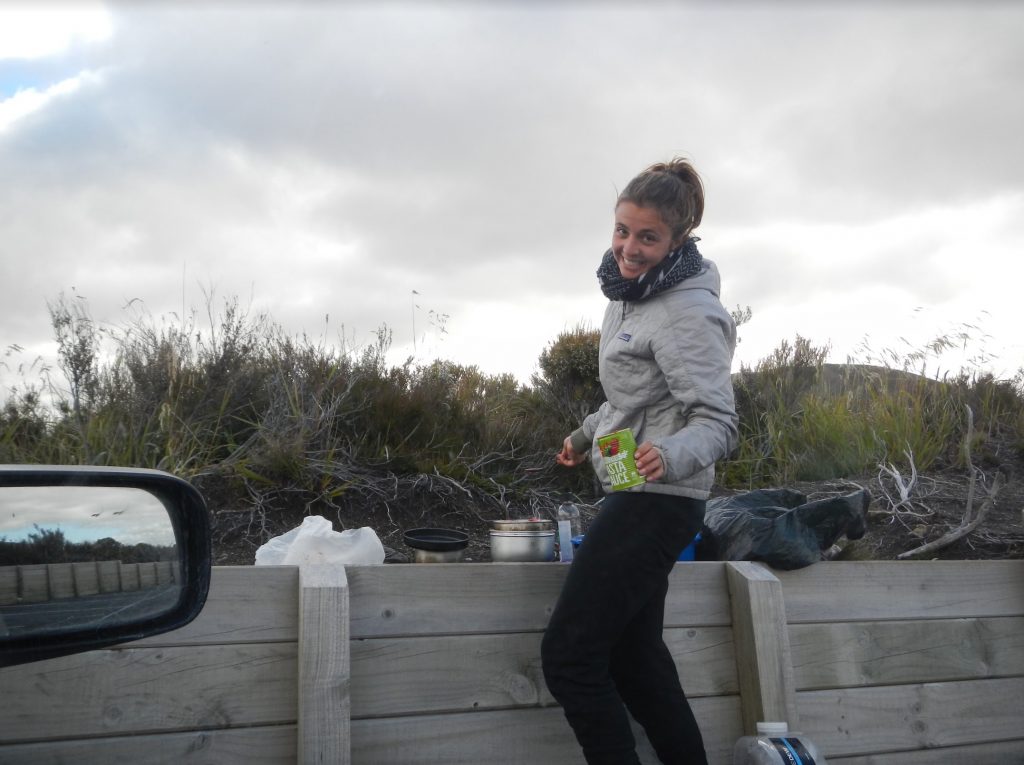
Probably cooking dinner of champions in a parking lot, 2014.


On my previous trip to NZ, I was workin’ with a rather ambitious budget (i.e. spend as little money as possible). We’re talking no eating out, no staying in hotels, no “splurge” items, and a lot of pasta, beans, and PB&J. Let that be evidence that yes, you can do NZ on a budget! That trip was some of the most frugal traveling I have ever done. I wanted things to feel more comfortable and convenient on my next trip, and looked for a balance of free outdoor activities and paid indoor activities (ok, sometimes these were outdoors too). The other big difference between then and now is that wasn’t working as a photographer back then. I didn’t even own a camera. But my memories of that trip are so vivid, and I had a list of places I wanted to return to with the knowledge (and gear) I have gained since.

Another gem from 2014.


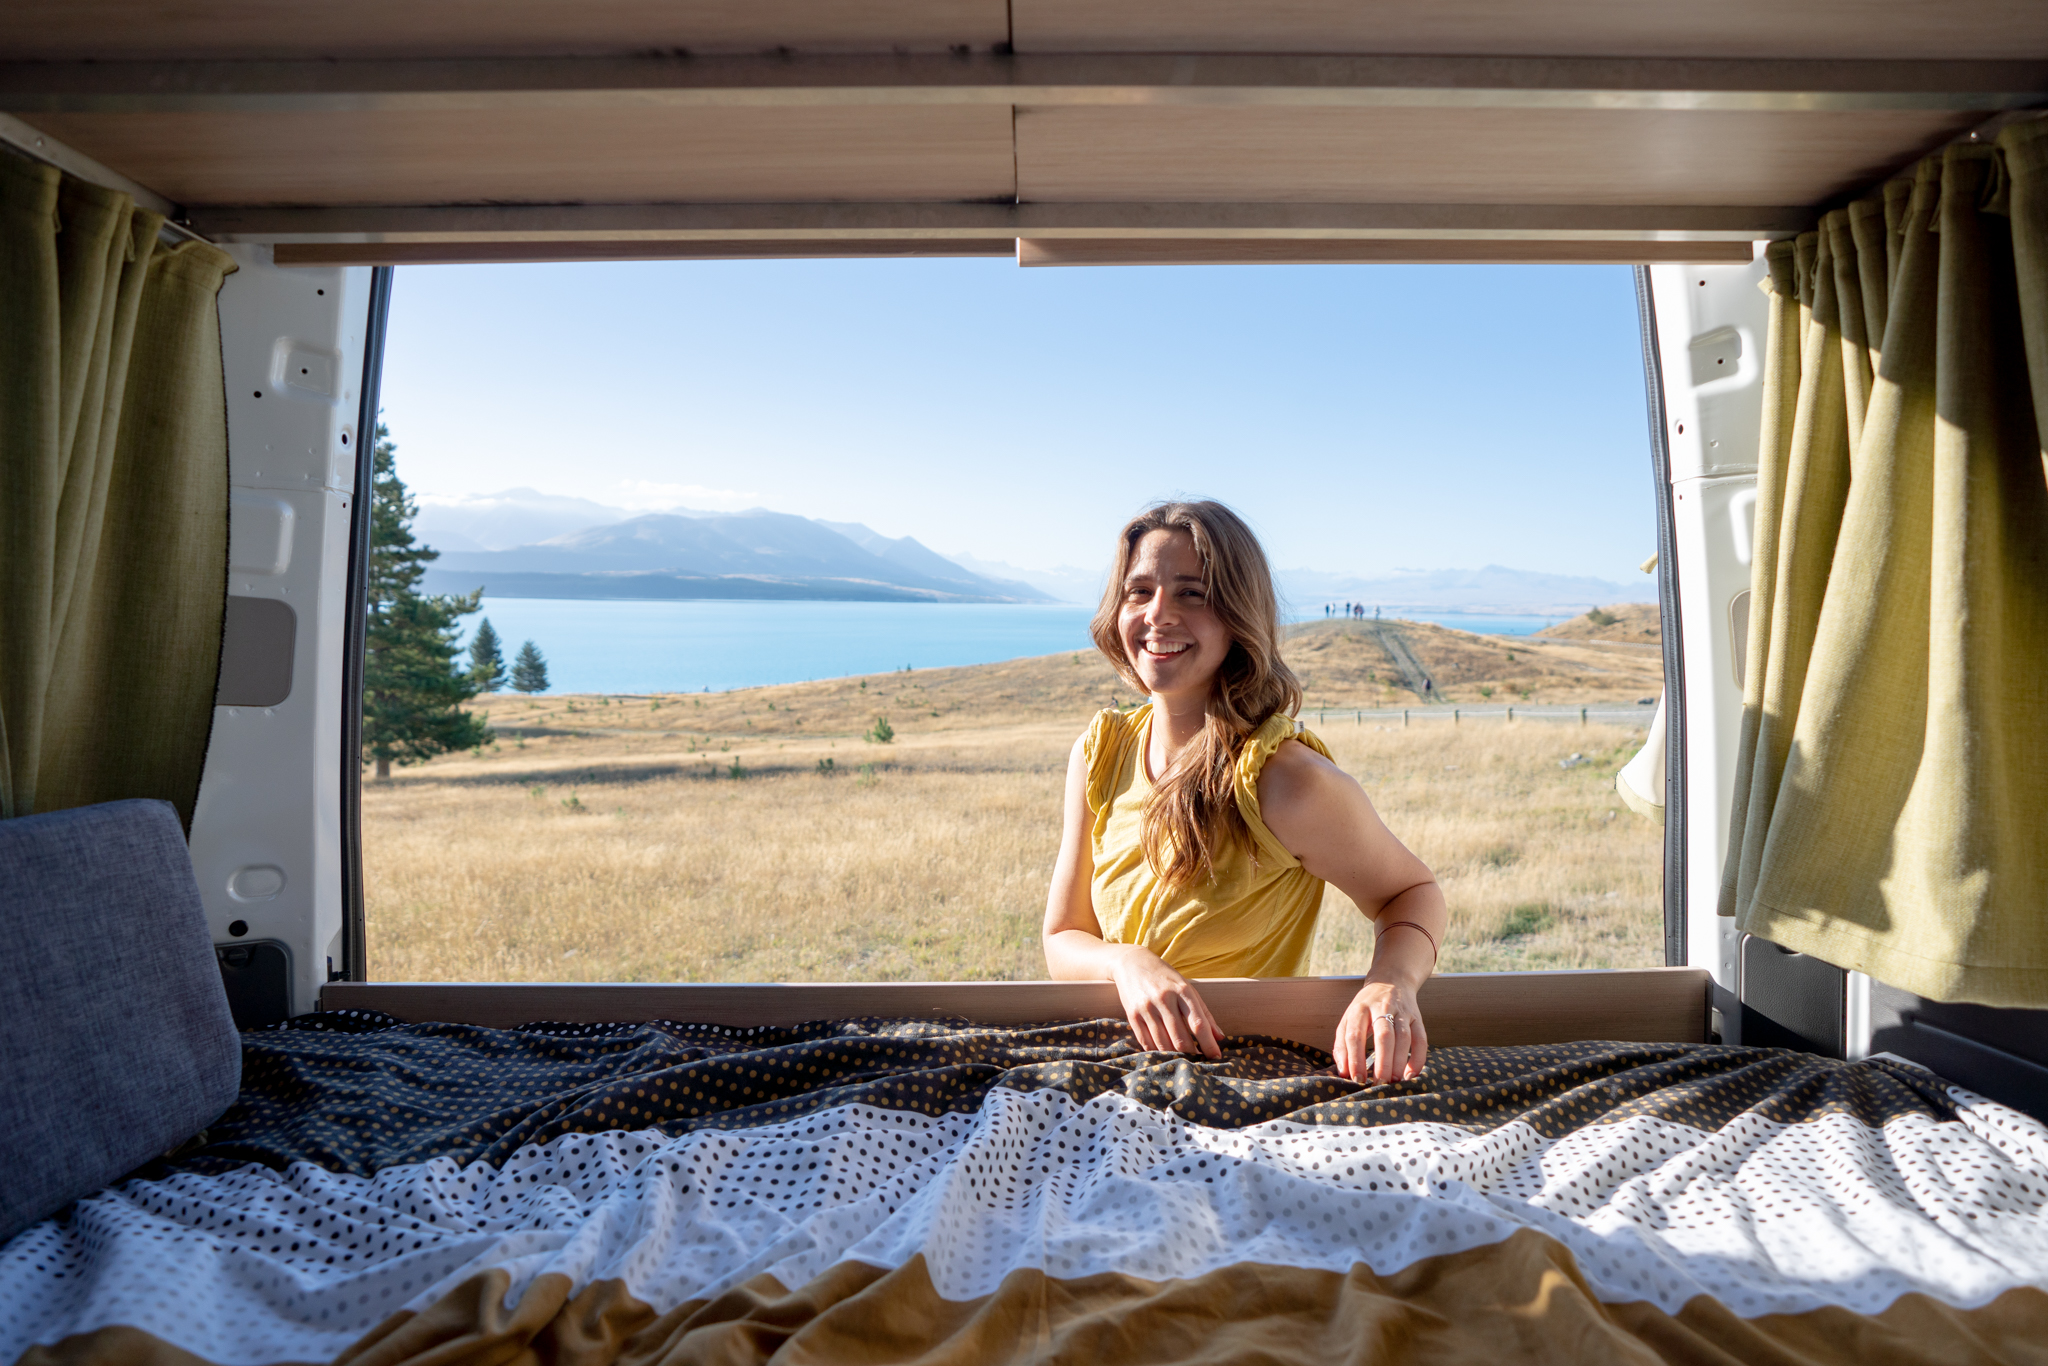
I planned this trip with my friend Rachel Rudwall, who is an amazing and hilarious human also working in the travel media space. Rachel is a total badass, and I highly recommend following her journey if you are not already! We decided the best method of transportation for our trip would be a self-contained camper van. It’s very convenient to have a home on wheels, it’s more luxurious than a tent, and it would allow for flexibility in our schedule. We partnered with Heron Campers for our van, and rented the Heron 2+1 model, which we found to be the perfect size for our needs. It was big enough for us to feel comfortable and to store our gear in an organized way, but small enough to feel like driving was manageable. This model had a spacious bed, plenty of storage, a kitchen area with two gas burners, a sink and a fridge, and a bathroom (including a shower)–– definitely the fanciest vehicle I have had the pleasure of traveling in.

Our home for the trip (just change the scenery)!


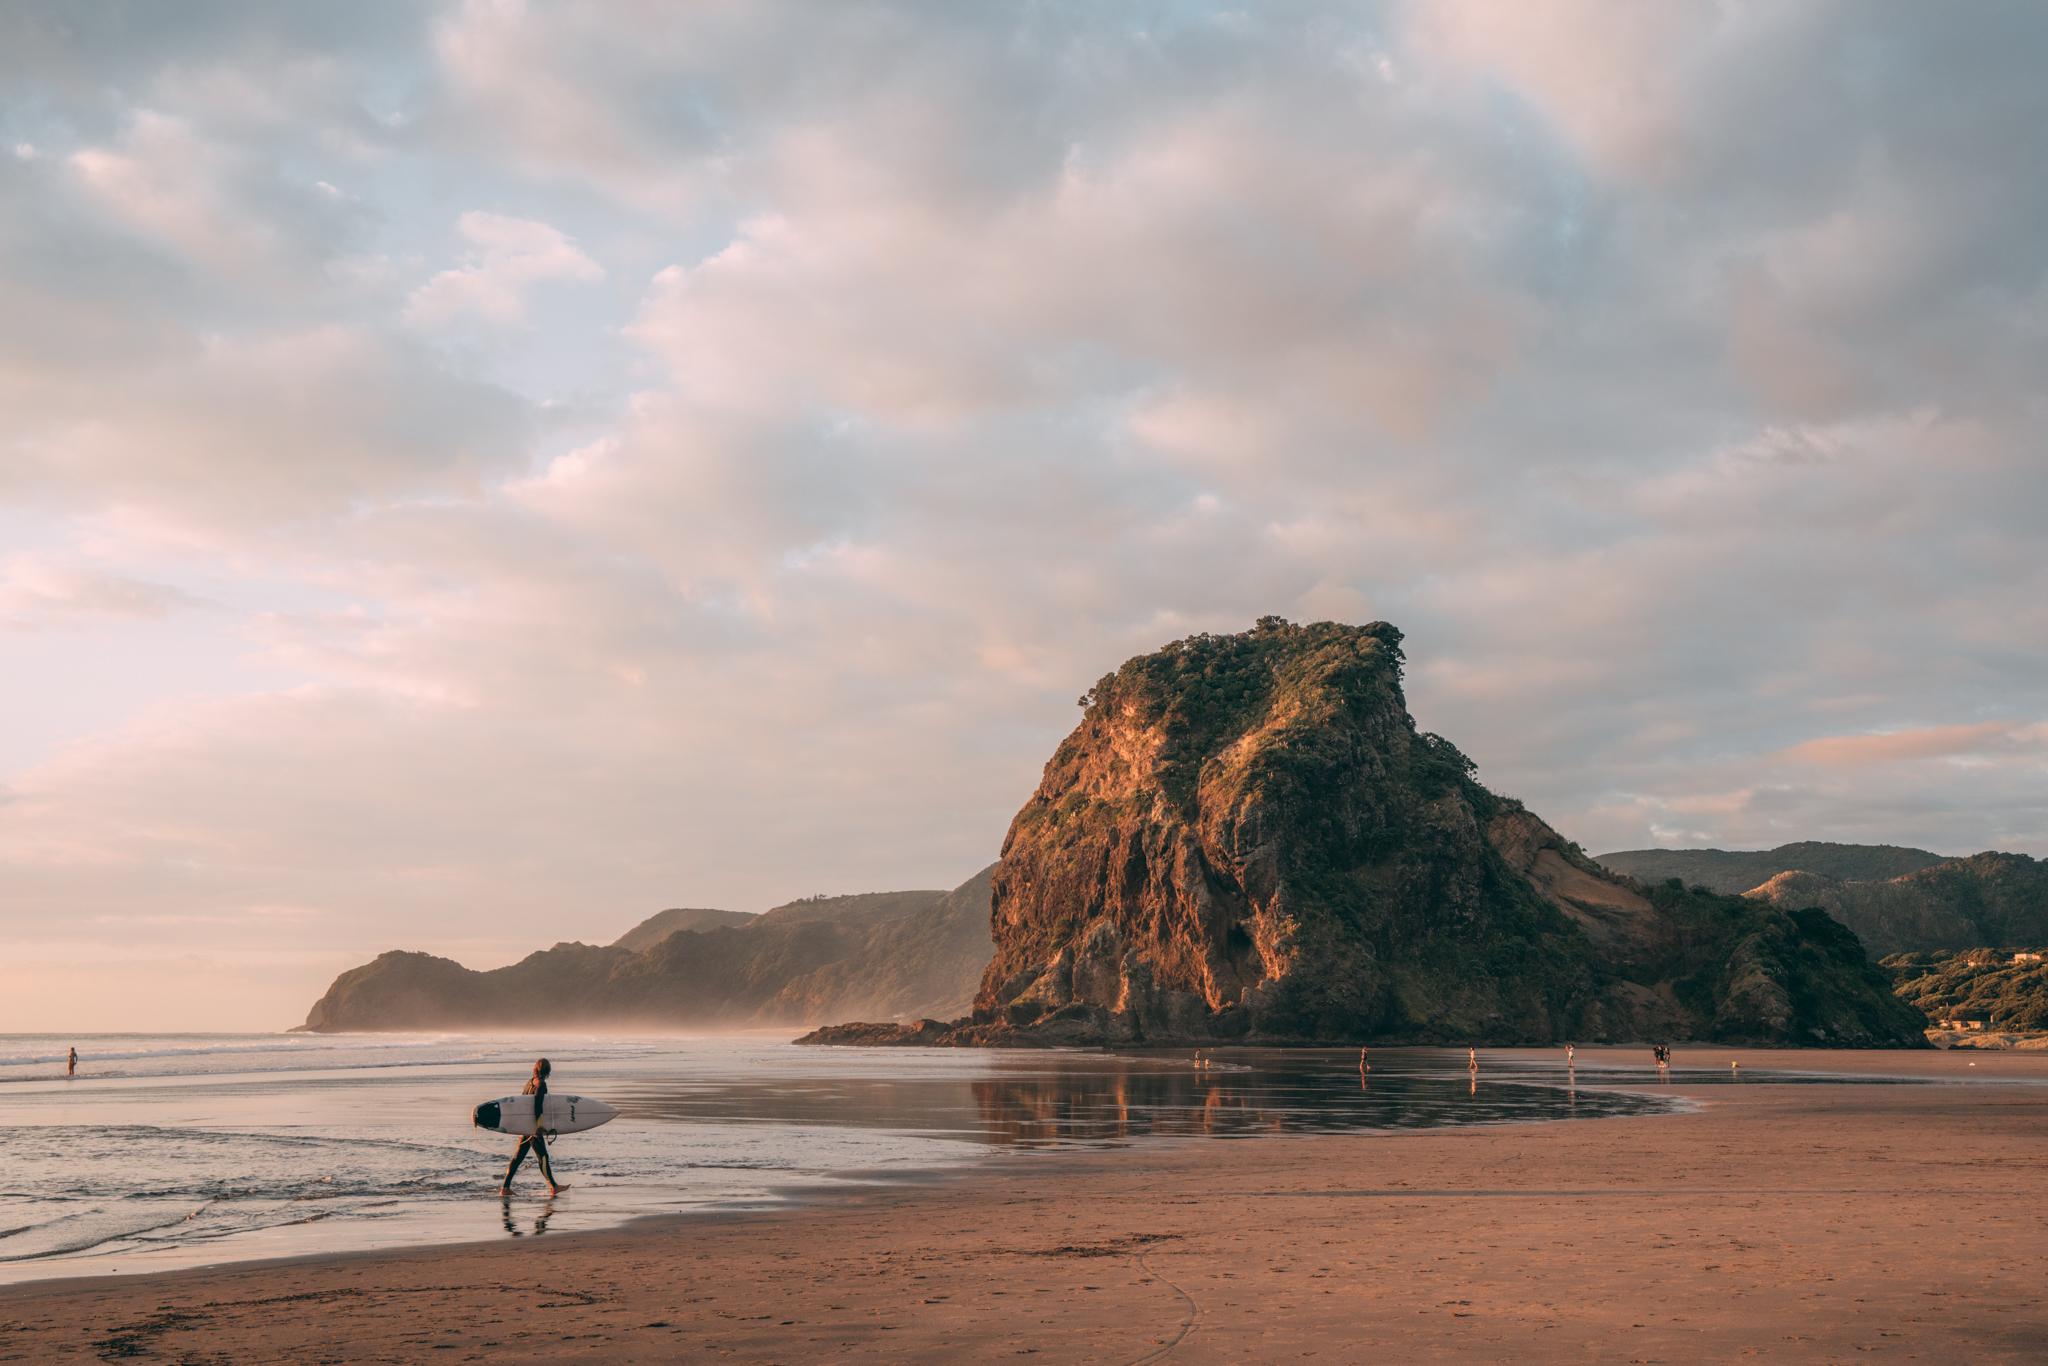
Upon arrival, we took a night to rest up in Auckland before heading to our first stop: Piha Beach. Piha is a gorgeous beach about 45 minutes drive from Auckland with some huge and unique rock formations. Piha is simply beautiful and such a fantastic place to spend some time. There is a campsite super close to the beach that offers powered & unpowered sites where we stayed for the night.

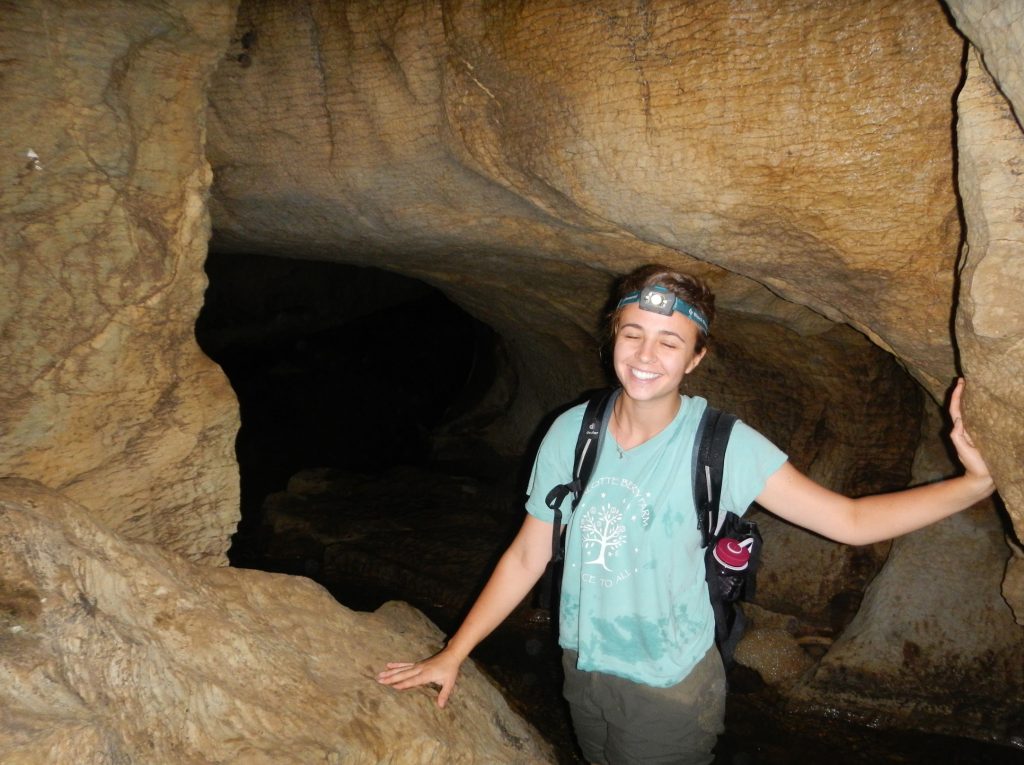
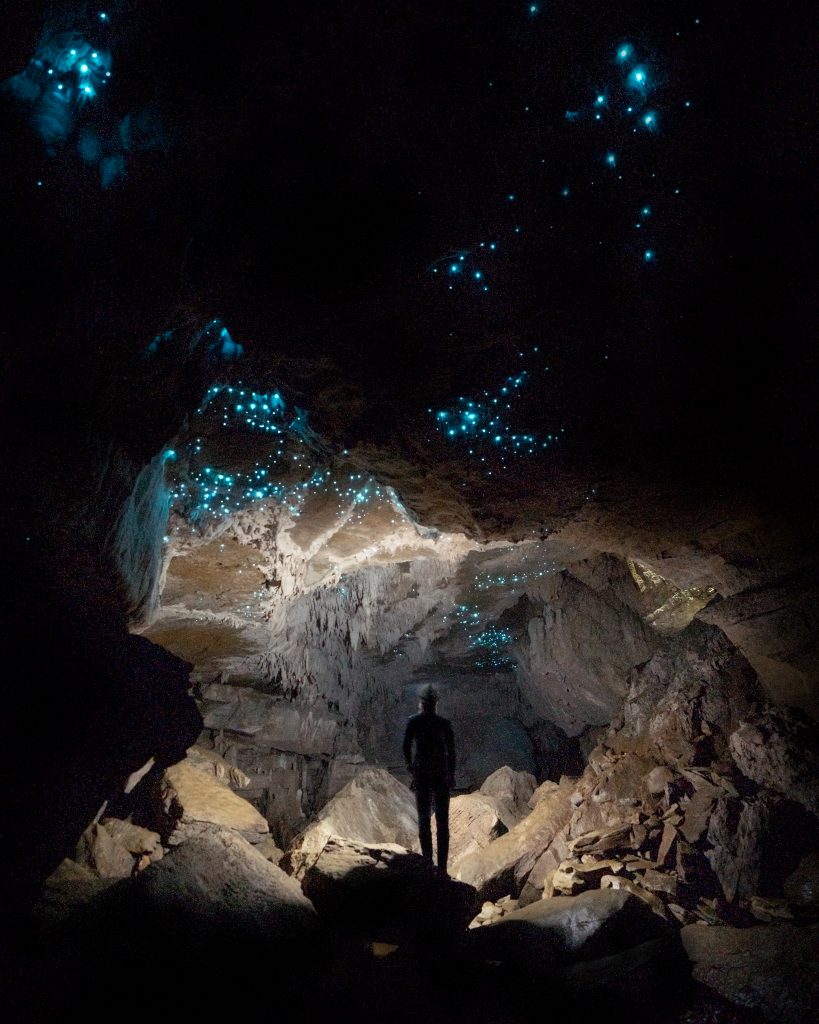
Given that I haven’t shut up about glow worms for the past month on social media, you won’t be surprised to hear that our next stop was to visit some glow worm caves. We found a small family-run operation called Glowing Adventures, which offers unique & adventurous cave tours on their property. The tour groups are small, so this is a very different experience than you might have at the nearby Waitomo caves, which are arguably the most visited caves in the country. Comparatively, Glowing Adventures hosts only 8-10 people a day, whereas Waitomo can sometimes host a few thousand! We opted for their photography tour, which allowed us plenty of time to create images like these. Another note on glow worm caves in general: there are un-commercialized caves that have glow worms in New Zealand! I have been to several of them, and they are really special. As these are not commercialized, are sometimes harder to get to, and are less populated, you need to do your research. Think about the type of experience you would like to have and how much time/flexibility you have in your schedule, and go from there. Google is your friend.

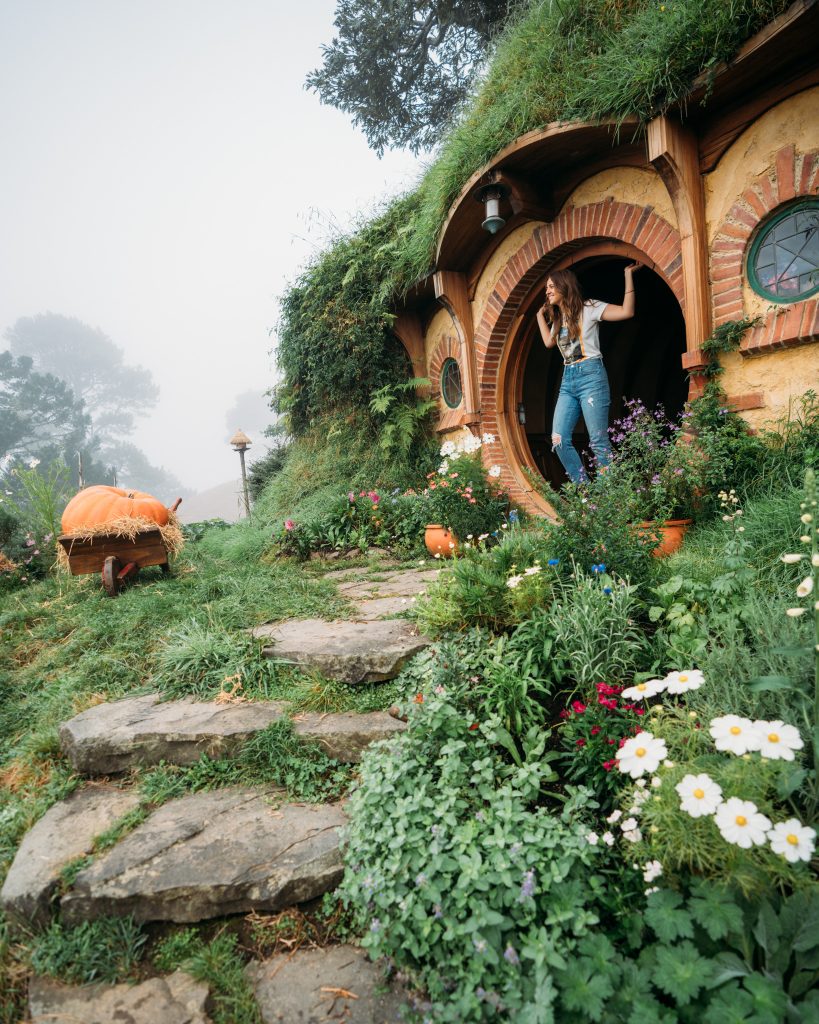
Another North Island highlight for me was shockingly… Hobbiton. To be totally transparent, Hobbiton was not originally on my to-do list for NZ. I’m usually not into super novelty or commercial things (I know I am a snob, thx), but Rachel really wanted to go see it, so I agreed to tag along. The fine folks at Hobbiton took us on an early morning tour of the Shire, and I was surprised at how much I truly loved this experience! This is a tremendous example of human creativity, and such a magical universe. Walking through the grounds with our guide was an experience I will not forget. Even if you aren’t the biggest Hobbit/LOTR fan or are just cynical, I would recommend doing the tour at Hobbiton, especially if you’re passing through the area anyway.

Before we continue, let’s take a moment to go over your camping options in New Zealand. There are lots of options for camping in New Zealand, but you should be aware of what they are so that you can follow the rules and respect the environment and the residents. Your first option is private campgrounds & holiday parks. These generally offer both powered & unpowered sites, and often have great facilities including kitchens, laundry facilities, showers & bathrooms at a minimum. The Department of Conservation (DoC) also manages a number of campgrounds across the country. These usually have pretty basic facilities and are operated on a first-come, first-served basis unless they are fully serviced. Another camping option is freedom camping, which you guessed it, is free. The thing with freedom camping is that you need to be 110% certain you are allowed to camp in the designated location… you can’t just show up anywhere and camp. Each freedom camping site has its own rules and regulations. You may be required to have a self-contained vehicle (and the sticker that confirms this), which means you have a waste management system on board. If you intend to freedom camp, make absolutely sure you are following the rules, and check with multiple sources if possible. Even well-intentioned campers who do their research (hi) can get parking tickets. 😉

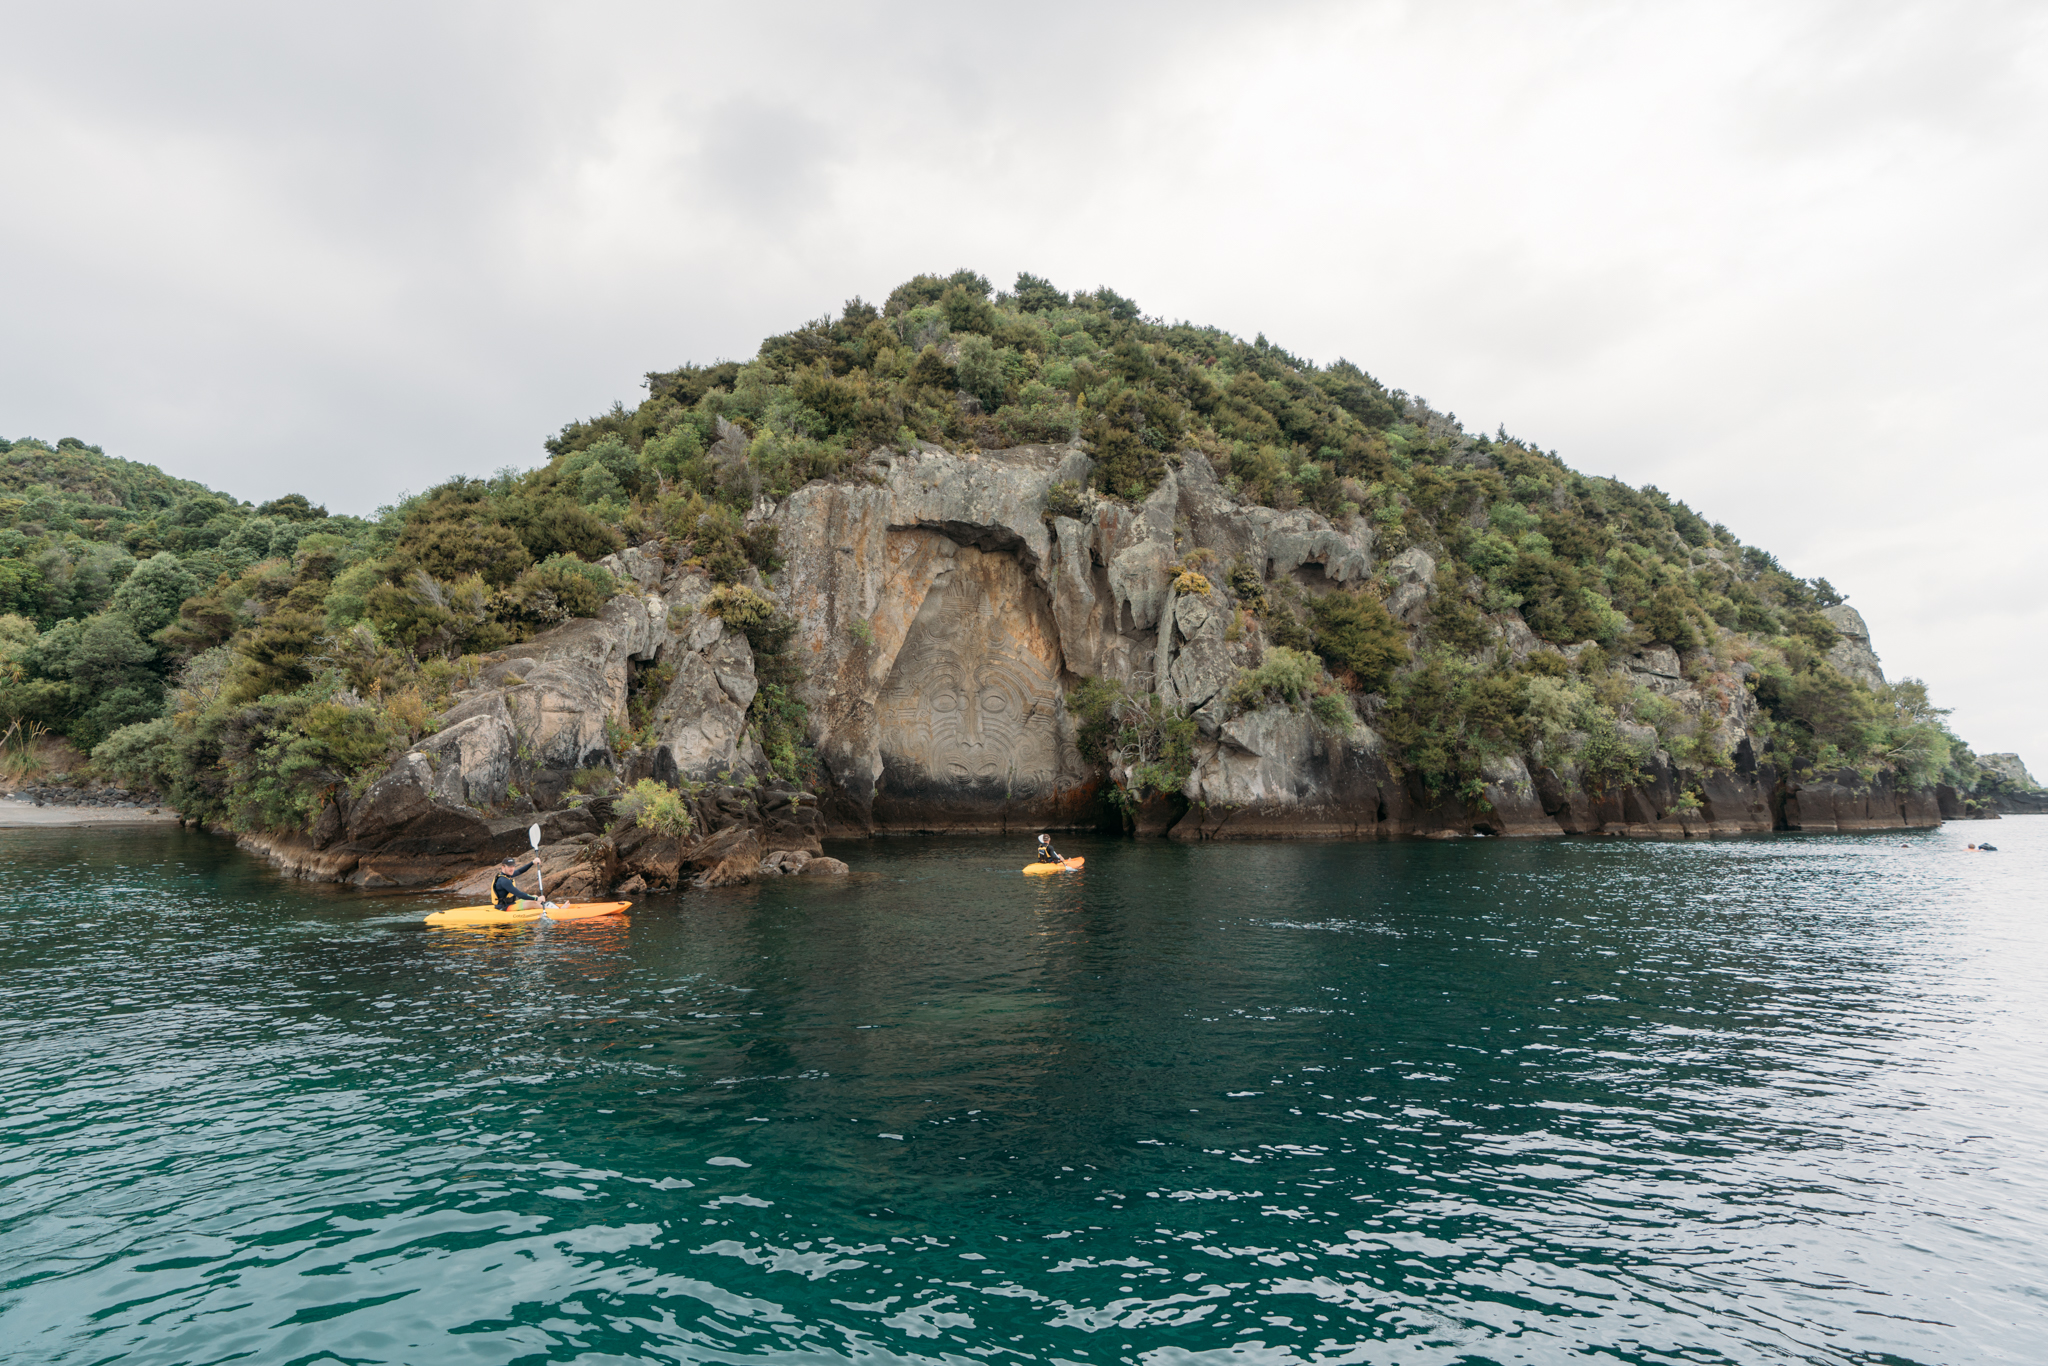
Back to the trip. When doing research, we saw photos online of intricate Maori rock carvings on Lake Taupo and looked into how we might go about seeing them. The carvings, which were created between 1976-1980, were made by artist and traditional marae-taught carver Matahi Brightwell, and represent an ancestor of his grandmother. Originally, he was looking for a tree as his canvas, but decided to carve on rock when he couldn’t find something that suited the work. We were able to visit the carvings with Sail Barbary, the only 100% sustainable boating company on Lake Taupo. You can choose to either kayak to the carvings or take a boat. Though we opted to sail, kayaking also looked like a great option, as it would allow for you to take your time and get even closer to the carvings.

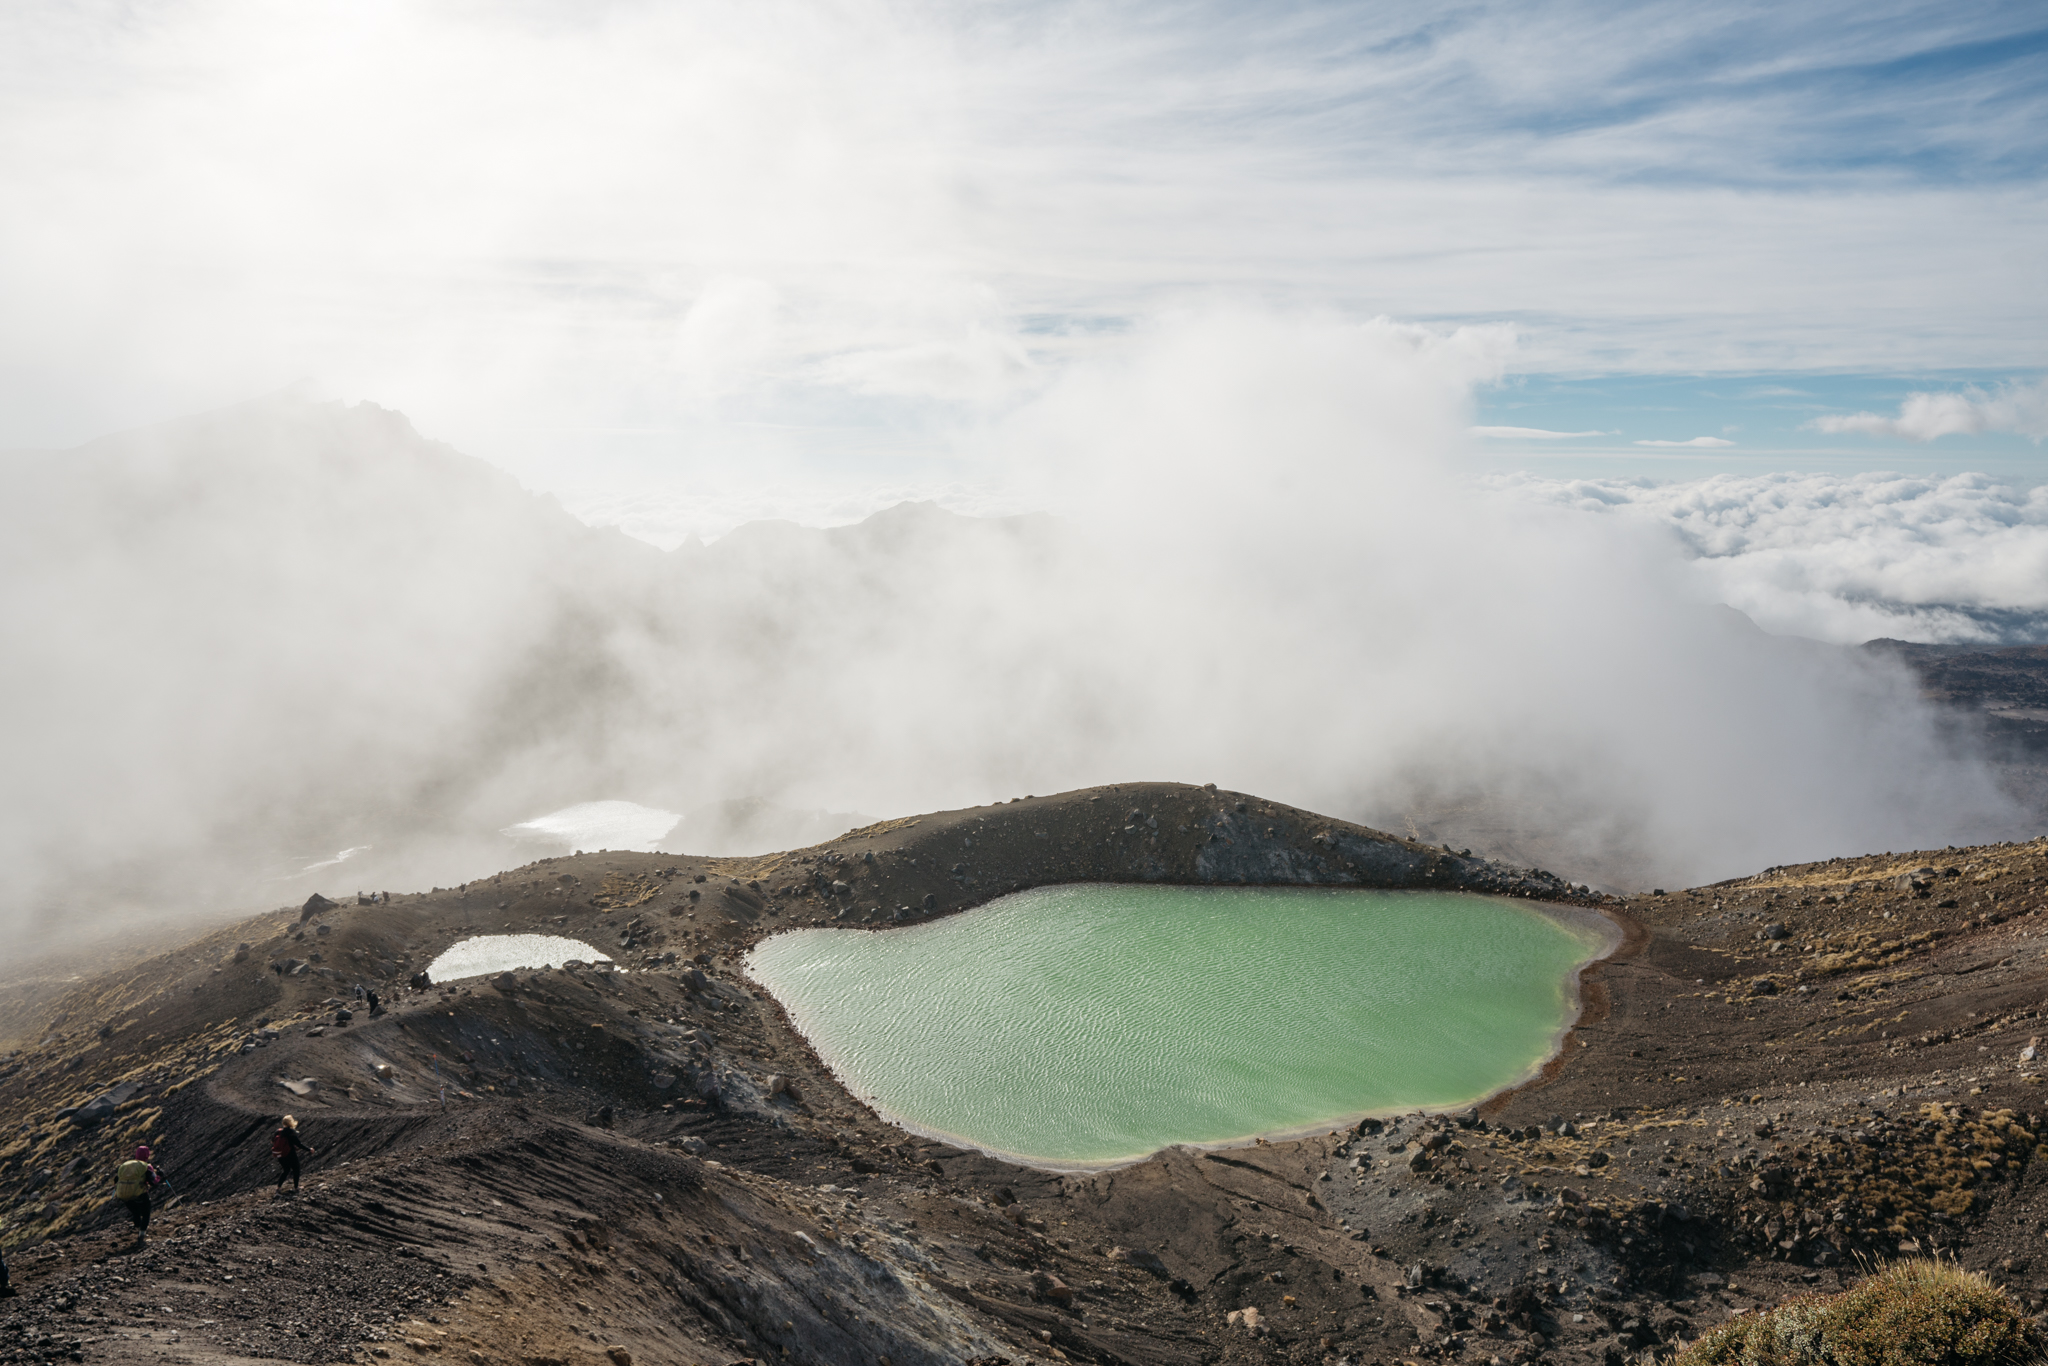
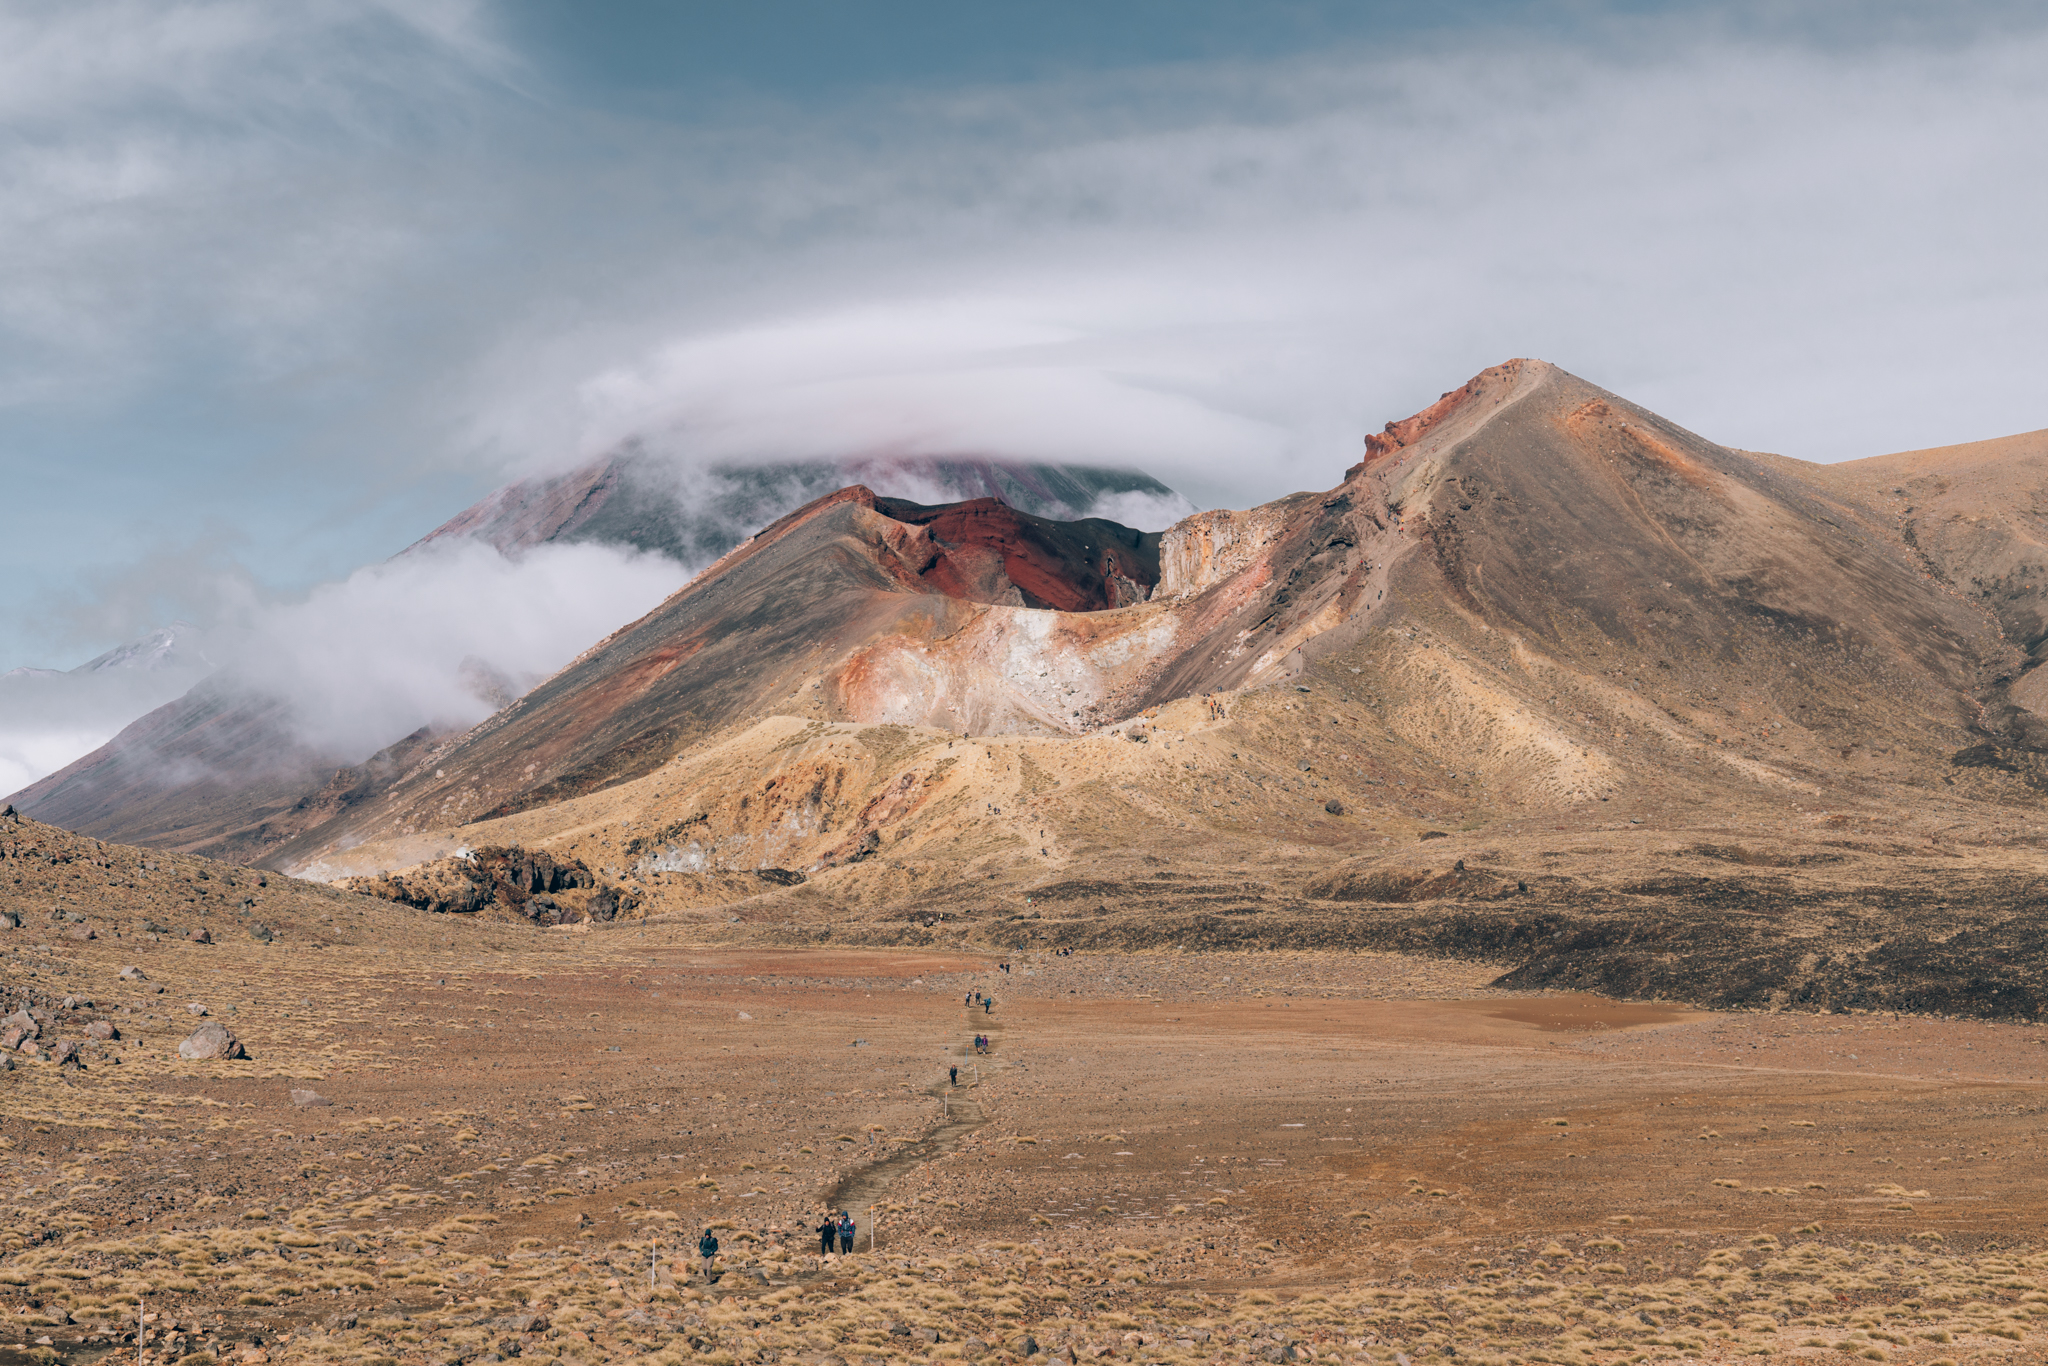
After a big grocery shop, we drove to Tongariro National Park, where we packed our backpacks for a 3-day hike of the Tongariro Northern Circuit. We hiked the loop clockwise, first starting out hiking toward Mangatepopo Hut and arriving with plenty of time to enjoy the afternoon light. The next morning, we packed up early and headed for the Emerald Lakes. This hike takes you through otherworldly volcanic terrain, and the weather can be unpredictable as well! We started our hike on a relatively mild morning, and experienced fog, sideways rain, and heavy winds as we hiked up to the ridge. As we hiked down to the Lakes, the clouds cleared to reveal the landscape.

Many people experience Tongariro National Park on a famous day hike called Tongariro Crossing. My recommendation for those of you who enjoy challenging hikes and jaw-dropping landscapes would be to do the whole Circuit over 3-4 days, but if you don’t have the time or aren’t traveling with your backpacking gear, this is an incredible day hike. Make sure to book yourself a shuttle to get back to the starting point after your hike.

After hitting the Emerald Lakes, we continued onward to Blue Lake just to take a look, before backtracking and heading back toward Waihohonu Hut. The variation in the terrain on this hike alone was pretty stark. We started the hike surrounded by low-lying scrub, eventually walked up to a rocky ridge-line before passing through a moon-like saddle, then were surrounded by brightly colored lakes, red rock, orange lichen, and then dunes as we made our way closer to Waihohonu. Absolutely spectacular.

On the last morning of our hike, we made it back to the van around 11am and started our drive down to Wellington. A quick note to those of you who may be reading this in order to plan your own trip–– Rachel and I did a LOT of driving on this trip! A LOT! If you’re willing to sacrifice chill/relaxing time on your trip, it’s doable… obviously, we did it. But just know that our itinerary was on the ambitious side, and that you have to be dialed-in with your logistics to do all of this in such a short period of time. Our trip was a bit less than three weeks at 18 days, and we planned it this way on purpose, but you might not enjoy this quick pace. In general, there is so much to do and see in New Zealand, and it’s hard to choose! That said, I would recommend doing less and having more time in the places you do choose to visit. Hopefully, you will be able to come back to pick up where you left off.

We were so happy to pull into Wellington for the night! When I booked our Airbnb, I didn’t realize that it was actually a converted photography studio! So perfect. If you’re into unique Airbnbs, be sure to bookmark this one for future trips–– it is one of the most special properties I have ever stayed at, and was a super relaxing place for us to spend the night before another long day of driving.

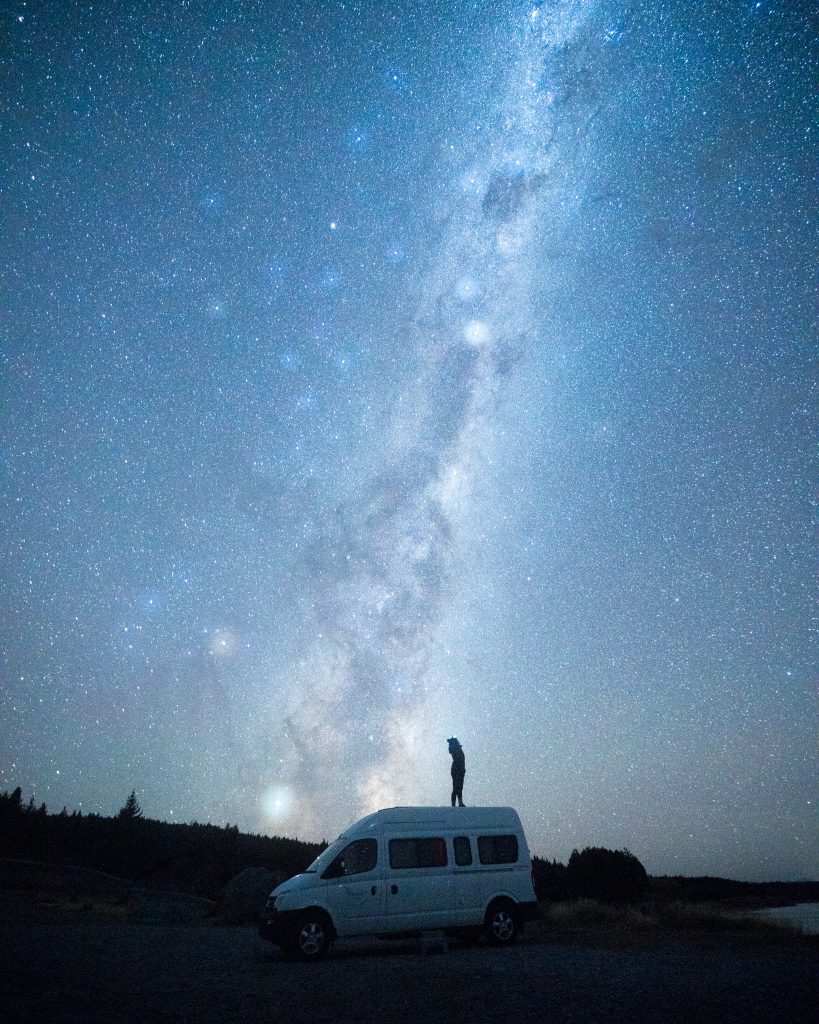
The next day was a rather exhausting ambitious travel day… a 3 hour ferry followed by a 9 hour drive all the way to Lake Pukaki. We took turns driving, had some great conversations, made some bad hilarious jokes, ate a lot of snacks, and eventually rolled into our campsite right on the lake at around 10pm. We stepped outside the van and looked up to see the Milky Way perfectly positioned above the van, and spent the next few hours doing some astrophotography.

I’m sure some of you experience this too… when I’m in the moment and in my zone, I am in a total state of flow. I forget that I haven’t eaten or whatever small thing I was stressed about. It’s just me behind the camera creating something beautiful. That’s what this moment was for me.

We spent the next two days in the Aoraki/Mt. Cook area. One of my favorite campsites ever (like, in the whole world) is located on the Southern end of Lake Pukaki. Driving from Tekapo, you will see it on your right, right before the bridge. Turn off onto one of the dirt roads toward the lake, and you’ll probably see a sign or other vans/campers. If you hit the visitor’s center, you’ve gone too far. The spot is definitely a lot busier than it was five years ago, but I am happy so many people get to experience this gorgeous place!

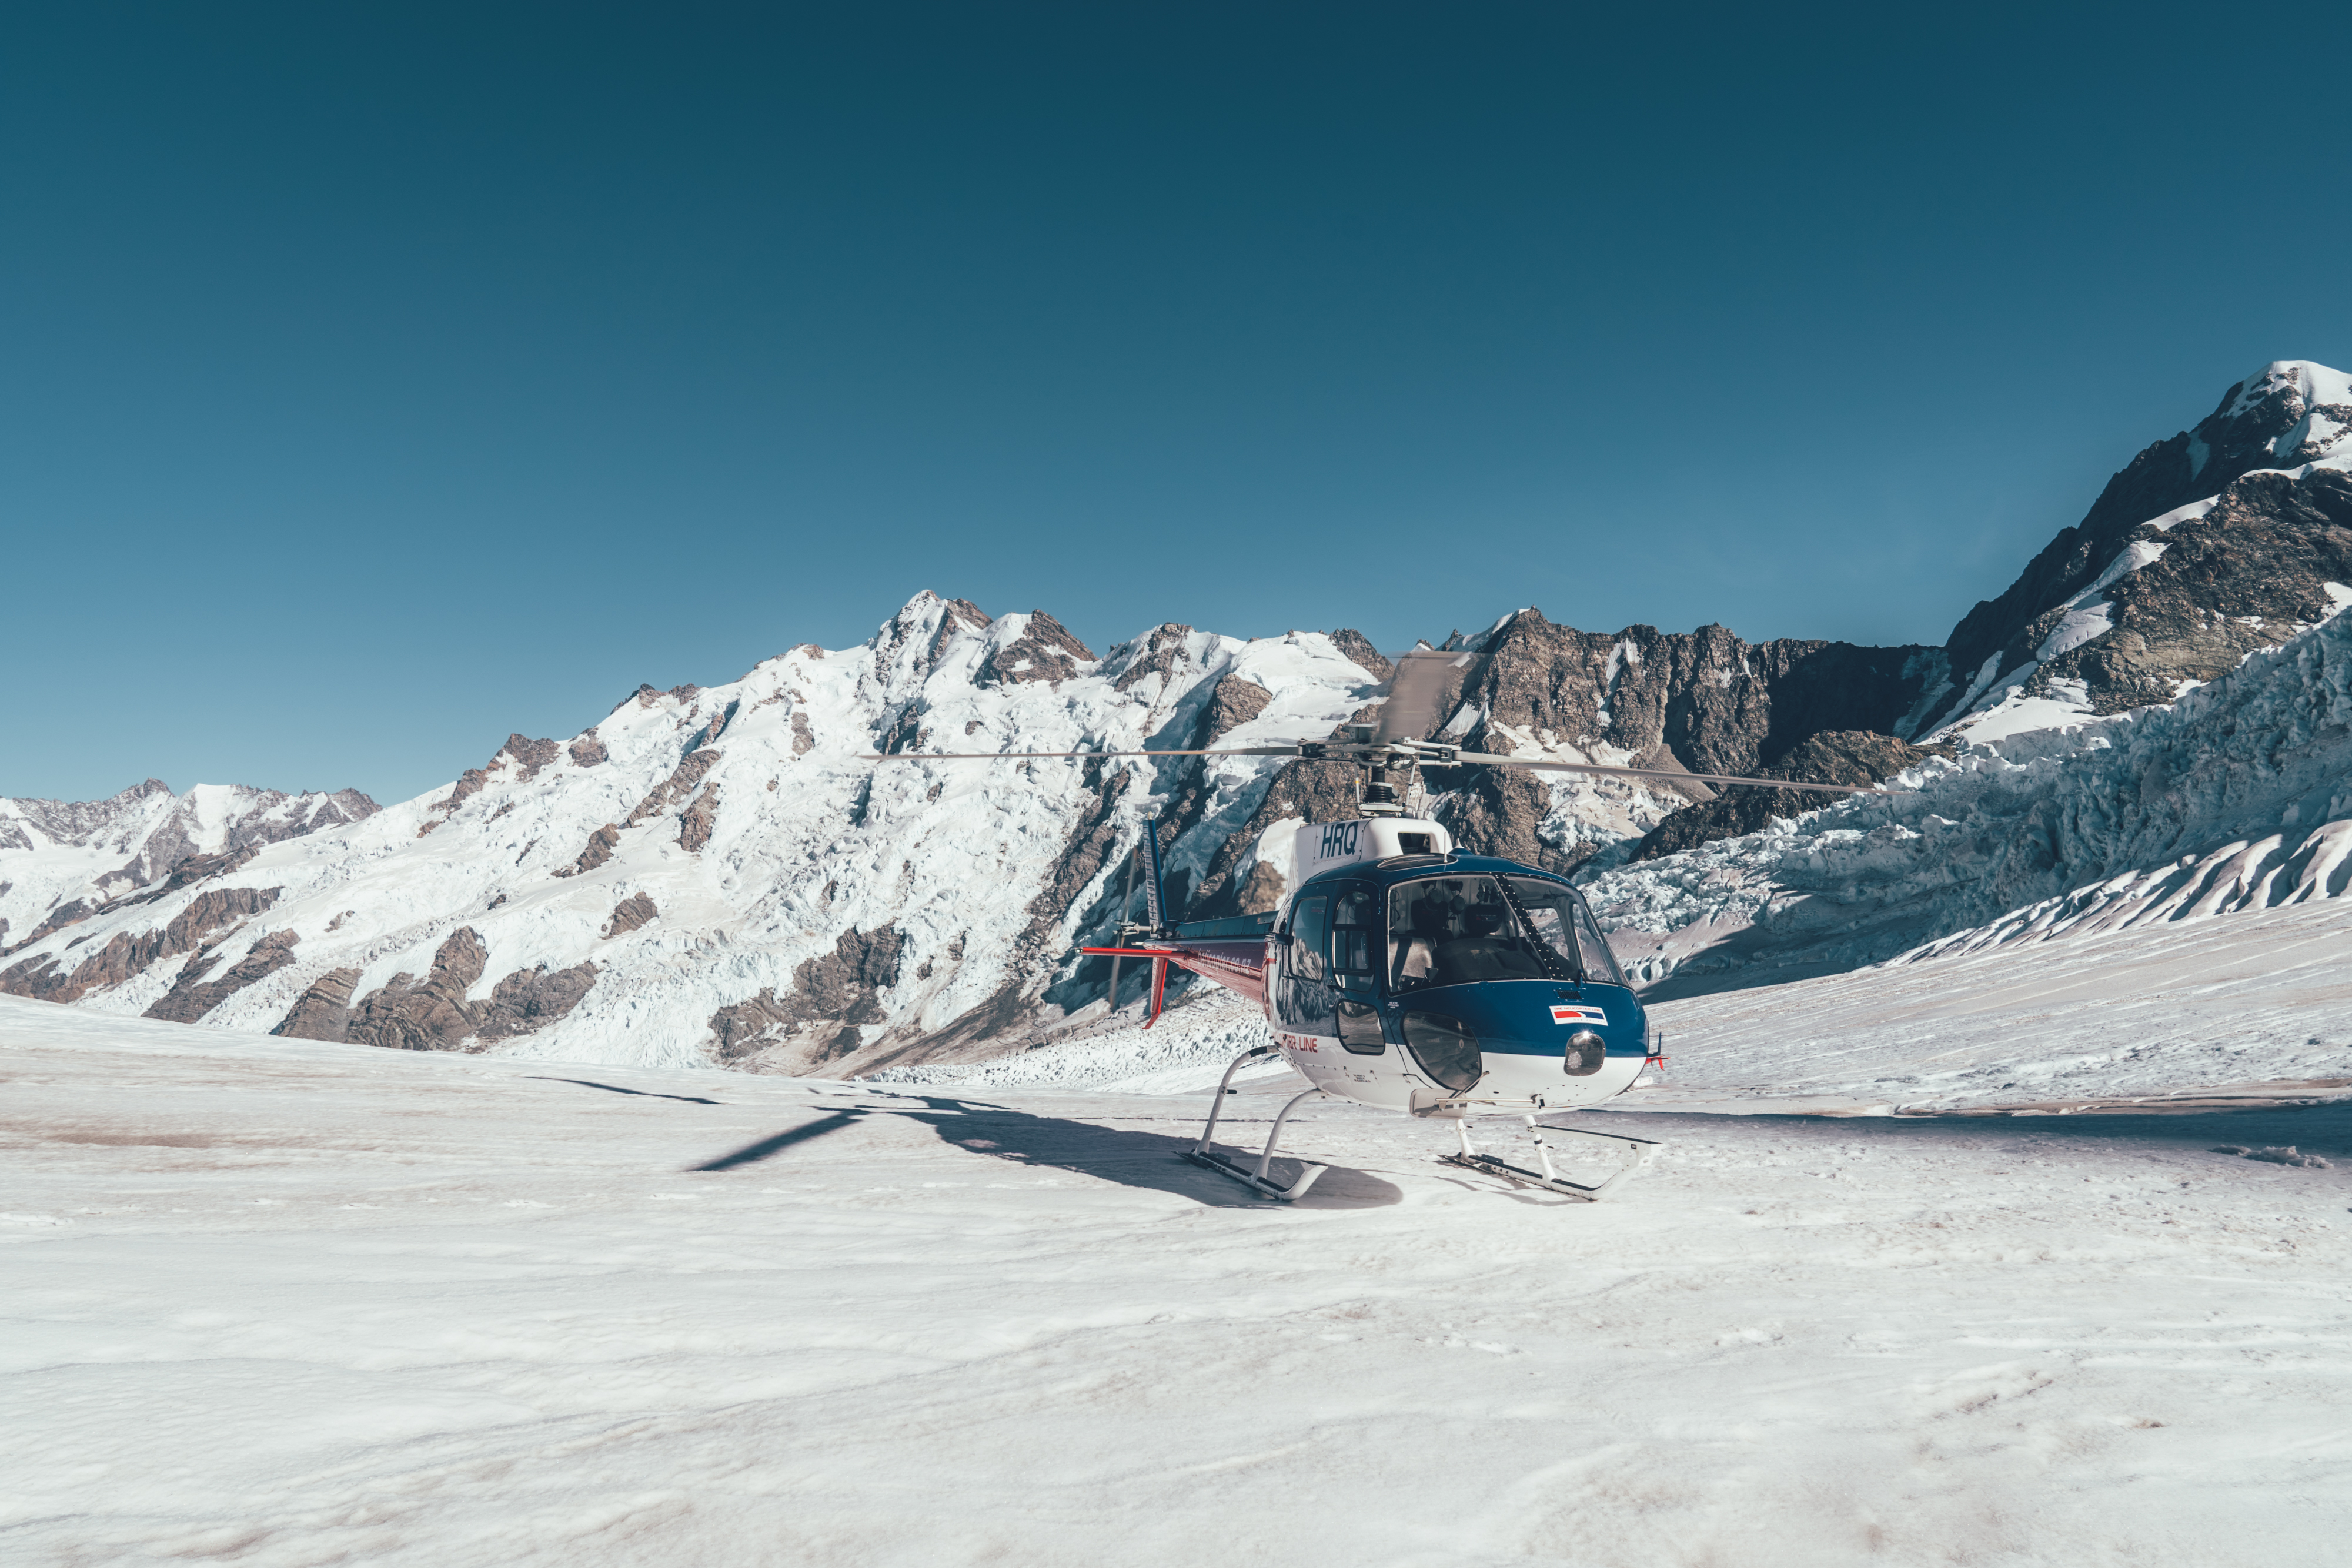
On our first morning in Aoraki, we had a helicopter flight scheduled with The Helicopter Line. Though the cloud was too low at first, it eventually lifted and we were able to go up on a scenic flight, landing up on Tasman Glacier before heading back to the base. Seeing a place from above gives you a unique perspective on the place, and that is certainly the case with Aoraki! If you are looking to go up on a helicopter flight for photography, doors off is always better. That said, it is an amazing experience regardless.

In terms of where to eat in the Mt. Cook area, I would highly recommend the Mountaineers Cafe. We loved their bagels & salads for lunch, and enjoyed spending time sitting in the sun with a good coffee before and after our hikes. Our first hike in the park was a quick walk to Tasman Lake. I use the app AllTrails to download maps to my phone so that I can pull them up on a hike and track my progress. This was a situation where I was really glad I had the map! Once hitting the main viewpoint of the lake, there is a trail along the moraine that continues down to the lake. It’s not as clear-cut as the first part of the trail, and as a result, we were the only people on it. It was nice to experience such a popular area with less of a crowd around.

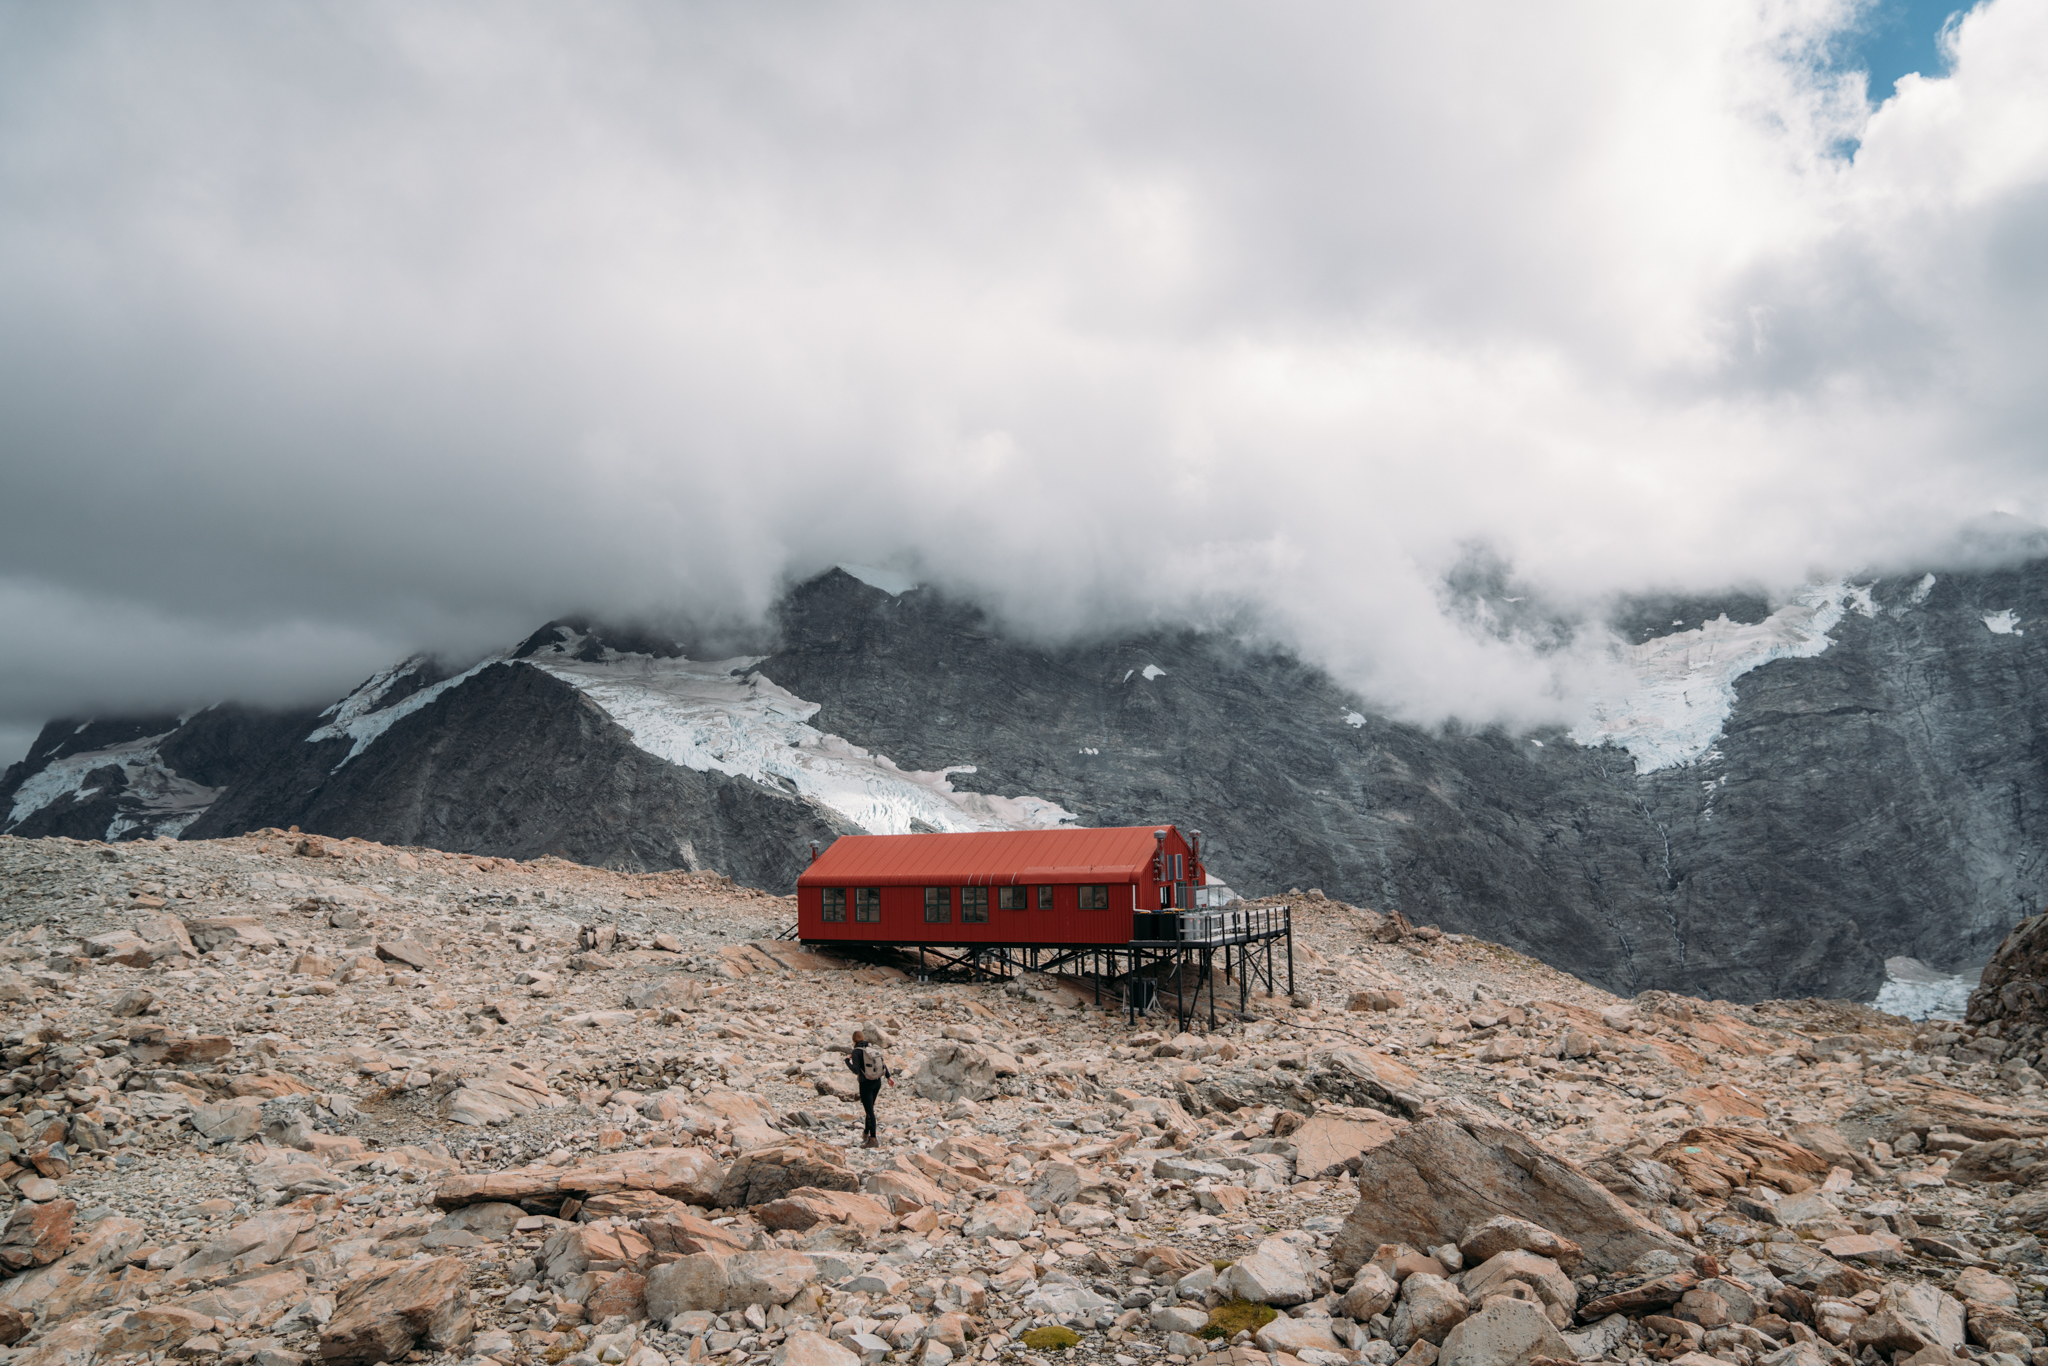
We picked a full day hike on our second day in Aoraki–– Sealy Tarns to Mueller Hut. We knew this was going to be a challenging hike… there are almost 2,000 stairs and 3,500 feet of elevation gain, but the views are definitely worth it. If you don’t want to go all the way up to Mueller Hut, you can definitely stop at Sealy Tarns and still get an amazing view. However, if you want to peek around the other side of the mountain, continue up to the hut. We did the hike in 5 hours and went pretty fast. I would advise someone very fit to allow 4-6 hours, but as many as 8-9 if you plan to stop a lot or take it slow.

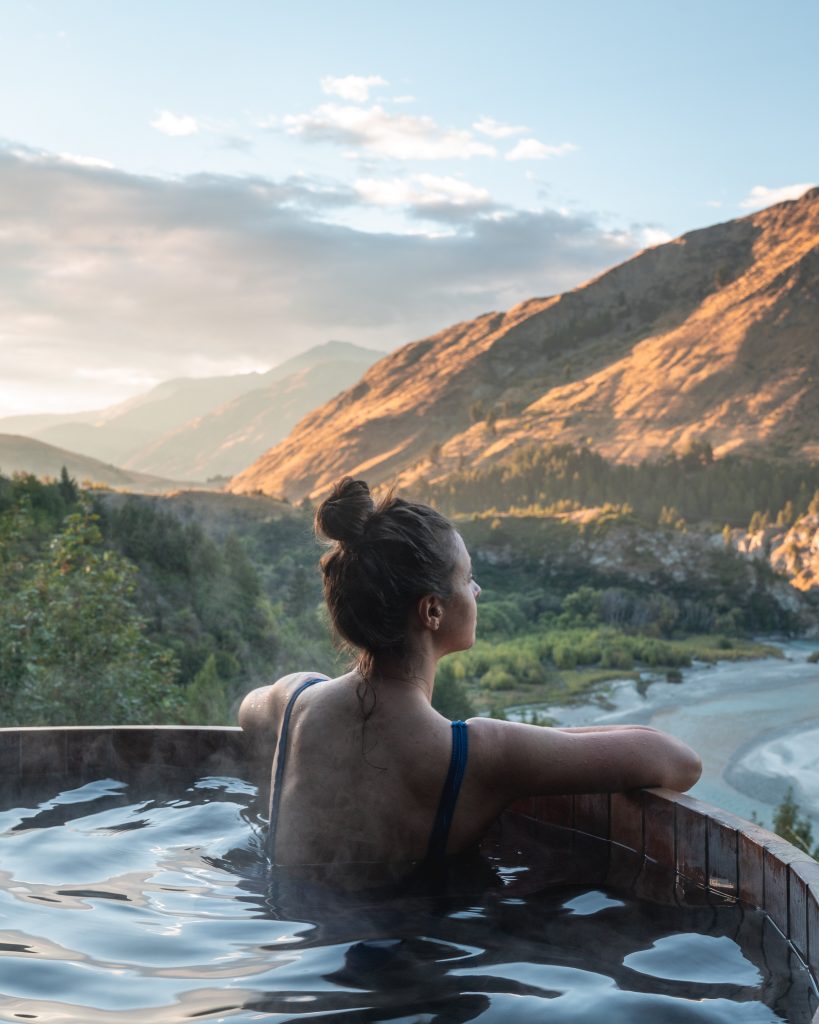
We hiked back to the van and started the journey toward Queenstown for a bit of a spa day after all our hiking. We had a sunrise soak scheduled at Onsen Hot Pools, a series of idyllic wooden tubs perched on the hillside above the Shotover Canyon. This is one of the most unique and natural day spa experiences I’ve ever had, and was such a nice treat. Erin five years ago would have freaked out! If you are looking for a way to treat yourself on your trip, this is a great place to do it.

When in Queenstown, wine tasting is a must… if wine is your thing, that is. It happens to be a thing for us, so we did some tasting at Peregrine Wines before heading to Amisfield Winery for more, as well as a giant delicious cheese plate we inhaled in an embarrassingly short amount of time. 🙃

I am (obviously) a huge fan of outdoor activities, but even for folks who love being active outside, it’s nice to take a day or two to slow down and indulge in some other, more “indoor” activities that New Zealand has to offer. After our spa and wine day, we felt refreshed, rested, and excited to go out on another hike. We found a waterfall hike near Queenstown in our NZ Frenzy guidebook (so worth buying), and decided to follow the recommendation. We were not disappointed and we barely saw anyone else on the trail.

Wanaka was our next stop, and we headed straight for the Mount Iron Track. This quick 5km loop offers beautiful 360 degree views of the lake and city, and was especially lovely at sunset. It is easy to see why people live in Wanaka with this access.

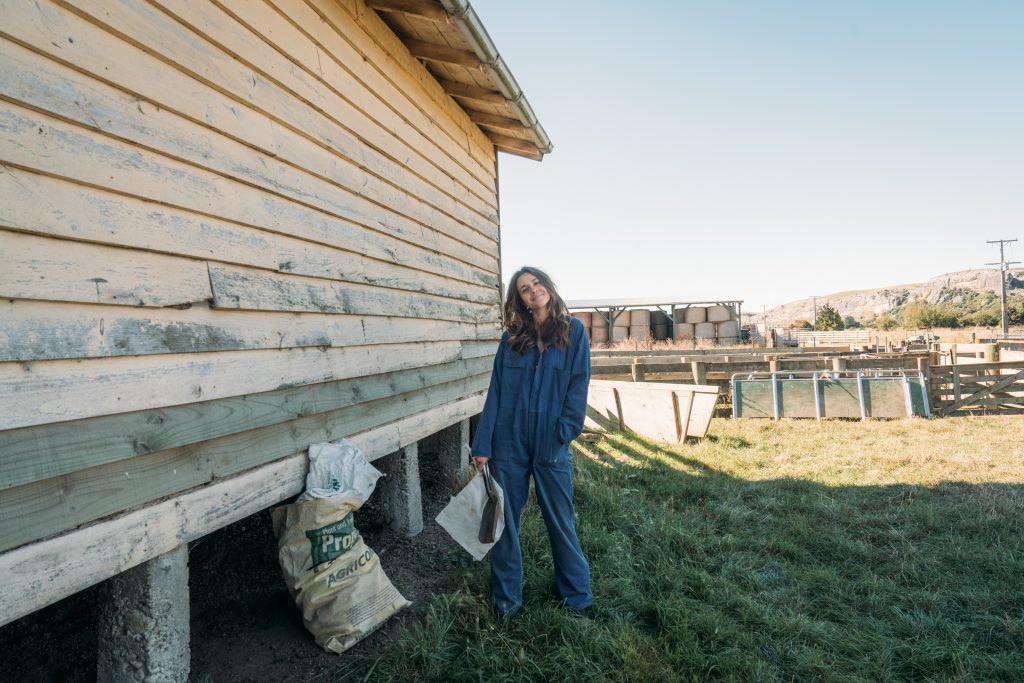
When we were planning this trip, I was hoping we would be able to stop by one of the farms I worked at when I was here 5 years ago. I sent an email to one of the farmers and heard back within 15 minutes with an invitation to stop by! A quick coffee visit turned into a two night stay, some lovely meals shared together, and some jobs around the property. It was truly so fulfilling to visit the farmer and be able to contribute in some way.

farm stuff.


As our trip came to a close, we cleaned out our home on wheels and got her ready for her return in Christchurch. As Rachel and I both had very early flights, we booked an Airbnb close to the airport for the night. We sadly didn’t have time to explore Christchurch, but I have been before and know what a cool city it is. That’s the thing about New Zealand… there is truly SO much to do. Even if you had a full year, you would still not be able to do or see all of the amazing things packed into these two magical islands.

Hopefully this gives you some ideas! If you’d like to see any of what I talk about in this post in video form, check out my “New Zealand” highlight on my Instagram stories.

QUICK FAVORITES LIST:

This trip really just scratched the surface, and there are plenty of things we missed simply because we did not have time! If you’re reading this because you are planning a trip to New Zealand, you’re in for a real treat. Have fun! Questions or feedback? Let me know in the comments below. As always, thank you so much for reading and following along. I appreciate you. 🙂


Some of the activities listed here were sponsored. As always, all opinions here are my own.

When is it OK to take a photo? When is it not OK?

I ask myself these questions on every trip. More specific questions include:

Should you ask? Will asking someone permission ruin the candid nature of the photo? Is it OK to not ask? Is it OK to take photos of someone’s property? Of someone’s children? Is it OK to take pictures of poverty? When is it exploitative? Is it OK for me to be in the photo myself? If I got inspiration from a particular photo, is it OK for me to take a photo of the same spot? Is it OK for me to imitate a concept? Is it OK for me to take a photo of a remote, beautiful or environmentally fragile place and post it on my social media channels with a geotag?

I could keep going, but you get the point. There are endless questions you can ask yourself when it comes to the ethics of travel photography.

There are no hard and fast rules for ethics when it comes to taking pictures when you travel, but just because you bought a plane ticket doesn’t mean you bought the rights to photograph every person and thing you see on your trip. There is so much to consider when taking photos while traveling, no matter what your subject is.
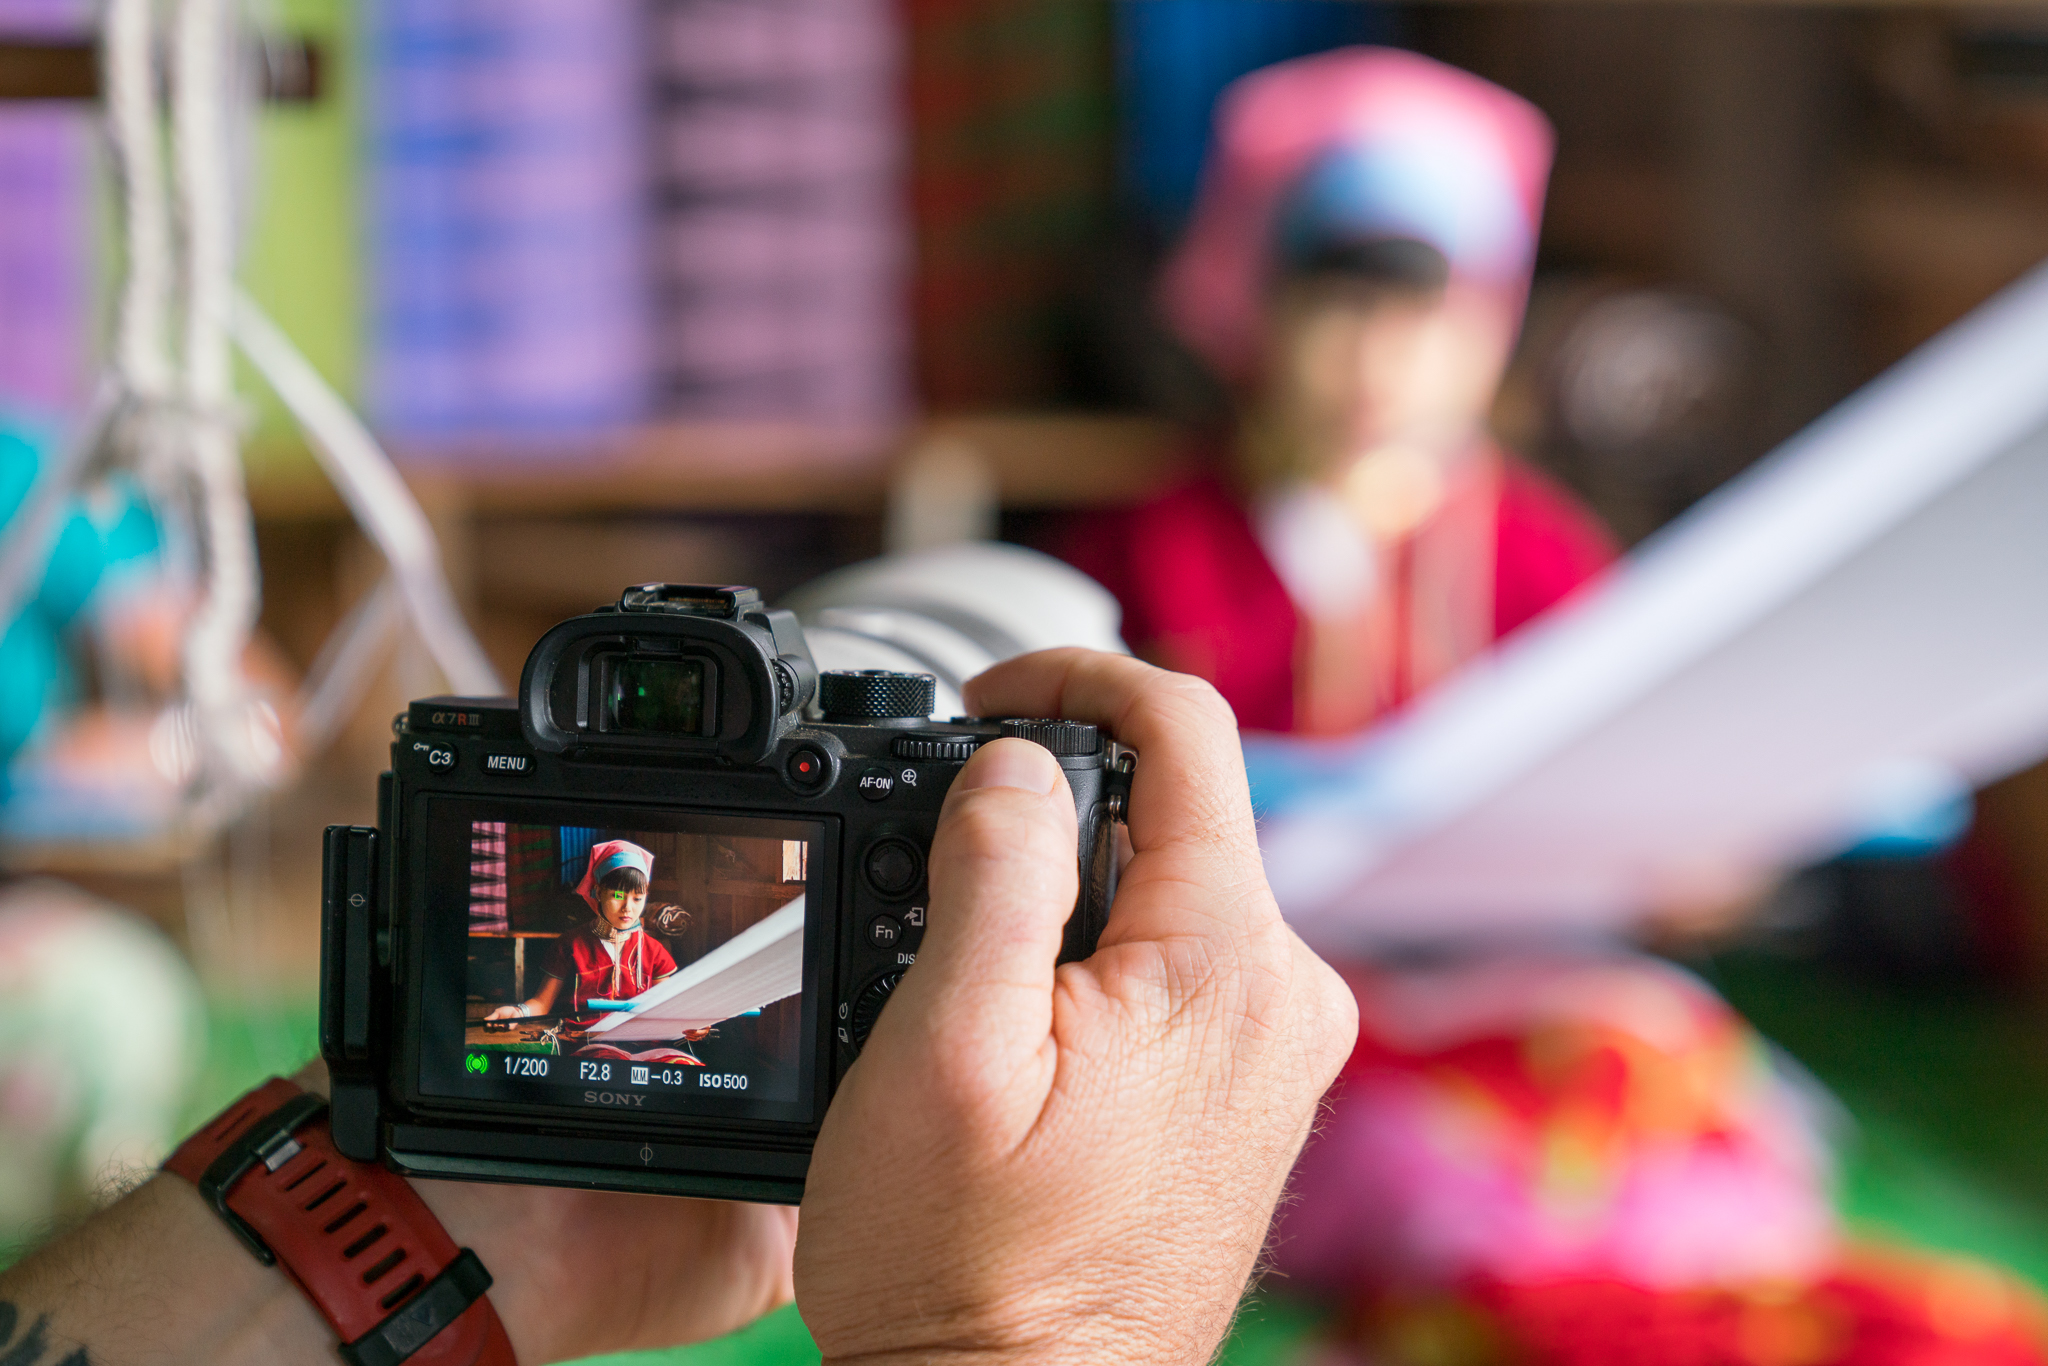
CONTEXT

As a traveler, you need to consider the context of your presence. Many lives have been and will be disrupted by tourism. Wherever you are, do the people actually want you to be there? Are you a welcomed visitor? This question is applicable for any situation you find yourself in with a camera. Be aware of the climate you are walking into (literally and figuratively), and understand that you are in someone else’s space, and that it is not a space you are inherently entitled to be in. Do not make yourself an intruder by acting entitled to anything, photos included.

Showing respect comes in many forms. Learn some of the language. Learn what kind of behavior is accepted, and do some research on what is found to be disrespectful in each place. Tune in to your intuition when it comes to feeling out a place or situation. Smile. Be considerate and pay attention to your surroundings.

Be careful about your language, before, during and after you travel. Many adventure photographers might describe the places they travel to as “unexplored”, “uncharted territory”, or “undiscovered”–– but these words invalidate the experience and history of indigenous groups who may have been living in the place for a very long time. I have certainly been guilty of using these words, and I am sure I’ll be checking myself on stuff like this forever. We need to remember that we are just guests passing through someone else’s home, and that should be greatly respected.

Something I think about often is the phrase “take a photo.” In many places Westerners travel, white Europeans have a violent and brutal history of taking things already: land, resources, and people. Knowing that you will be taking something away from your travels in the form of your experiences and images, ask yourself what you plan to give back. I am not necessarily talking about money or physical gifts, nor am I referring to temporary help in the form of voluntourism. I’m talking about being a net positive during your travels if at all possible, by thoroughly considering the context of every place you travel to and acting from the foundation of that knowledge.

PERMISSION

Should you ask permission to take someone’s photo? My answer to this question is yes, in a perfect world, you should. But do I always follow that rule? No, honestly I don’t.

Here’s an example: If I am shooting on a telephoto lens at a market and see a lady selling fruit and want to document that scene, I’d argue it is the right thing to do for me to walk over to her, ask if I can take her photo, then go back to my spot and get the photo once I have her permission. However, this might change her pose, or she might get confused at why I am going so far away, or the right moment may have passed by the time I go ask her and get back to the spot. So in these scenarios, I usually take the photo and ask for forgiveness afterward. In full honesty, sometimes I don’t ask for forgiveness. If they don’t notice me at all, sometimes I leave it at that. Some photographers would never do this. Some do this all the time. There are no clear rules.
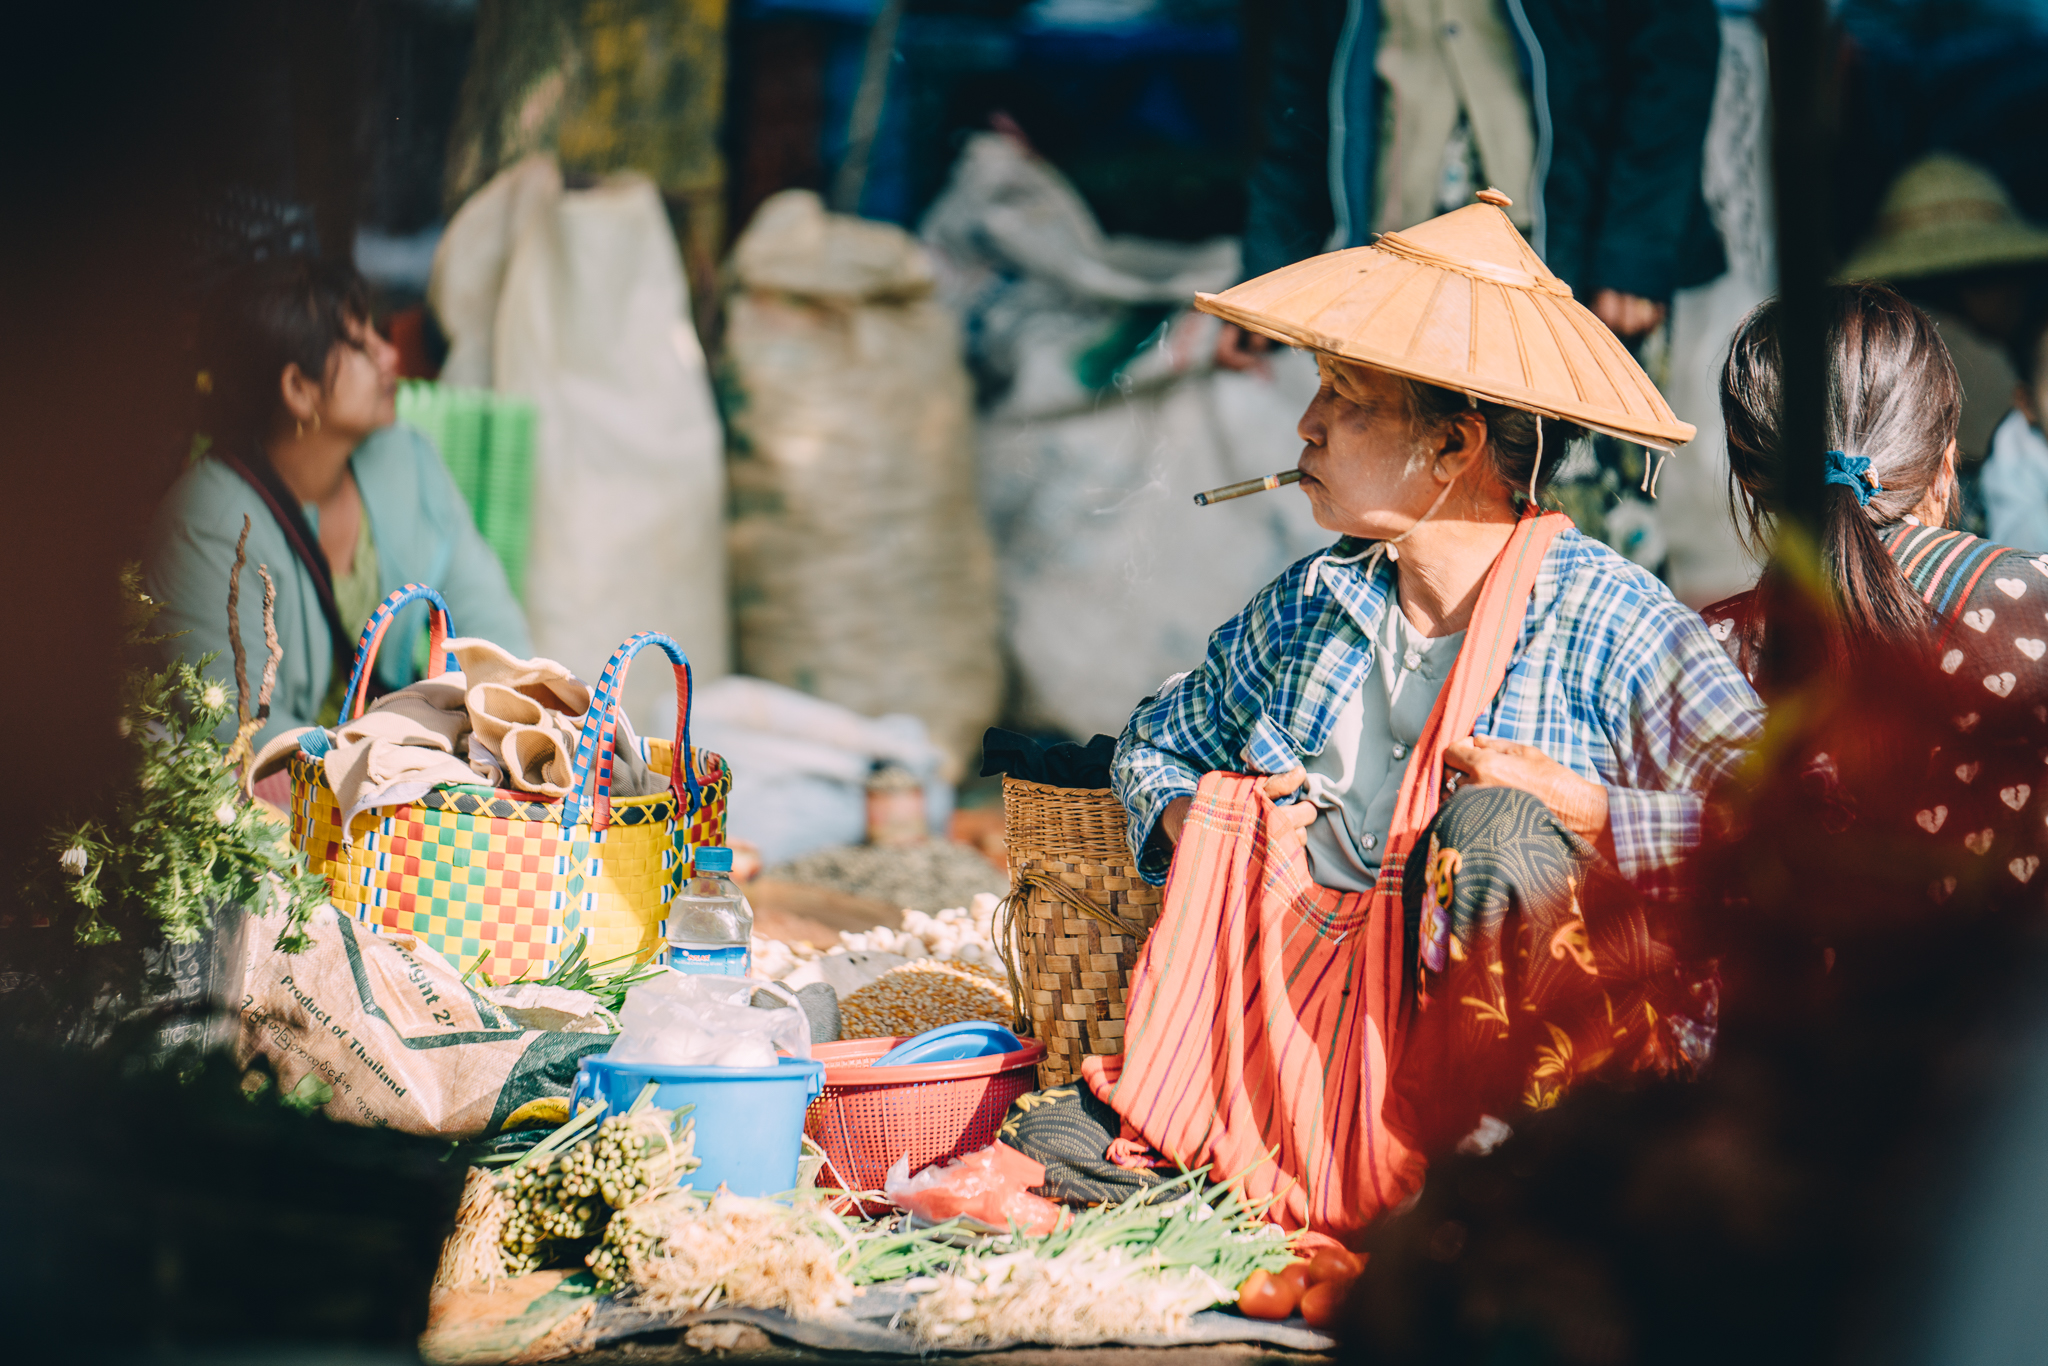
She never saw me. Is it wrong that I took this photo? Is it wrong that I am posting it here?


If you’re looking to photograph a candid moment, it’s not really possible to find out if someone is OK with it until after the fact. This is a decision and viewpoint every individual photographer has to develop for themselves. My personal opinion is that if I am generally welcome in the space (with my camera), not being obtrusive, and not exploiting someone or their property, I usually feel comfortable taking the photo.

If you do get someone’s attention, you can usually tell if they do or do not want their photo taken.

“It is always important to respect others boundaries. The other person always does something that tells me it is okay for me to take their photo. A smile goes a long way in street photography. If you show openness and just overall friendliness, it makes the other person somewhat comfortable if that makes sense. If they show any sign of aggression or “no photo!” I simply walk away respectfully.” –Travel & street photographer Paola Franqui, aka monaris

When I am interacting with someone, that interaction is more important to me than the photo I might get. Be more interested in the person than you are in the photo you might take of them. The photo is just a bonus.

I might say hello or sit down with someone if it doesn’t feel awkward. I might buy something from them if they are selling crafts. If they continue talking with me, I might point at my camera and ask if is is OK to take their photo. If they say yes, I will show them the photos after, and we might continue talking. I’ll stick around for a while if we are having a good time. And sometimes, the camera can be a conversation starter once you are acquainted–– sometimes people want to show their friends and have you take more photos of them. It all just depends on the situation.
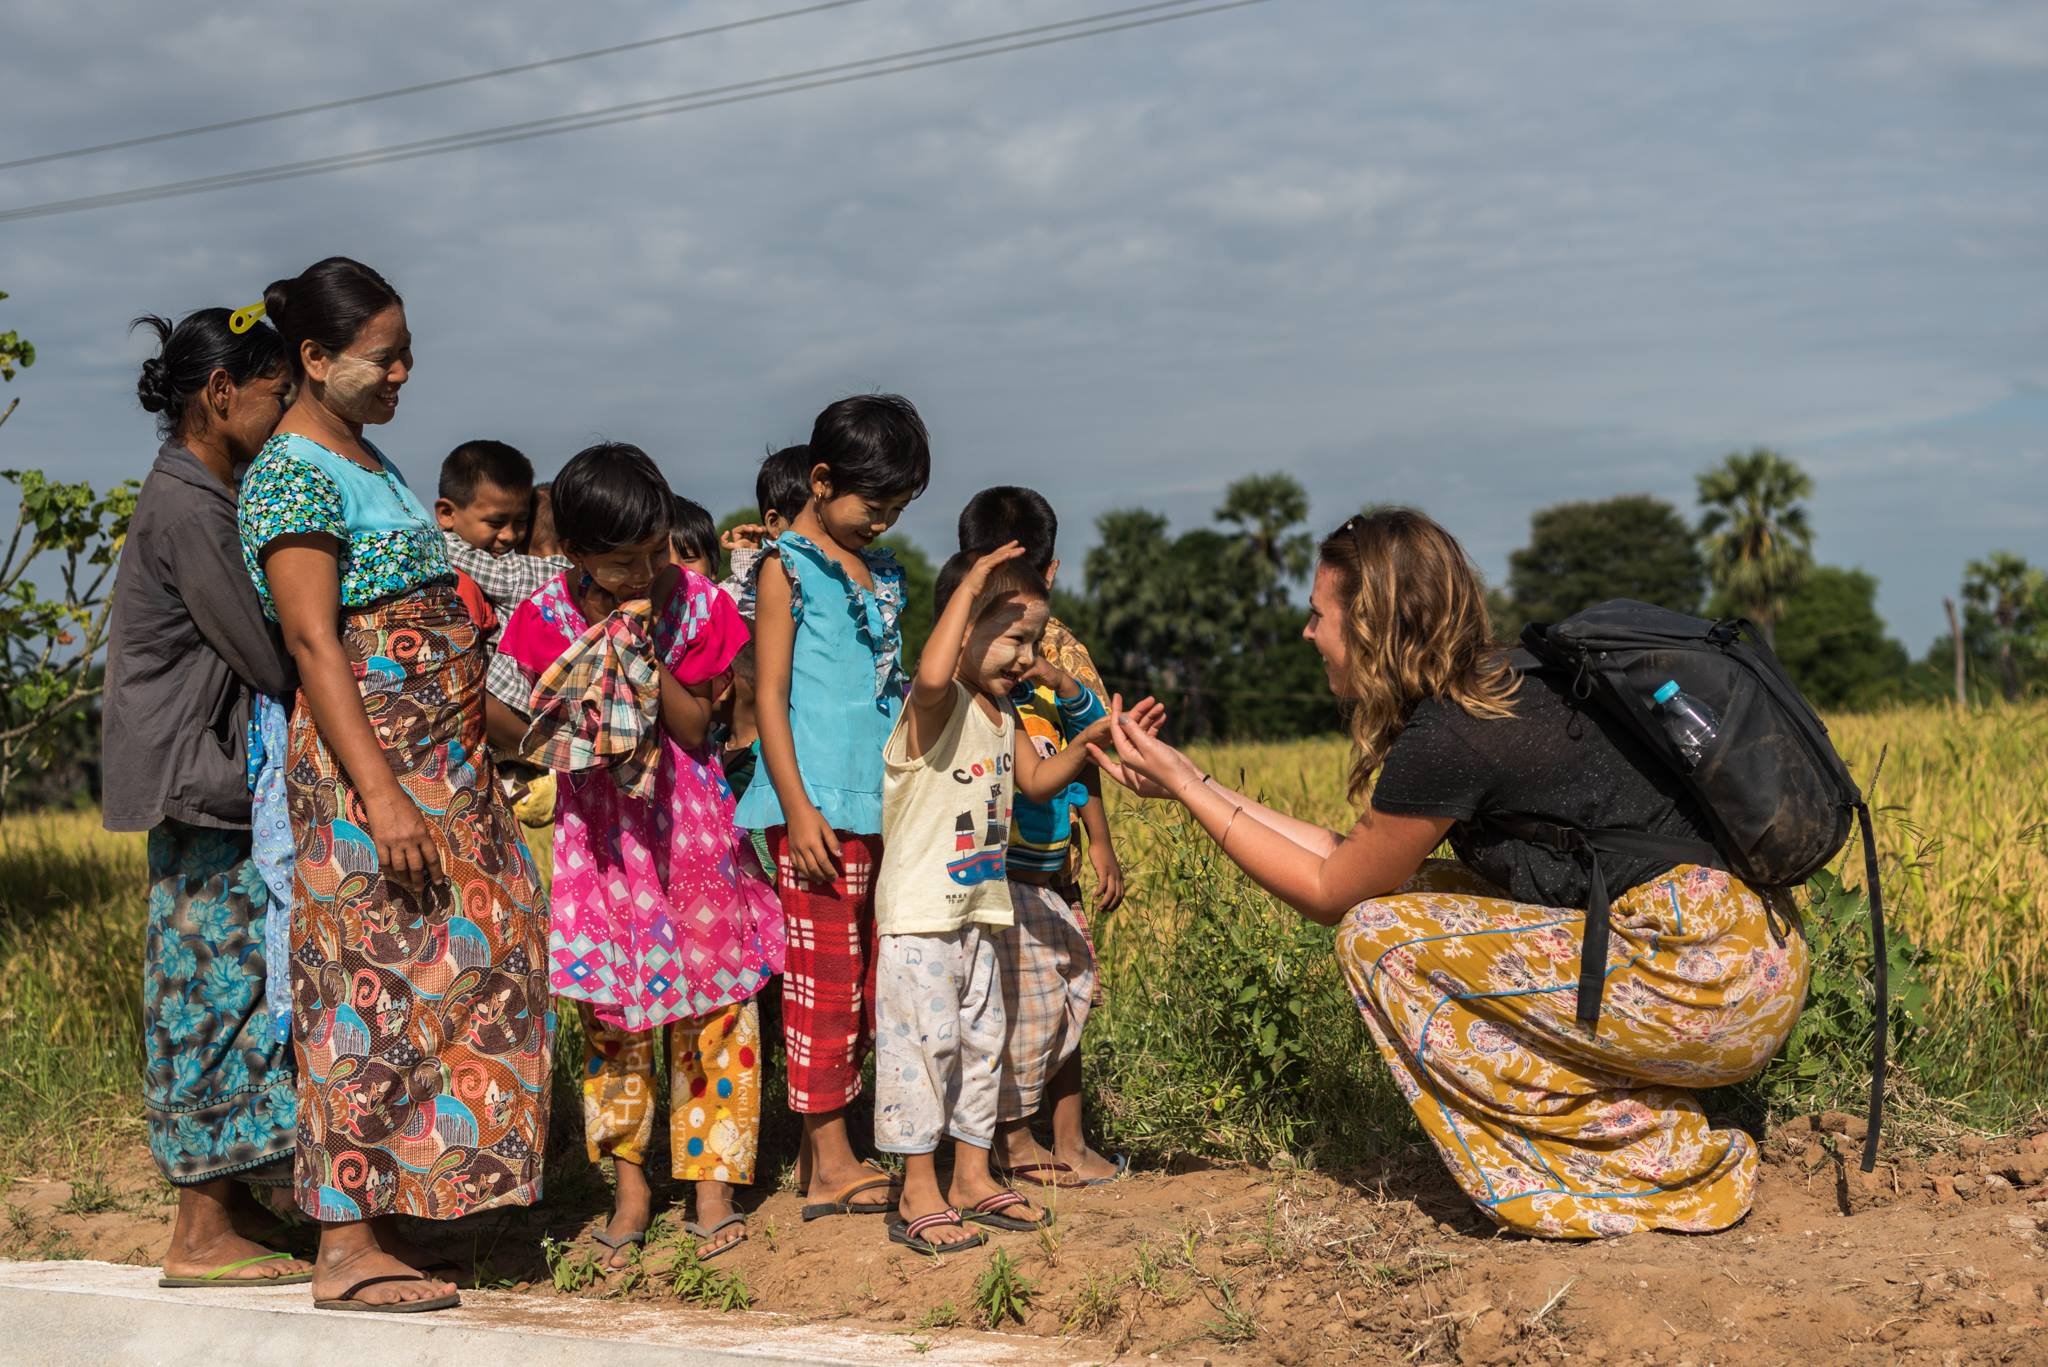
My camera is in my bag. These kids were curious about me, so I went up to them taking cues from their moms to see if it was OK. The kids cautiously approached, and I got down on their level and showed my hands up to them, both to show that I intended no harm and to invent a game with them. My friend Corey took this photo, but not because I requested him to. I didn’t actually end up taking any photos of these kids or their moms, I just enjoyed the interaction and didn’t take my camera out.


People are not museum exhibits, so don’t treat them like they are. It’s so important to be open. Talk to people. Learn some of their language. Learn their name. Learn how to say it correctly. Sit with them if they welcome you to. Be willing to laugh at yourself. And consider doing all of this before reaching for your camera.

When it comes to photographing children, I personally very rarely will ever photograph a child without the explicit permission of their parent or guardian. Sometimes that permission is a nod or a smile. Consider what you’d do in your home country and go from there.

Sometimes when we travel, our excitement clouds our judgment and we do things we would never find appropriate at home. Take a moment and filter yourself. You want your photography to be an act of respect, not an act of exploitation. If it doesn’t feel right, it probably isn’t. If you look at a photo you took and it makes you feel uncomfortable, well, it probably feels that way for a reason.

For me personally, taking photos of people on my travels felt awkward at first. I learned what is and is not OK because I learned to form a relationship with the people I am photographing. When you form a relationship with someone, even if it is a brief interaction, you learn a bit of their story and you can tell relatively quickly if it is appropriate or not for you to document it.

INTENT

Why are you taking the photo? What is the story you want to tell? It helps to get clear on this.

As you know, travel photography does not exist for the photographer to brag about all the cool places they have gone, so if your reason has something to do with showing off your travels, I urge you to re-consider your intention. Most locals don’t care about being a part of your “authentic” travel experience. 😉 So if you are photographing another human being, ask yourself why. What are you hoping to convey with the images you are taking?
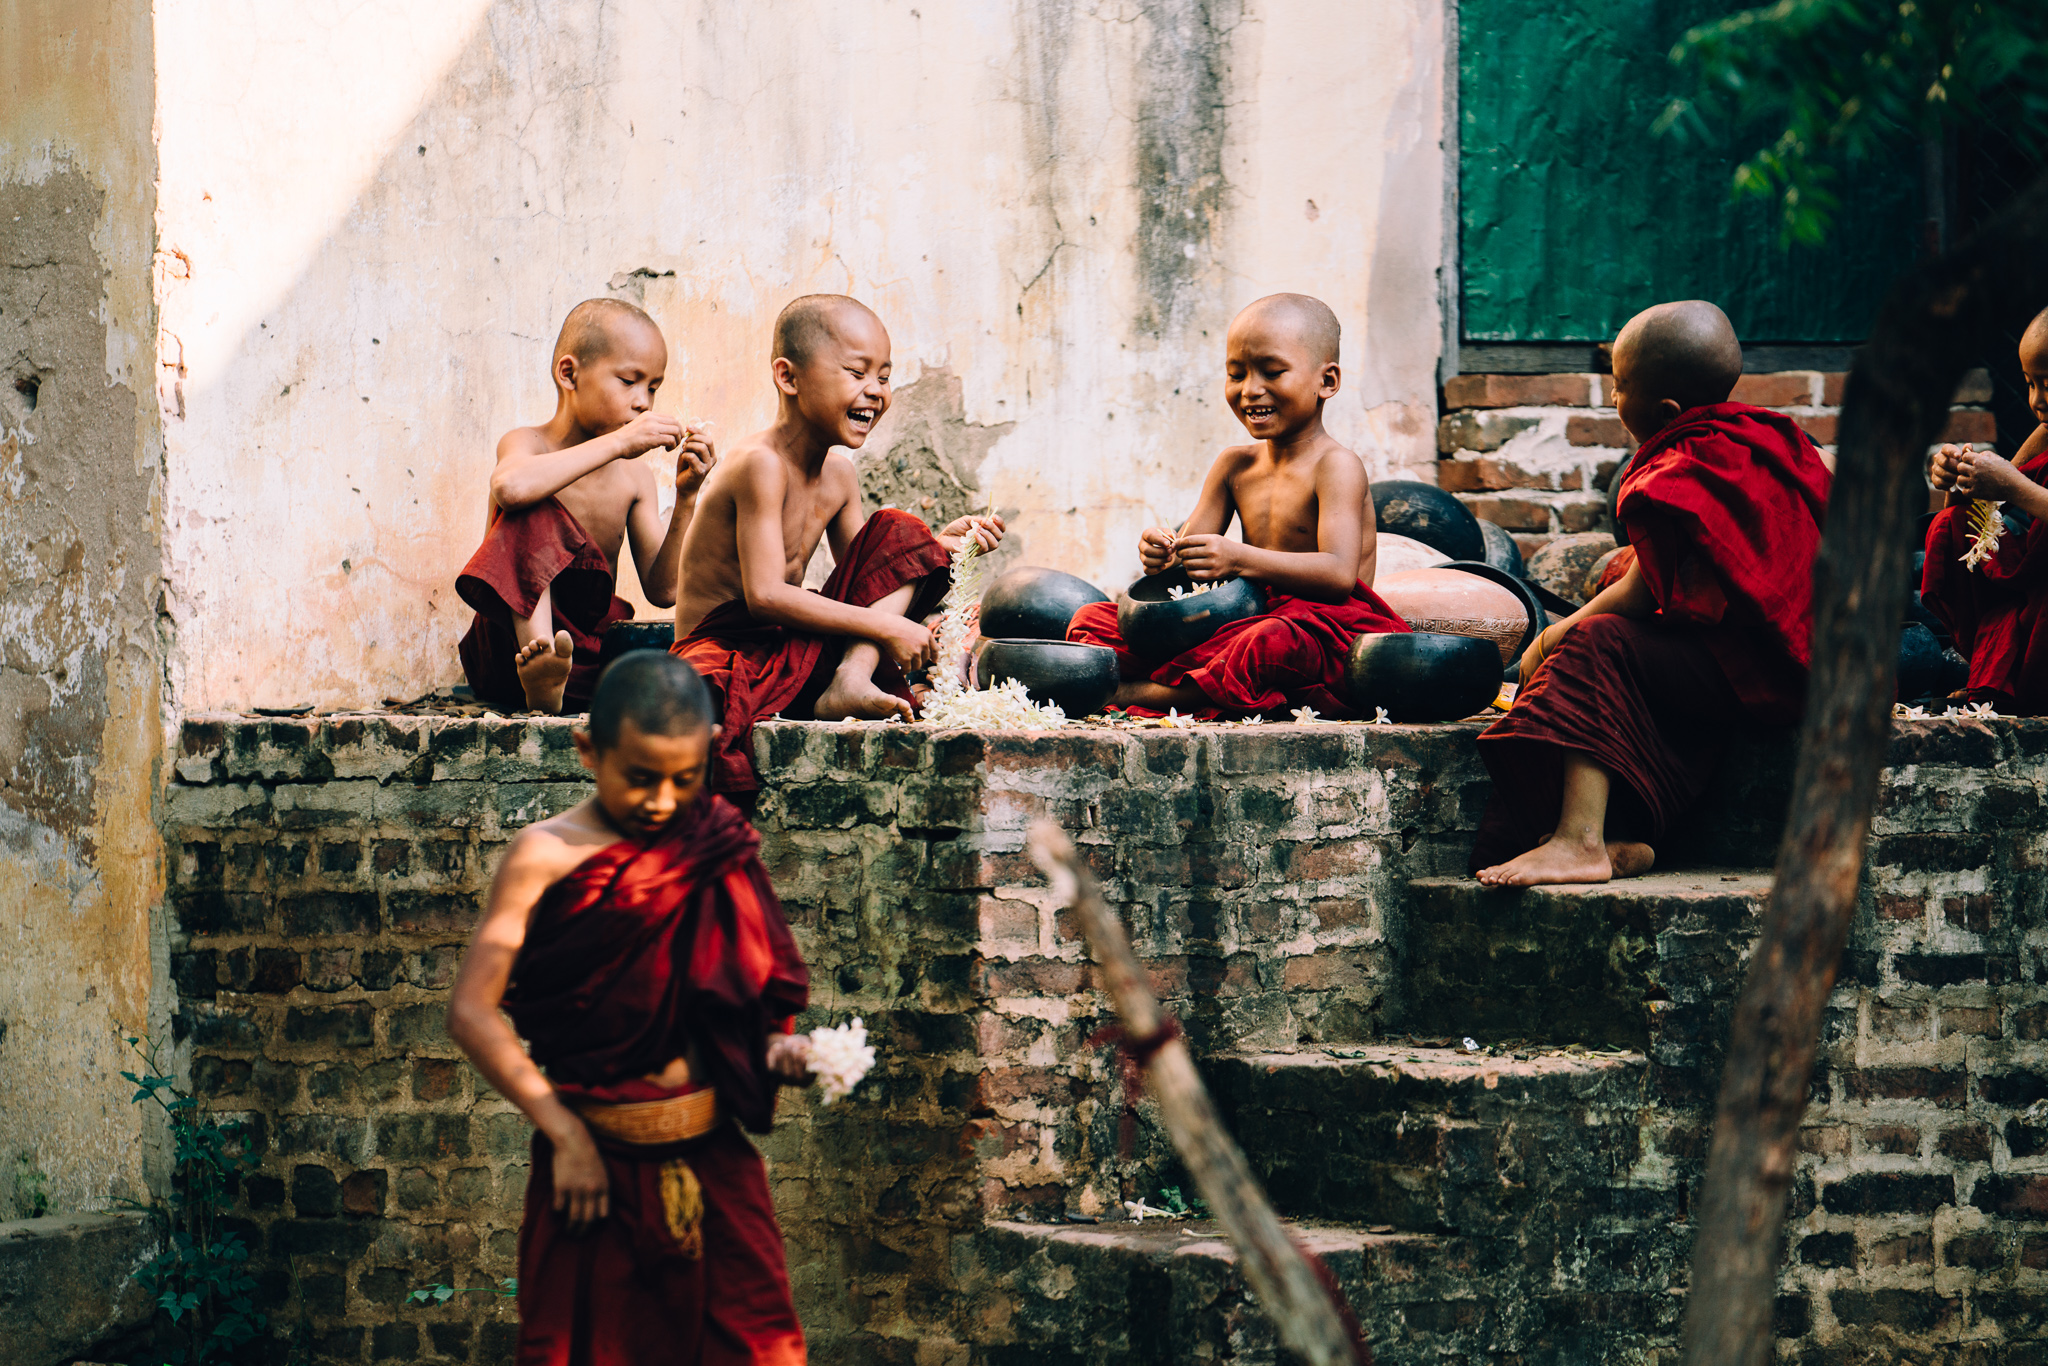
The reason I bring up this subject is that images are powerful, and storytelling is a skill. My hope is that photography does not contribute to the exploitation of (often poor) people around the world, but the fact is, I would not be writing this saga of a post if it did not carry that possibility.

Speaking for myself personally, I hope to communicate the beauty of a person, but not oversimplify their situation. I hope to show the complexity of their culture, not exotify it. I hope to make my viewers think deeper, not gloss over images of the planet they live on. I hope to show what is real and true, and never sugarcoat things for my own benefit or the comfort of my audience. And I always hope to preserve dignity.

What you intend to communicate is up to you as the artist. Make it a deliberate choice, then do everything you can to bring that intention to life.

COMPENSATION

Should you pay someone to take their photo? When would this kind of thing be appropriate? This can be a complex issue, and may or may not be appropriate depending on context and where in the world you are.

If you took a photo of the guy selling onions at a market, then buy a couple onions. Yeah, I know you probably have no use for onions, but it’s the right thing to do, in my opinion. If you took a photo of a woman selling bracelets she made, buy something. It is a pretty simple thing and creates a relationship with them besides just you taking their photo and leaving like many other tourists might.

In some areas of the world, posing for photos can be a way for people to make money. Recently I spent some time on Inle Lake in Myanmar, where many fishermen do not actually fish–– instead they pose in traditional outfits for tourist boats. Is this a good thing or a bad thing? On one hand, posing for tourists may be preferred work and/or easier physically, depending on the individual. On another hand, an income earned in this way is dependent on foreigners… often of the same race as the people who make decisions that harm the country/location in question. This is a rich and deep issue, and I don’t think there is a one-size-fits-all answer.
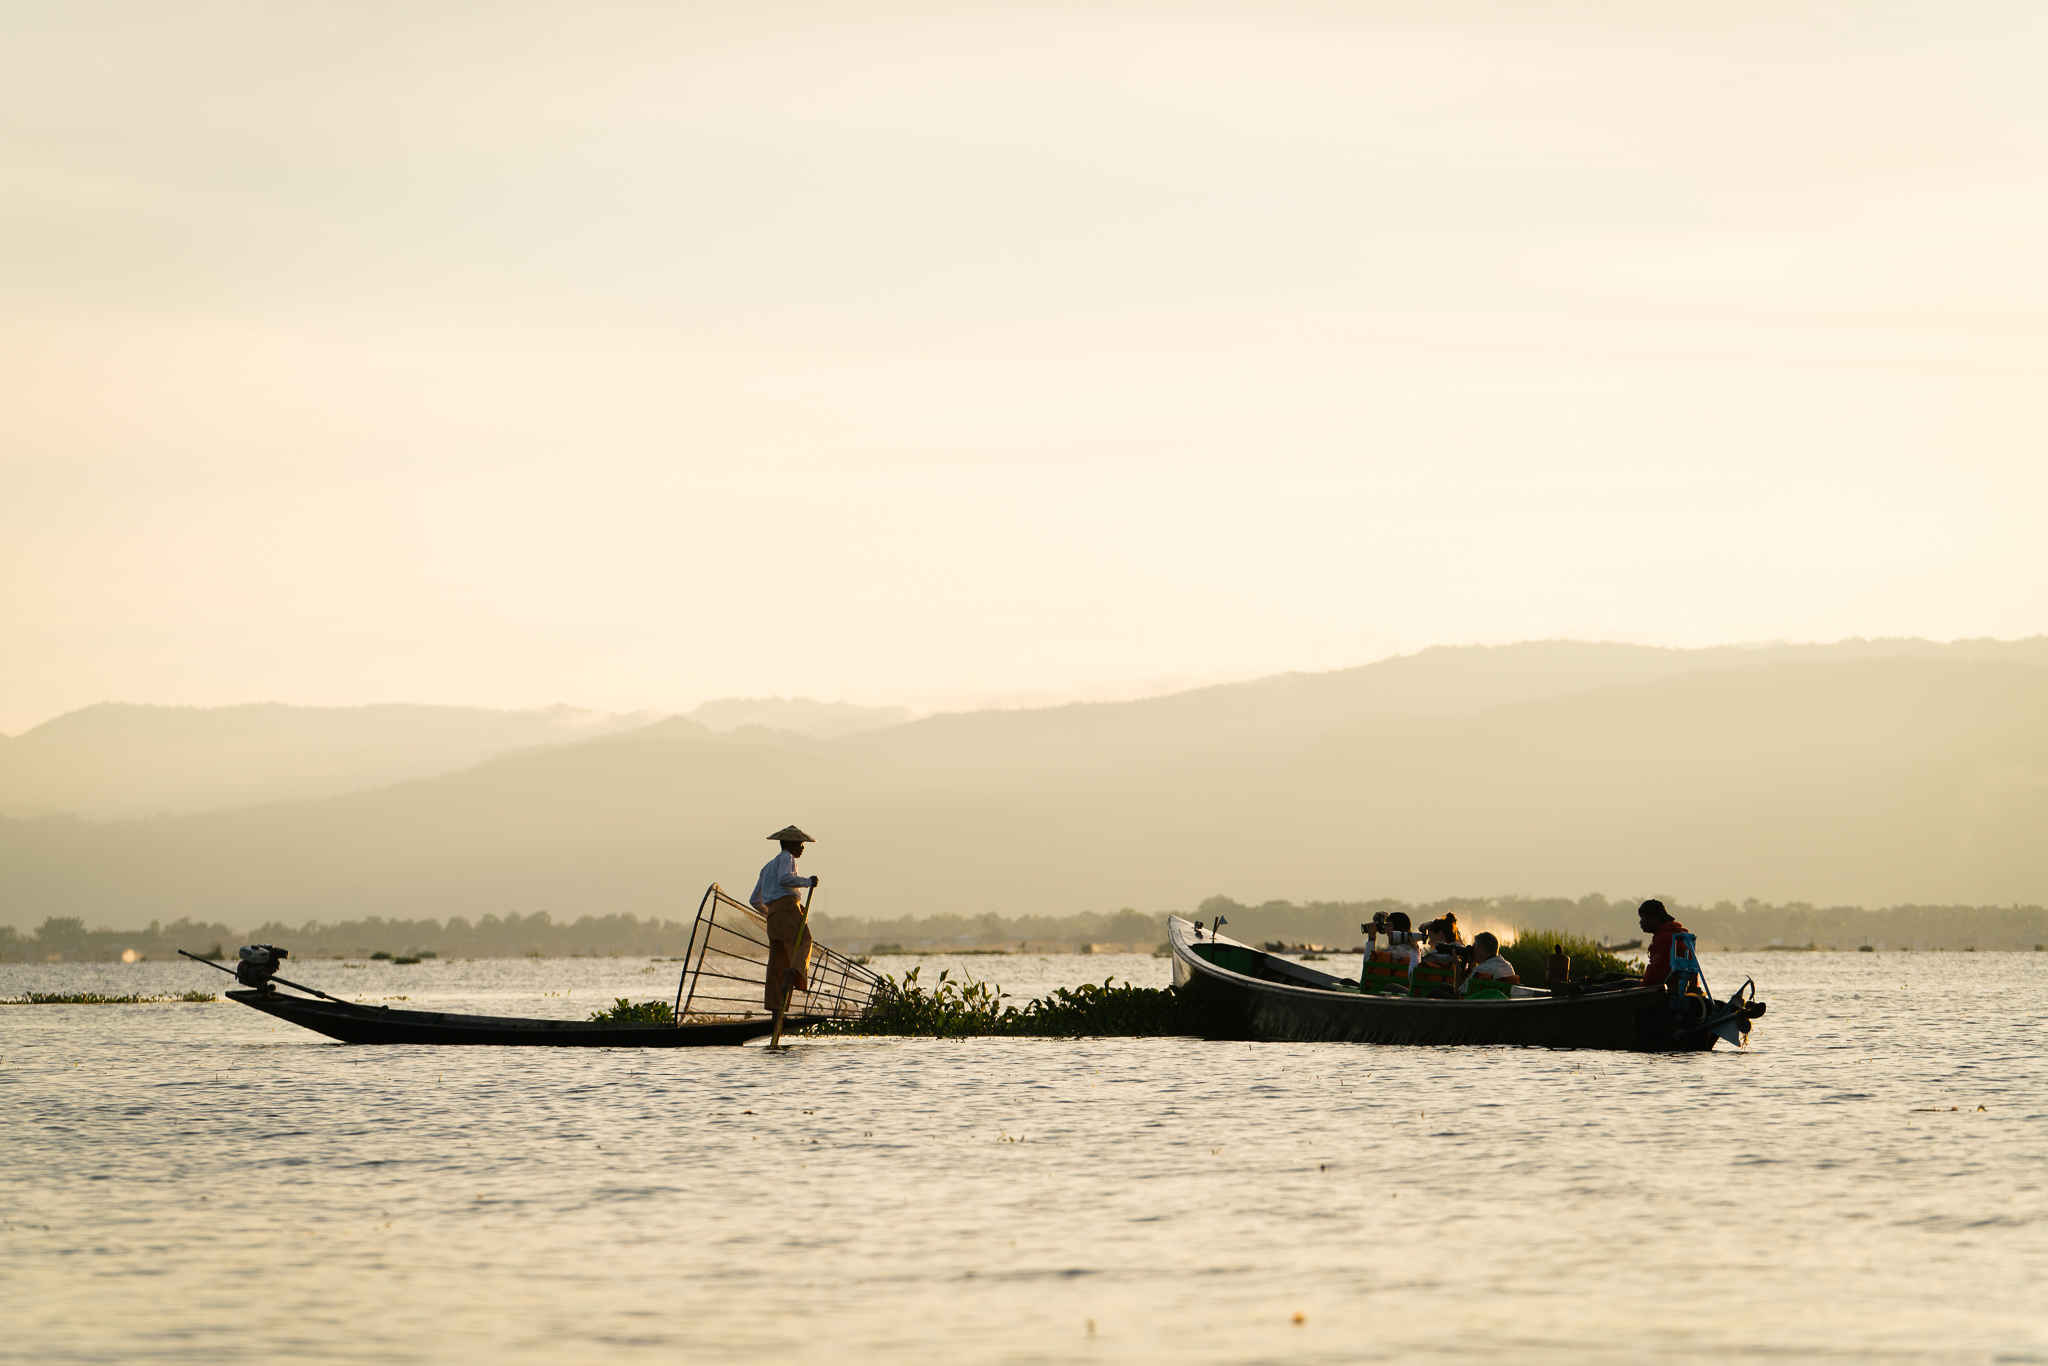
Another question: from a journalistic standpoint, if you pay someone to pose for you, is that photo really true and authentic? If it is set up, is it warping the fundamentals of photography? Is staging OK if done outside of the context of documentary-based work?

I hope that by asking yourself these questions, you can form your own opinion.

RESPECT

So far, a lot of what I talked about here has a lot to do with respecting people and culture, and I think that is obvious. But this can and should be stretched to more specific things–– as travelers, I believe we should be respecting rules, regulations, guidelines, laws, traditions, private property, privacy, and wildlife.

Just logistically speaking, not abiding by rules in certain countries could get you in trouble or even land you in jail. But in terms of basic empathic and considerate behavior, it’s important to think about whether or not it is appropriate to photograph certain things. Religious structures, sensitive ceremonies, and certain celebrations or traditions, for example. You are representing not only yourself, but foreigners as a whole, and your behavior (positive or negative) reflects on other visitors as well.

Within this topic is respecting Leave No Trace principles if you’re outside or camping, and abiding by regulations that prohibit drones in certain areas (US & Canadian National Parks, for example).

For wildlife photography, feeding animals is never OK in my opinion. I believe you should pay attention to an animal’s cues–– they will show you how they feel about your presence. If you are scaring or threatening them, their body language will tell you that.
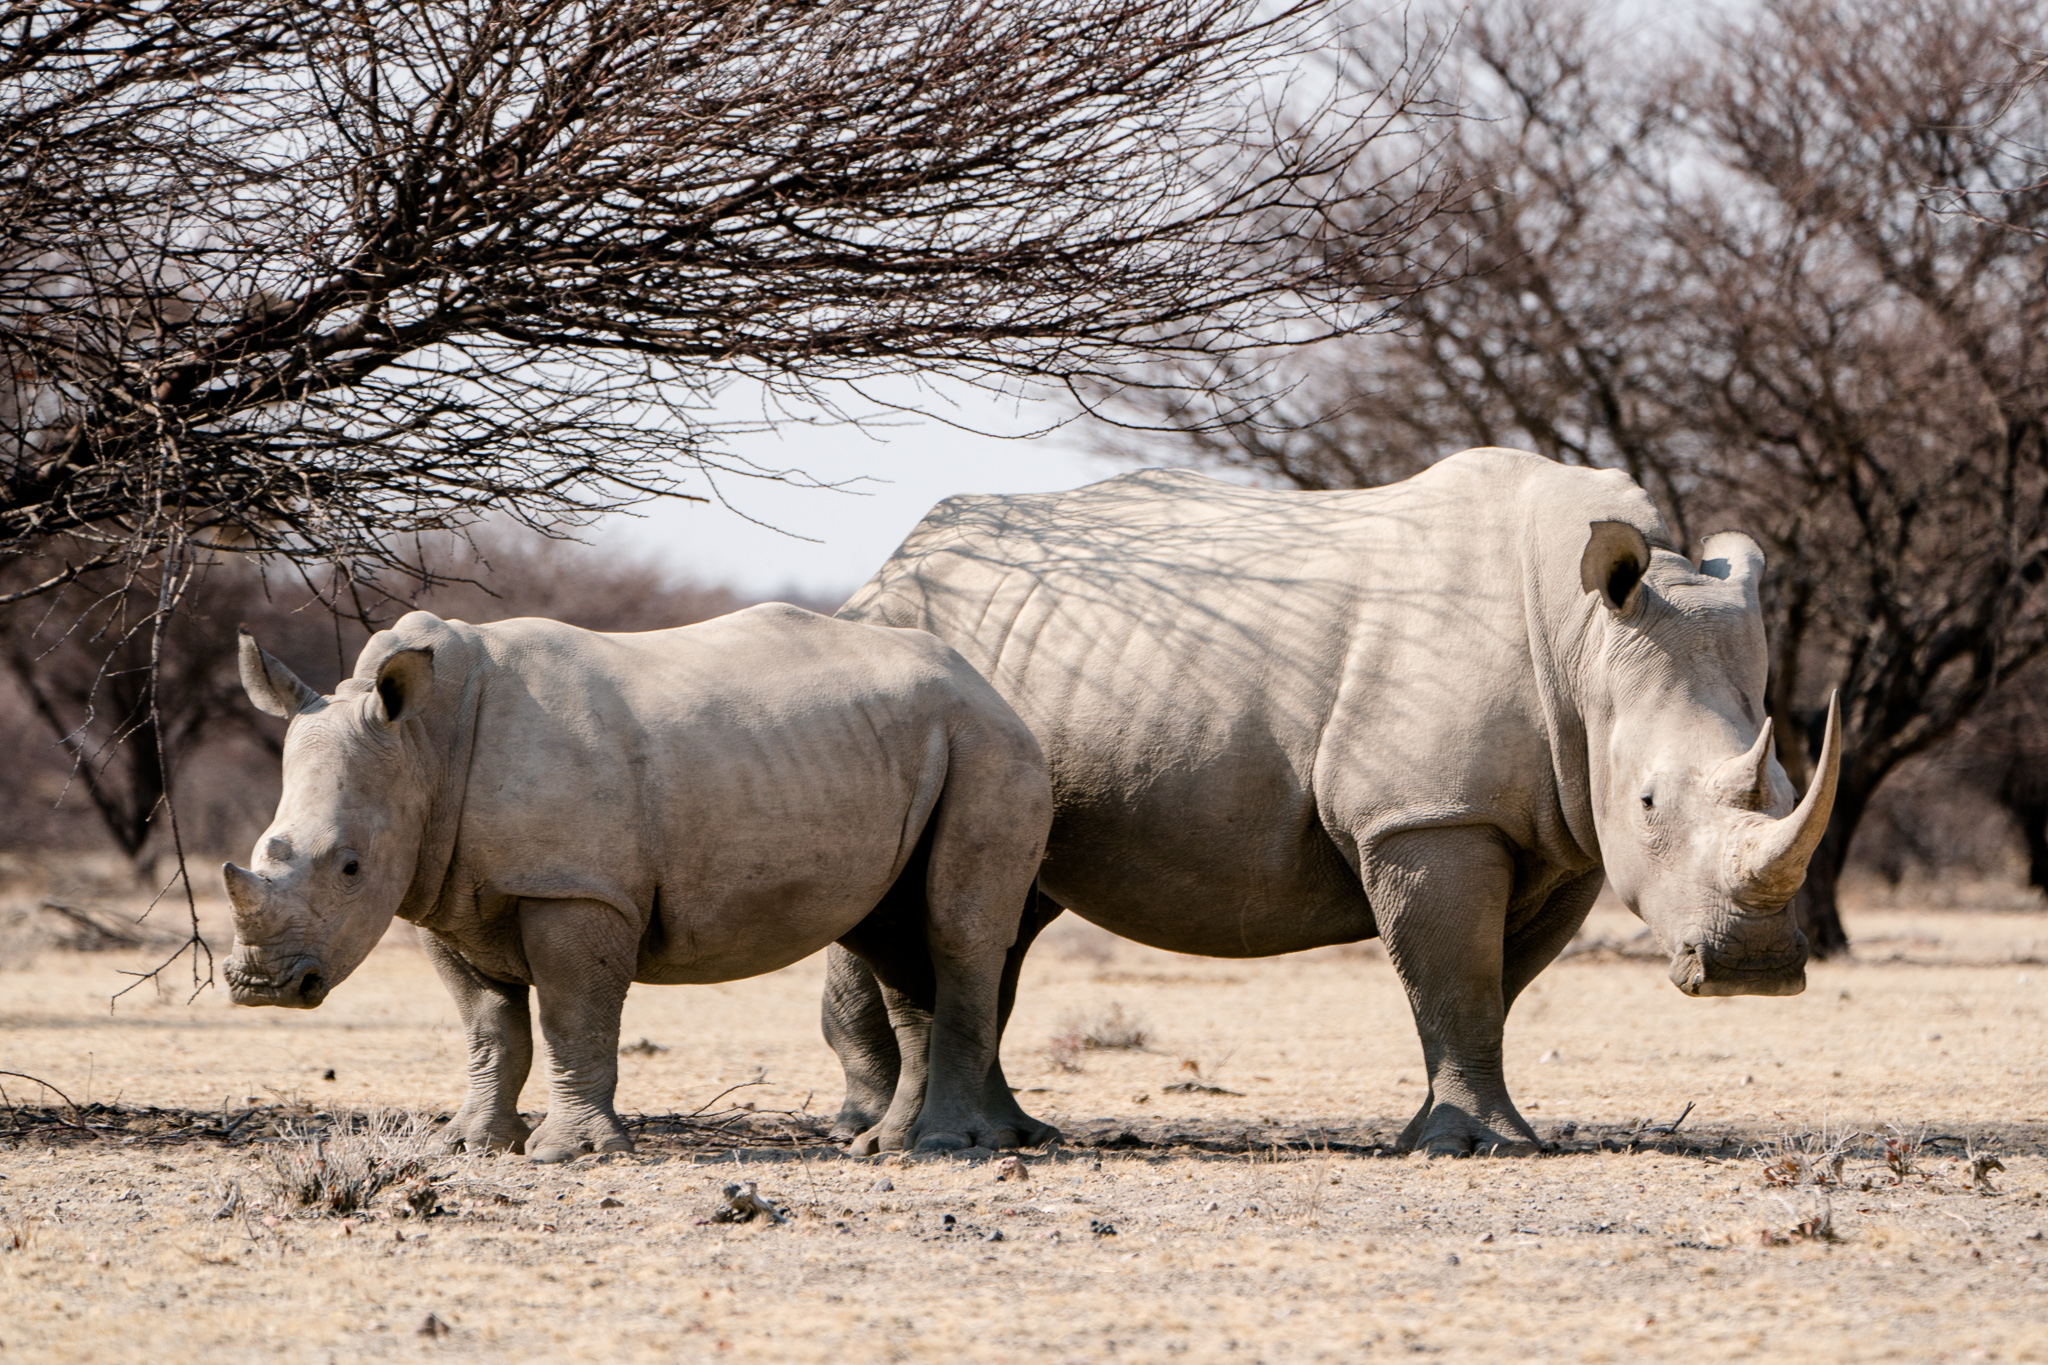
I shot this photo on foot, following our experienced guide. We were tracking these rhino, and it was clear that mom was protective over her baby. She did not notice us in this moment. I’m sure that if she did, she and the calf would have run away quickly. If we were visibly bothering her, I would not have felt comfortable taking this photo.


Sometimes, the respectful thing to do is to put your camera away.

VISITING A TRIBE

Because we are talking about travel photography, I think it is worth talking about tribal visits. Visiting with a tribe is something travelers might seek out to learn about a culture different than theirs and expand their travel experience. If you are visiting with a tribe, make sure you are doing it in a way that the tribal members have approved, and that your visit actually benefits them (read: you are paying them directly). I have heard stories and can certainly imagine that it is easy for tribal members to get ripped off here, so do the necessary research that your money is actually getting to them, and that it is not being pocketed by your tour guide or driver.

Tribal visits are one way for tribes (common in Africa, but also Asia) to make money, especially as the lasting impact of colonialism and climate change has drastically changed their way of life. Some tribal visits can be booked through tour companies, or you might try to get a word-of-mouth recommendation for a guide once you’re on the ground. Unfortunately, not all visits are positive experiences for the tribe, or for the visitor.

Being respectful does not come easily for all travelers. I watched a carload of tourists unload in a Thai hill-tribe village, distribute candy and whistles to the village kids along with flags from their home country, take photos like they were at a zoo, and take off again loudly in their 4×4’s. I asked a local woman I was sitting with what she thought of this. She said, “not so good.” I can’t even imagine what an understatement that must have been for her, and how ironic it was that she was saying it to a western tourist (me).
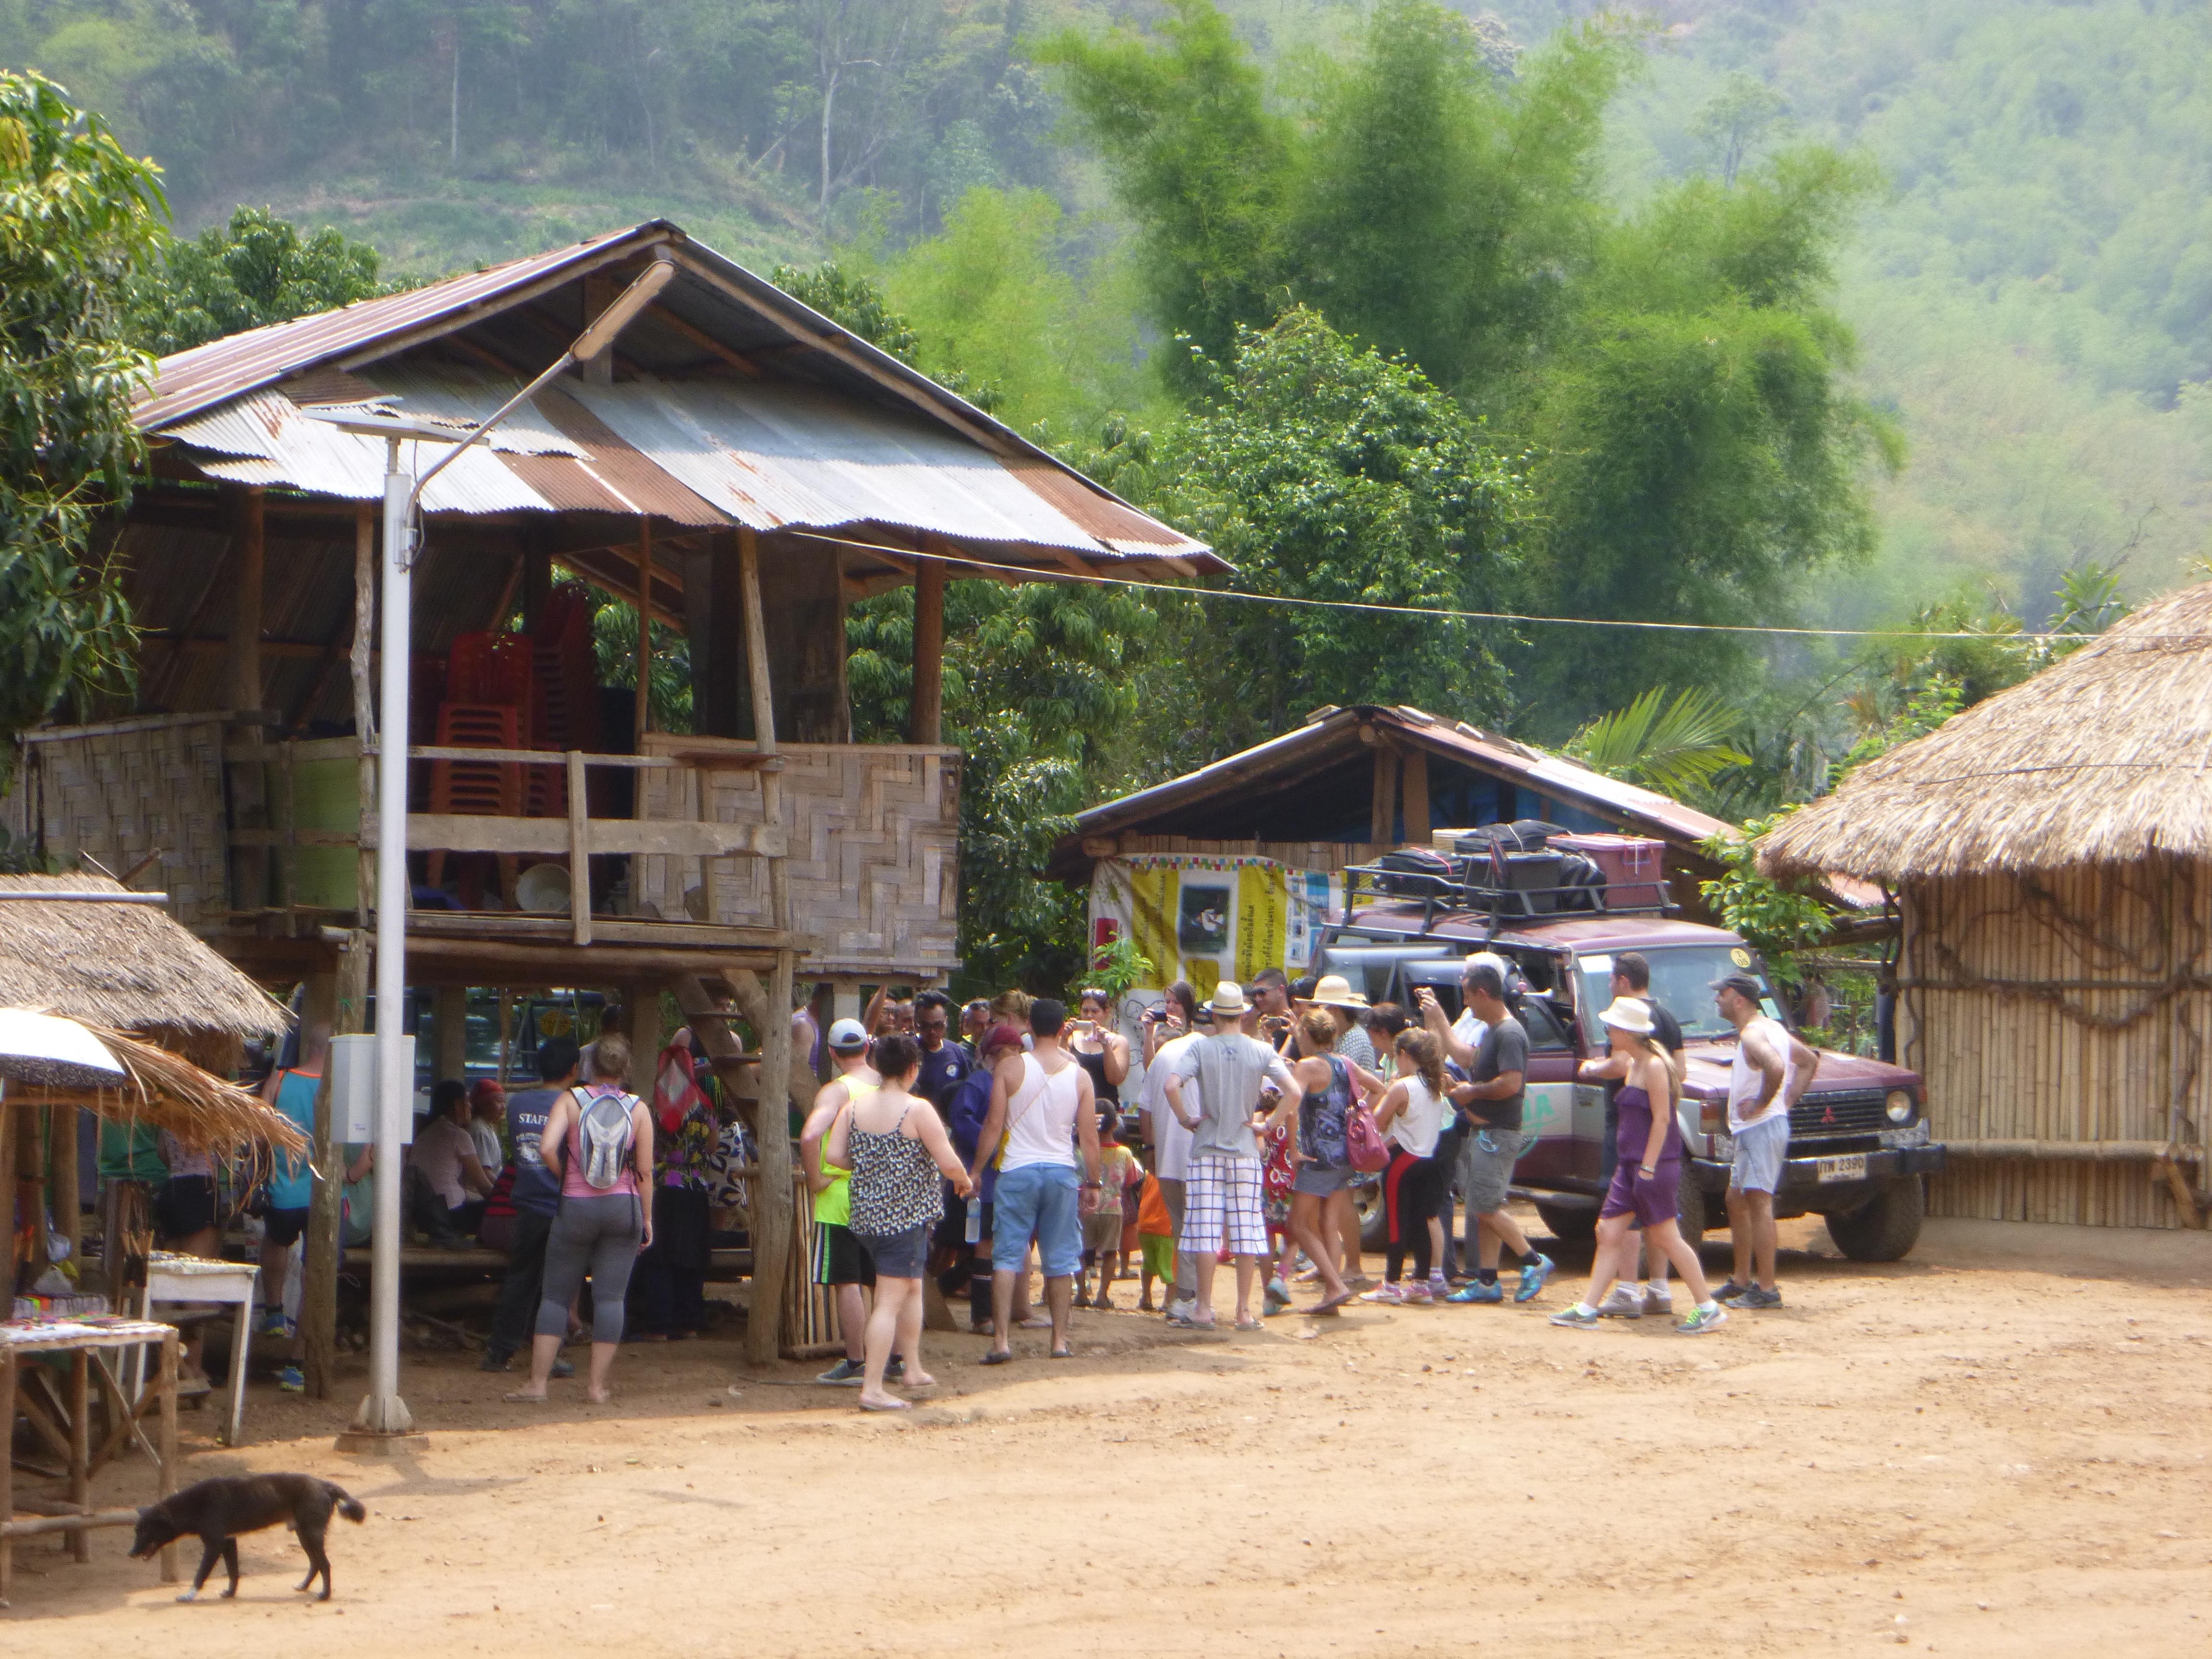
Even looking at this photo still makes me feel gross. You can see the tourists surrounding the kids, all taking photos of them from above with their phones.


In another scenario, I watched tourists pull over at the entrance gate of a luxury resort where tribal members were selling jewelry. They got out of their vehicle, took photos of these people, and got right back in to check in to their chalet… a resort built on ancestral homeland, from which the indigenous group receives little to no money. Can you see why these behaviors are completely inappropriate?

I am willing to bet if you are reading this that you are not looking to treat people like this, but you should know that it happens, because you will see it happening all around you especially if you are aware of it. So please be intentional with your actions, and ask your fellow travelers thoughtful questions about their behavior when they take photos on their trip.

If you want to bring a gift to a tribe, make it something that the people actually want or need, not just candy or a noisemaking toy because that’s what you think they’d want. Do not go if you are sick. People living in remote areas often do not have access to the same healthcare that you do. Ask permission if you are not sure: permission to take photos, permission to pick up a toddler, permission to enter an area of the village. Don’t assume you are entitled to anything. The terms of your visit should be agreed upon, or you should not be there. If you are considerate and the group welcomes you, visiting with a tribe or local indigenous group can be a great experience, and one I would recommend.
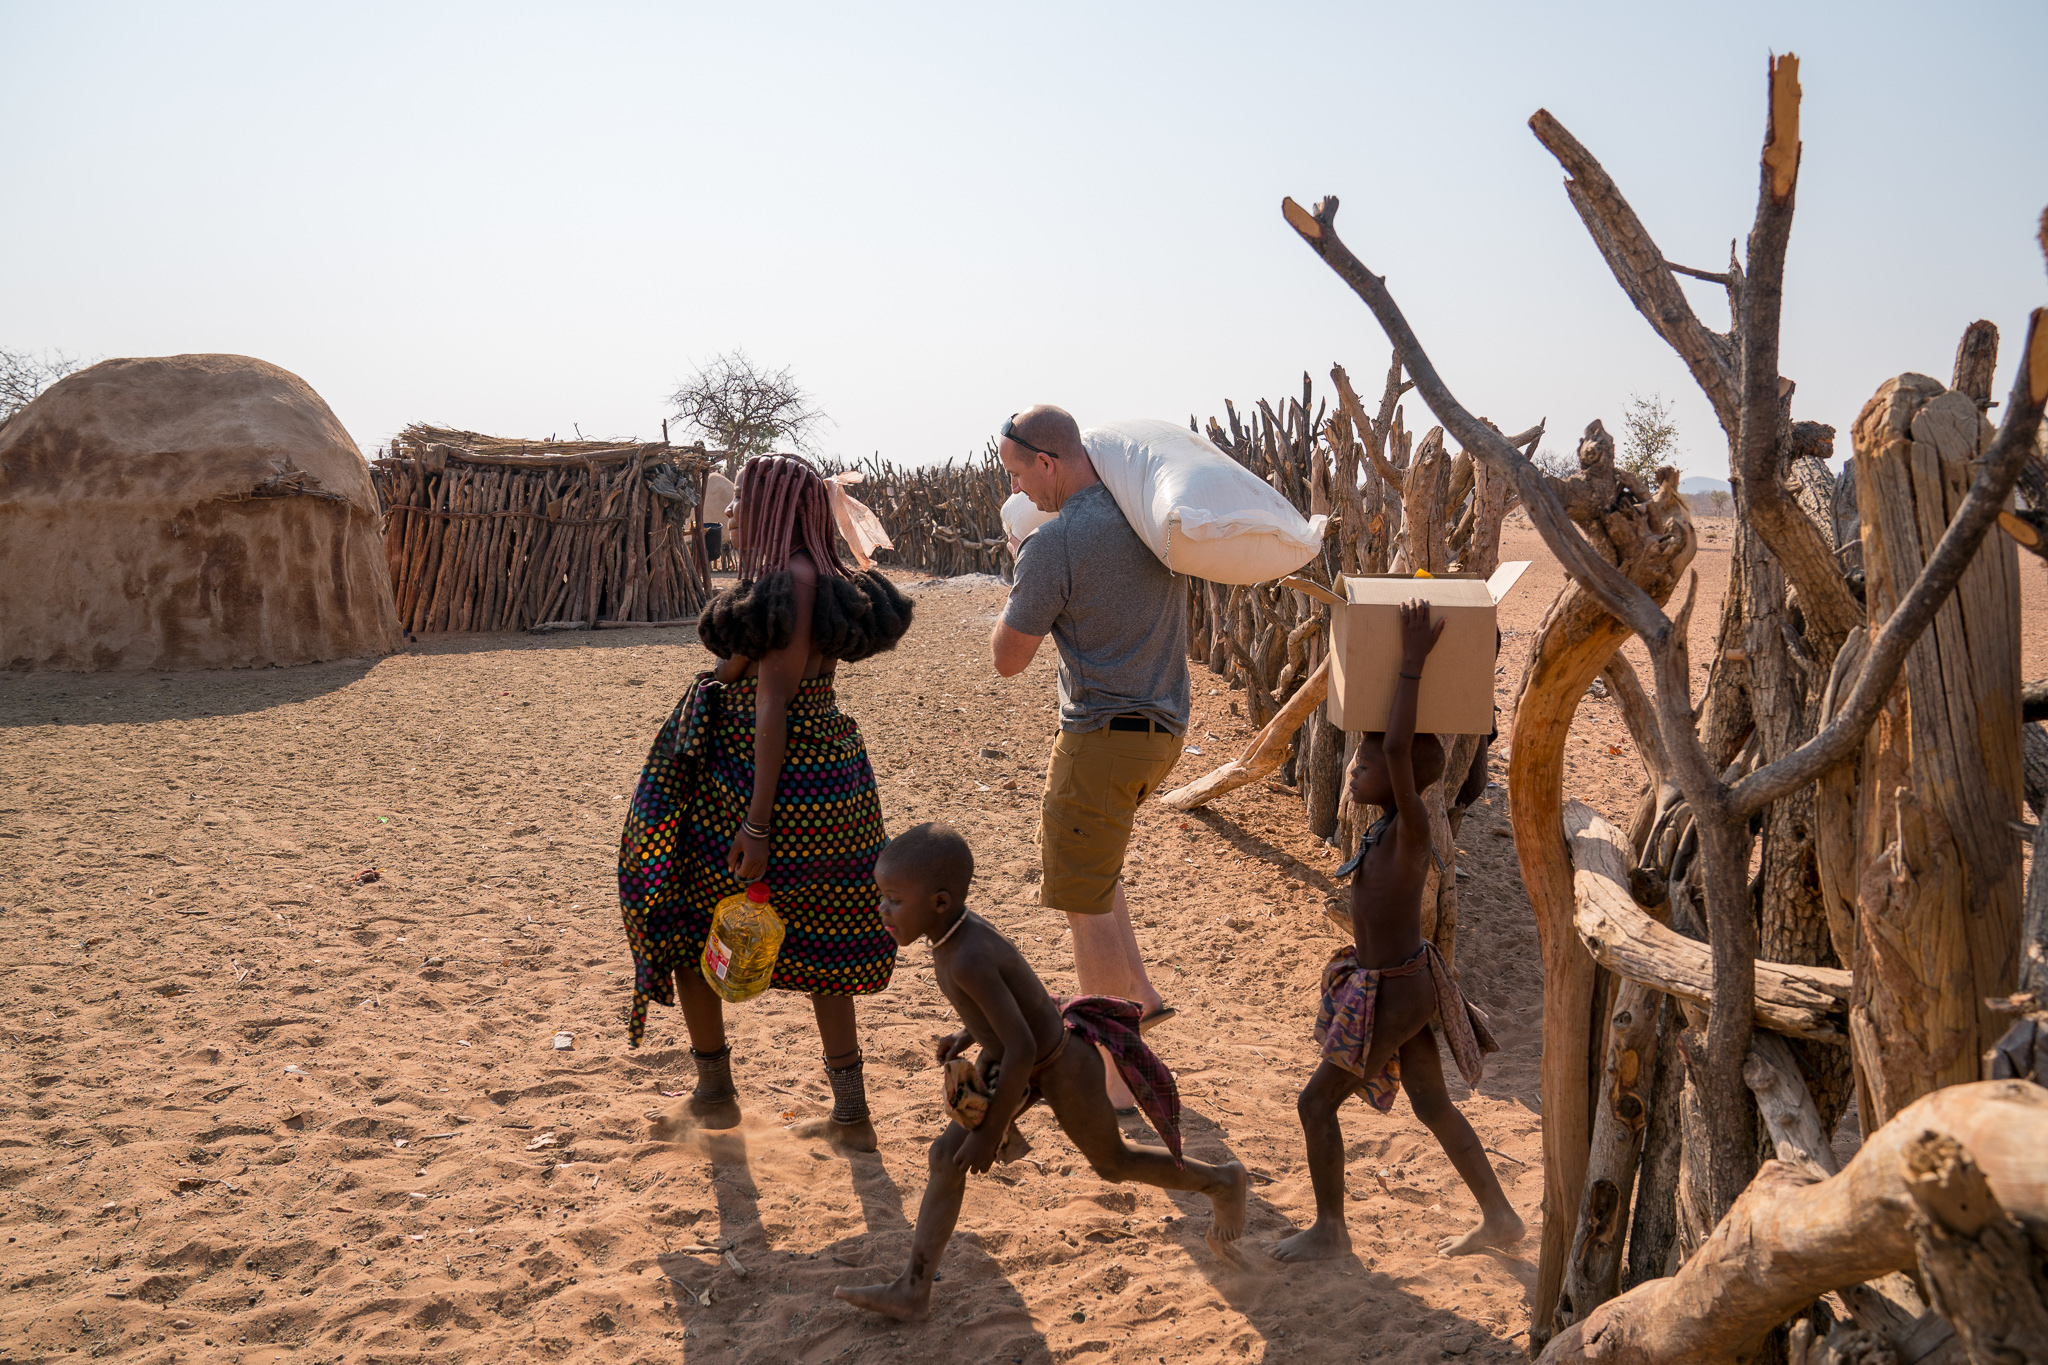
Colby Brown bringing our payment into a Himba village we visited. We bought food for the village based on their requests.

SELFIES

It is no secret that social media puts the focus on the individual. People are now personal brands. I would also argue that it has become cool to show photos of yourself doing altruistic things. Did you really volunteer if there’s no picture of you surrounded by 5-10 smiling (non-white) children, who are just so “happy even though they have nothing”? I am not only referring to the do-good stuff, but also just fun and out-of-the-ordinary travel experiences. Did you really eat a fried bug if there isn’t a video of you to prove it? Did you really saunter through the market if your friends and family don’t have visual proof? I am not saying this type of imagery is inherently negative, but I want to encourage us to think more about it.

Be careful what you pose with, and how you pose with it. Be respectful of religious sites, family businesses, statues and the like. The same goes for people. If you want a photo of yourself with local kids, ask yourself why. What is the photo about? If you’re in it, then well, at least partly, the photo is about you. I know you probably don’t view other human beings as accessories, so make sure that isn’t what you are accidentally communicating photographically.

I don’t think there is a hard line that says all of this type of imagery is problematic, I just think it is important to consider it. Having a photo of yourself in a place can be a wonderful reminder of your time there. I have lots of photos like this of myself. But I know looking back which ones were in good integrity, and which ones I took so I could later post them on Facebook. At the time, I might have told myself I was taking those photos with clean and clear intentions, but when I reflect back, I know it was just because I wanted to look cool and worldly. The only person who will really be able to tell is you, and you will know in your gut what feels right and what feels icky.
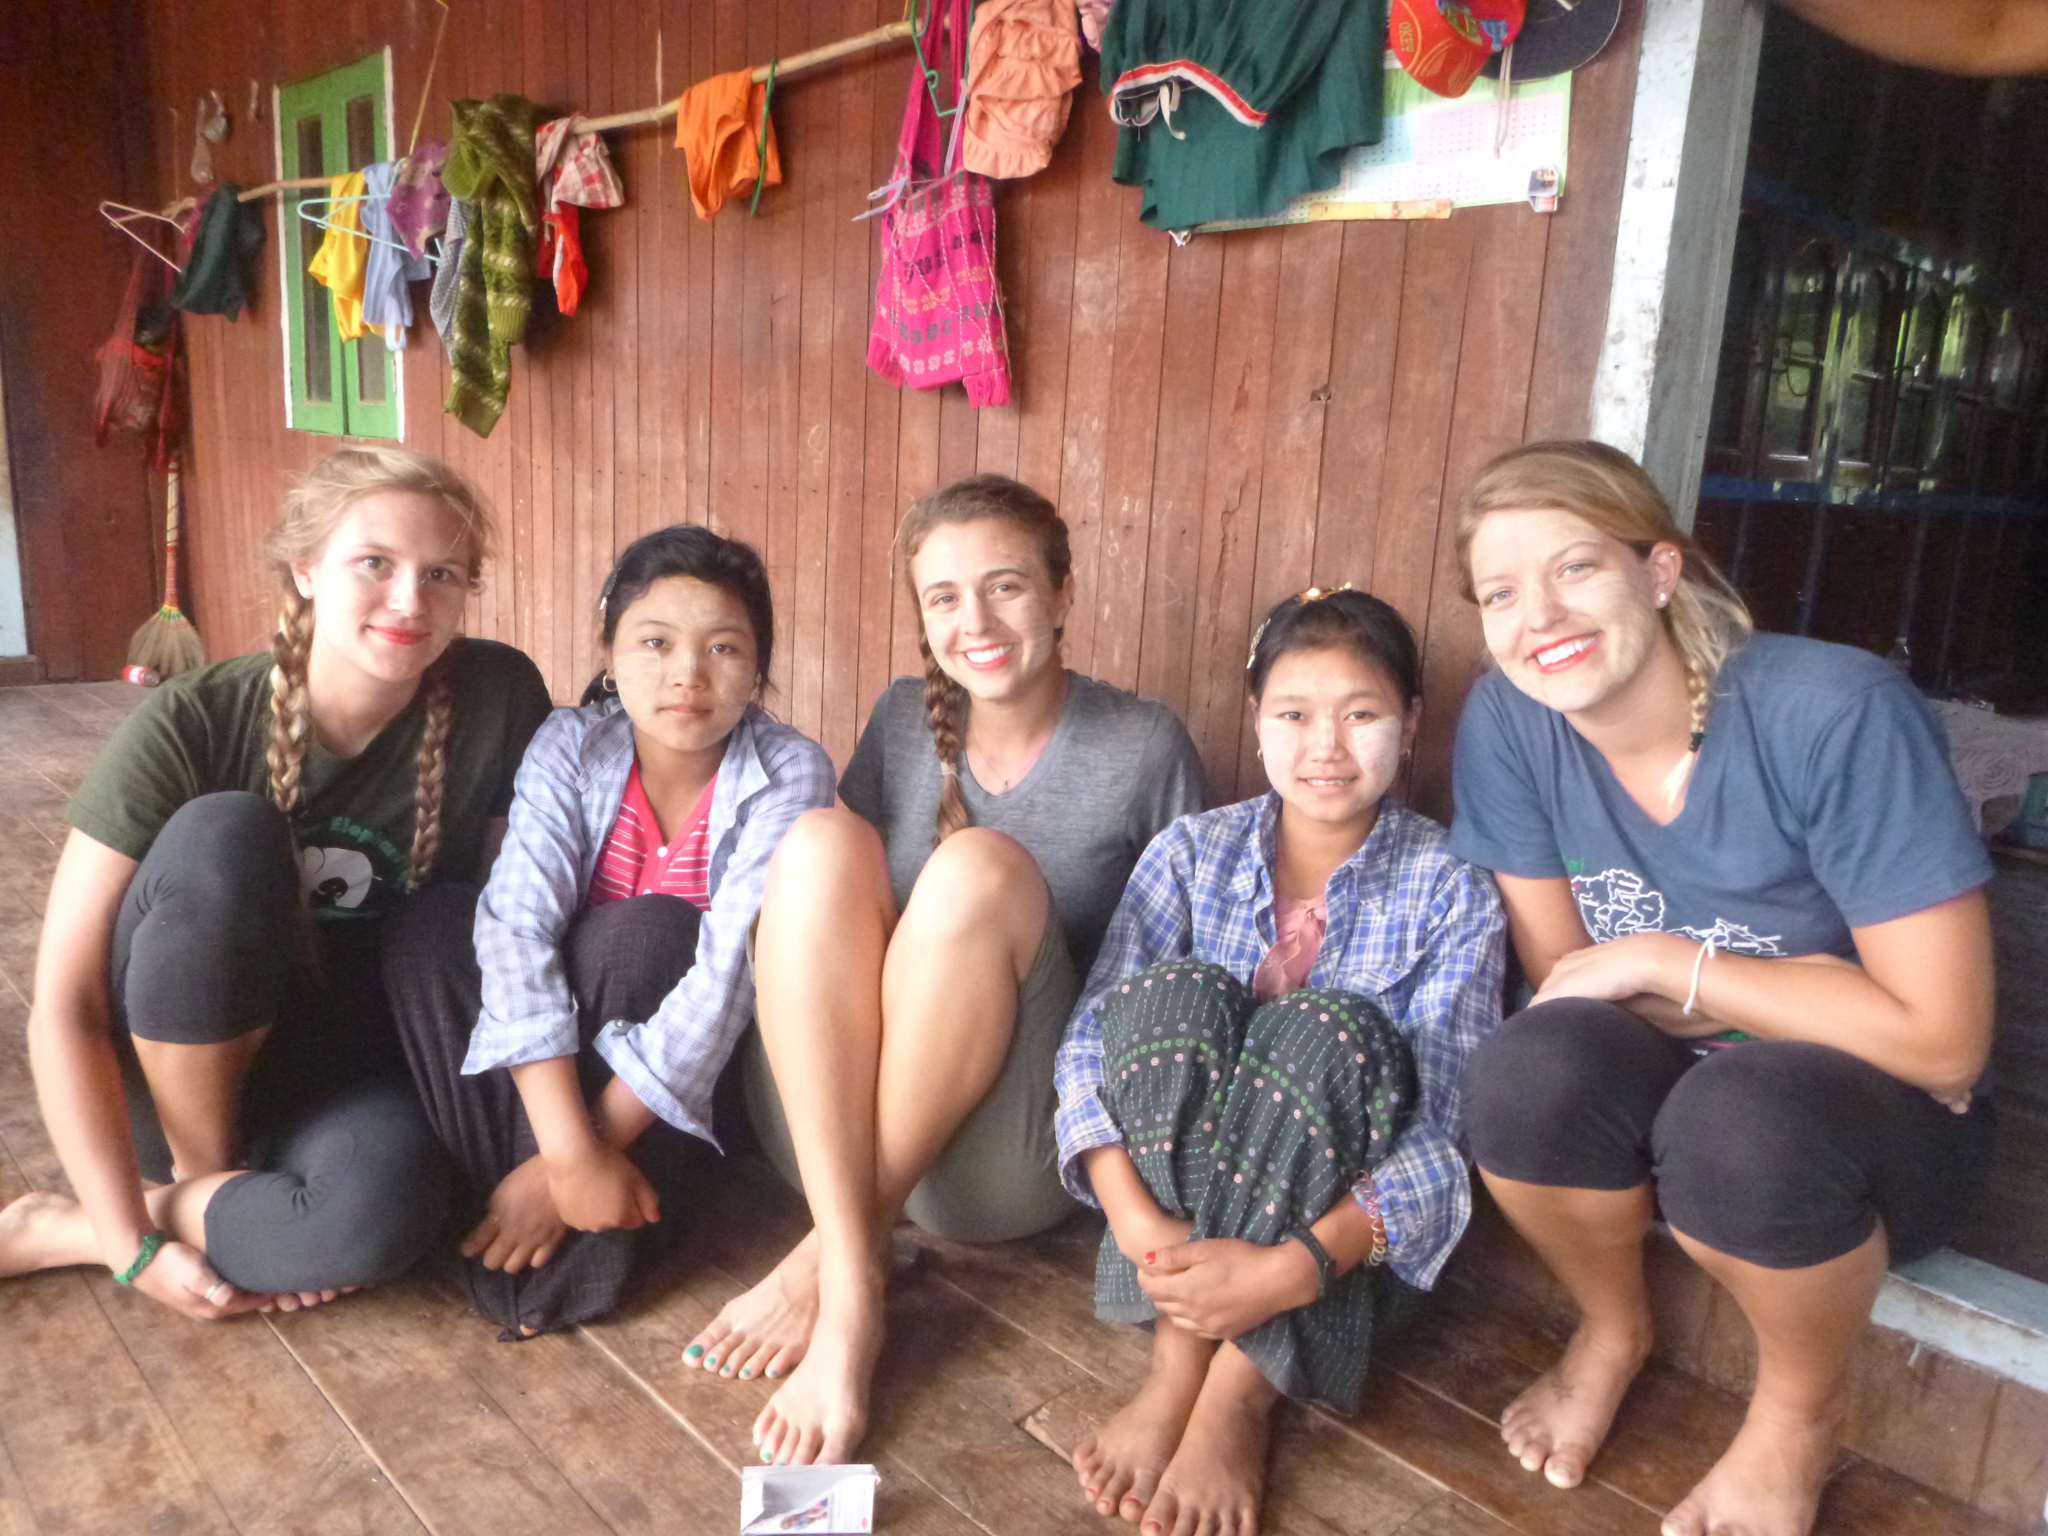
Vintage Erin. Here’s me and a couple of friends in Myanmar in 2014. We were hiking in the hills with a guide from a family business in Kalaw. These girls asked to do our makeup with thanaka (common for women to wear on their faces in Myanmar), and I didn’t feel weird about this photo being taken afterward. They were giggling and smiling, even though the girl on the left looks rather serious in this photo.

POST-PROCESSING

With powerful editing tools, we are able to easily change many things about a photo, from the color of the sky, to the scale of just about anything. A photographer’s editing decisions can transform an image to something much more impressive than it was as a RAW file. However, extreme editing of images can be misleading in certain scenarios. It is up to the photographer to decide what is acceptable.

When it comes to respectfully displaying culture through your photography, the amount of editing you do matters. Whereas I might get super creative with colors and lights/darks in my landscape images, I would never make any huge changes in a photo of a person where it mattered to their story. I don’t want to tell a story that was not true to how I saw it. Alternatively, I might edit an image heavily if the edit lends itself to the way I felt when I took the image.

One recent example of a choice I personally made in post-processing is in my images from visiting a Himba village in Namibia. I didn’t want to evoke a possible feeling of pity from the viewer, so I chose to Photoshop out a couple of flies and some stray stuff from my subject’s face and hair. Was it the right choice to make these edits? I’m not sure there is one. Here’s the before and after:


In another case, I changed the colors in the sky drastically. I liked this change stylistically, and I felt that the edit was consistent with how the scene felt in the moment. I posted this image on social media, and it’s likely that my audience assumed that these were the natural colors of the sunset that night. They weren’t.


Editing is a stylistic choice. Personally, I usually do not like to stretch my images too far from the reality of how it felt being there, but “too far” is completely relative. Some photographers are digital artists too, and create mind-blowing fantastical composites of their images. I think these are completely valid (and beautiful) too. What are the limits of photo manipulation? Should an image only be allowed to portray 100% reality?

You may completely disagree with my post-processing choices here, and that’s OK. These decisions are up to the individual to make.

POSTING & PUBLISHING

Most of us want to share our work, but with the ease of sharing online, you don’t always know where your photo will end up, or what the ramifications of that might be. Here’s an example: the featured photo of this article. I had this woman’s permission to take her photo, but did she know it would be used in a blog post and that thousands of people would see it? I can’t be sure. And yet, I am making a conscious decision to use her photo because her pose and expression communicates discernment, something I want to convey in this blog post. Some people might not agree with my choice to use this picture of her here, and I would understand that.

In the outdoor community, it is common for people to get upset, and rightfully so, if someone posts a photo of a tent at the edge of a pristine alpine lake, or a photo of a hammock set up across fragile trees. Not only might these activities be harmful to the environment and prohibited, but the act of posting images like this on social media could mean that more people go to these areas and engage in these activities, which then creates a domino effect. Monkey see, monkey do.
I should be aware that if I post something on Instagram, someone else might emulate my behavior.


Once you post a photo, it departs the confines of your camera, computer and imagination and gets given to the viewer… and to the internet. You don’t have control over an image anymore after posting it on social media. Ask yourself what that photo will mean when it stands alone, without your words or experience or defense.

Think twice before posting a photo that oversimplifies a complicated issue or displays something out of context. I’m not saying it’s always wrong–– I am just saying it is worthy of your consideration.

If you have taken photos of an endangered species, especially one that faces a poaching threat, be sure to wipe your metadata. Poachers have been known to take advantage of the ignorance of tourists by using their geotags and metadata from their images to locate individual animals. Here is an excellent resource on removing metadata, compiled by photographer Olwen Evans and shared with me by Rob Moffett from Ongava Game Reserve.

It’s entirely possible that someone could unknowingly publish a photo that could identify someone breaking the law or doing something that could be seen as such by their government. Sometimes as the photographer, we get swept up in the moment and in our own excitement of documenting and creating, but something that seems arbitrary to us could heavily impact someone else.

INSPIRATION VS. COPYING

There are so many photographers that inspire me, and I follow most of them on social media. As with any art form, as artists, we’ll always be inspiring each other and drawing our inspiration from the community at least some of the time. Everyone does it, and it’s not like there are that many truly original thoughts, concepts or ideas in the world.

When is it OK to get inspired by someone, and when does that turn into straight up copying them? Where is the line? I think it is usually clear to see when an image is an exact copy, versus cases where someone may have been inspired by another photographer and shot the same location, or a different scene in a similar style.

I am all for inspiration, but much like plagiarism in writing, exact copying is never OK.

Personally speaking, there have been cases where I have noticed people taking my writing word-for-word, or certain phrases that I always use, and putting them in their Instagram bios or on their blogs. Usually these are folks who are aspiring bloggers or photographers themselves… and I do notice. If you copy another photographer, especially one you look up to, it does not reflect well on you.

Getting inspiration from someone else is fine… we all do it! And it is totally expected that we experiment with different styles, especially when starting out. But there is a line between inspiration and stealing.

SELLING & LICENSING

If you end up with the opportunity to sell your images, either as prints or by licensing the rights, congrats! It is exciting that people want to purchase your work.

If the photo in question is a portrait, and you do not have a signed model release, you will have to ask yourself if it’s in your integrity to license or sell a print of that photo, knowing the person in the photo will never see any of the money you made. They might never know you did it, but that doesn’t make it right.

On the other hand, selling a print of a portrait might mean your work is displayed in someone’s home or office. Maybe it’s a conversation starter. Maybe it touches someone and encourages them to see the world or research conservation issues. Maybe this is a stretch… but maybe it’s not.

If you plan to sell your photos from the beginning, I recommend making sure you can legally (and ethically) shoot at your proposed location, and that your models, if applicable, are fully informed and have signed something confirming their understanding.
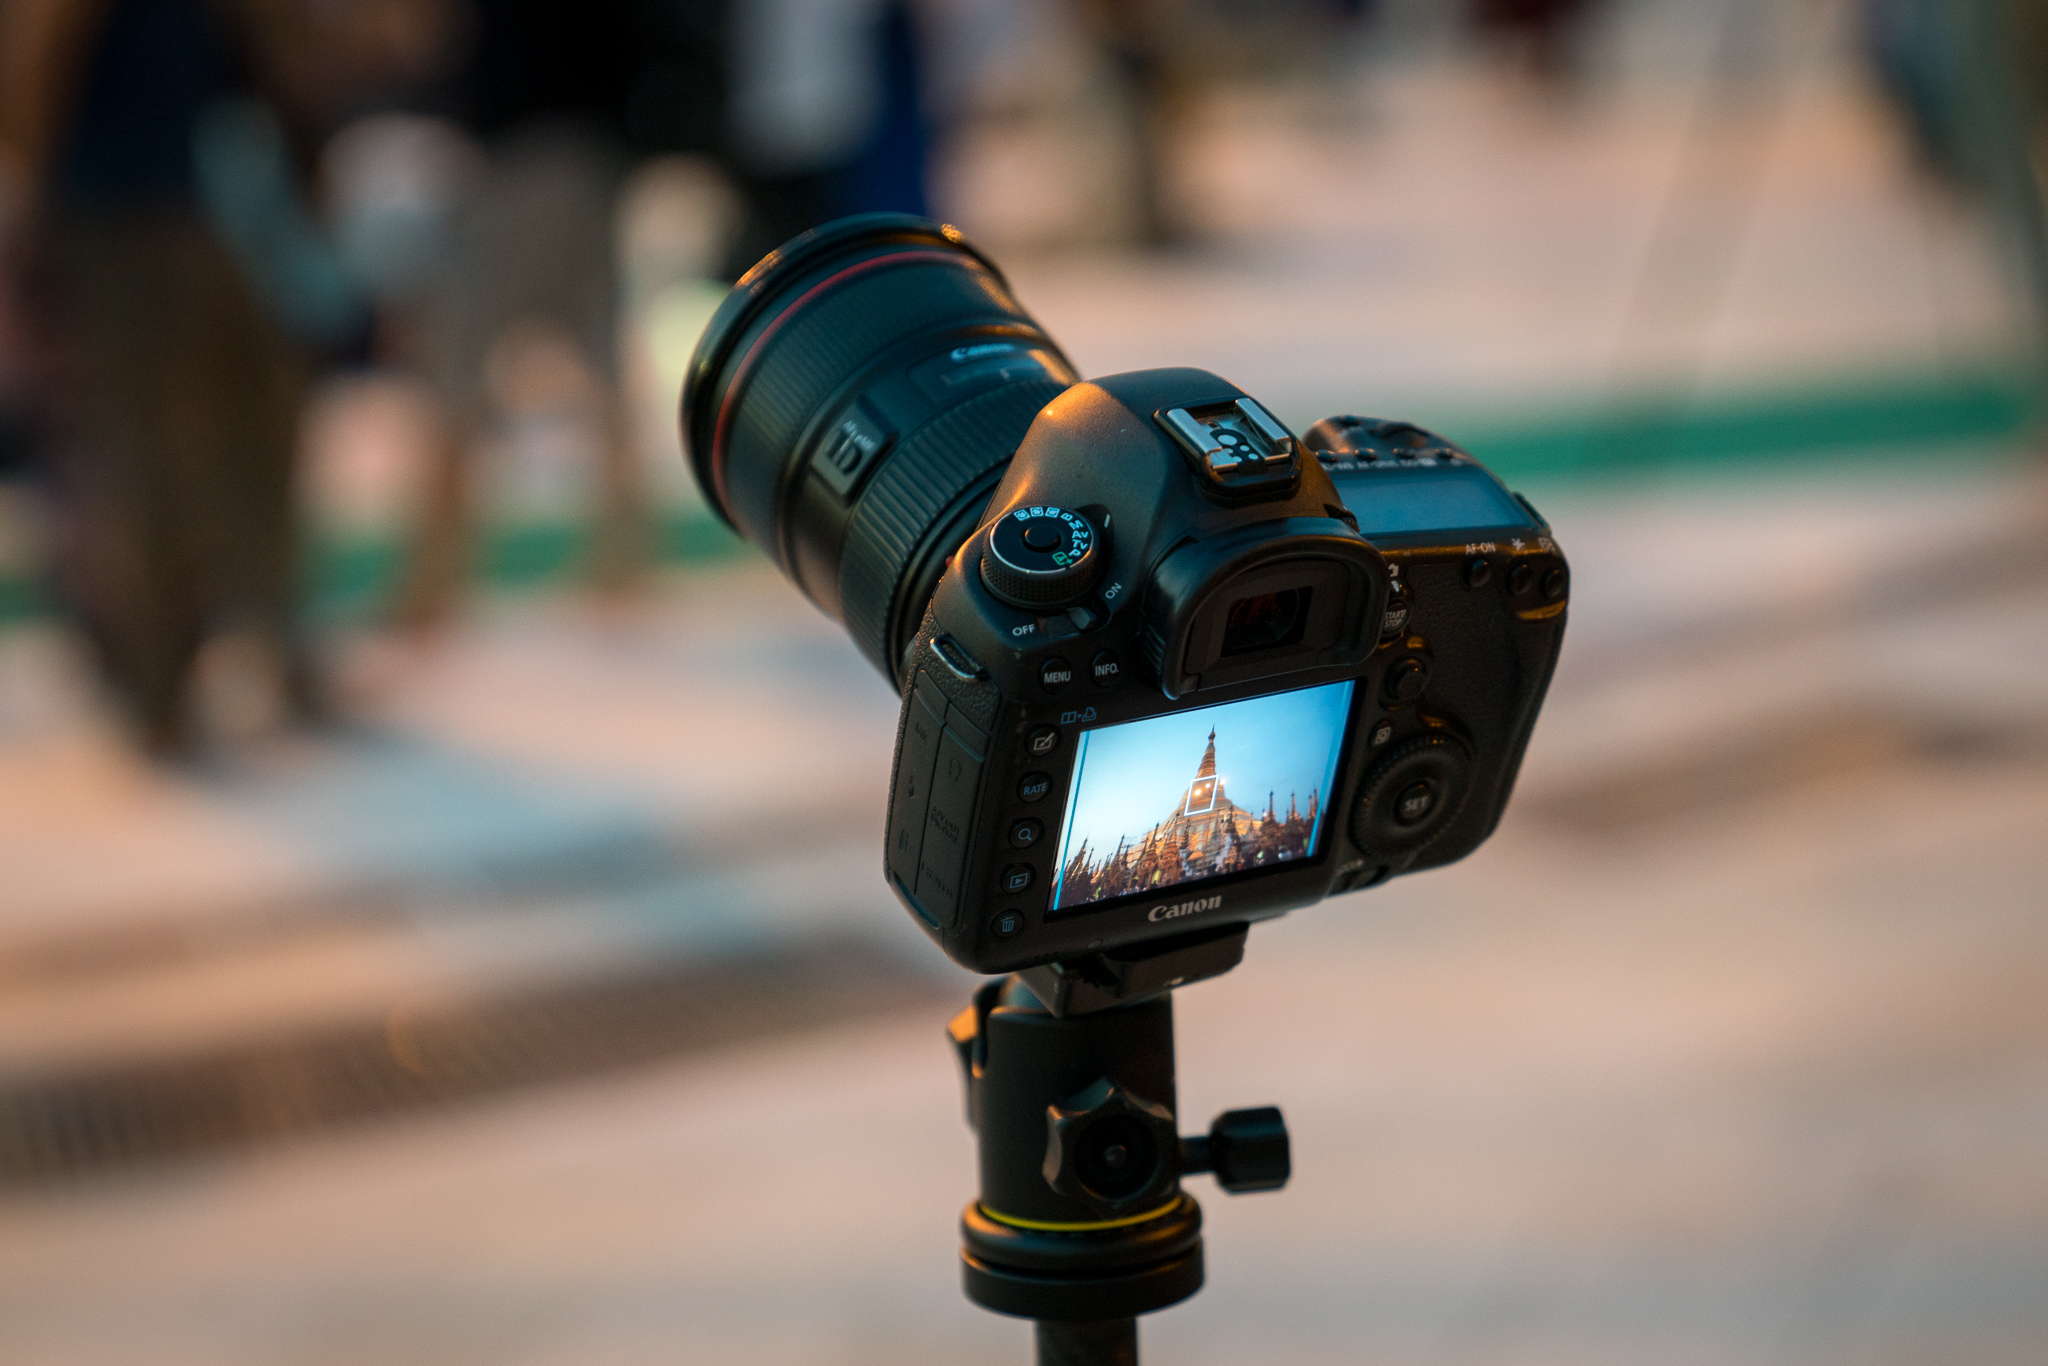

There are photographers I greatly respect with a wide range of opinions on everything I have discussed above. My opinions are not unique, but there are plenty of folks who oppose them, too. These can be incredibly controversial issues and are questions every individual photographer should ask themselves.

Any photographer can tell you that they have taken photos they should not have taken. Our stances on issues change over time. I am sure I have invaded privacy, and even exploited people for the sake of a photo, and that is both selfish and self-involved. If this happens to you and you feel as though you have overstepped a boundary, learn from it and apply that moving forward.

Photography is powerful. I have always believed that. As the photographer, you have moral and ethical responsibilities. By taking a photo, and by sharing it, you have the responsibility to preserve and communicate your subject’s dignity. Do not take this responsibility lightly. Like so much else in photography, travel photography requires being in tune with your intuition–– paying attention to what feels right and wrong, and using your intellect on top of that to question the implications of the photograph you are taking.

There is a lot to think about here, but it is all in the interest of being the best and most responsible photographers we can be. Hopefully by thinking through these topics, we can create impactful images that catalyze and promote positive change in the world.


This is a hefty topic, and I’m sure I left some things out that should be discussed. Let me know in the comments.

Feature photo of a Himba woman in Namibia in her village outside of Opuwo, taken with permission.

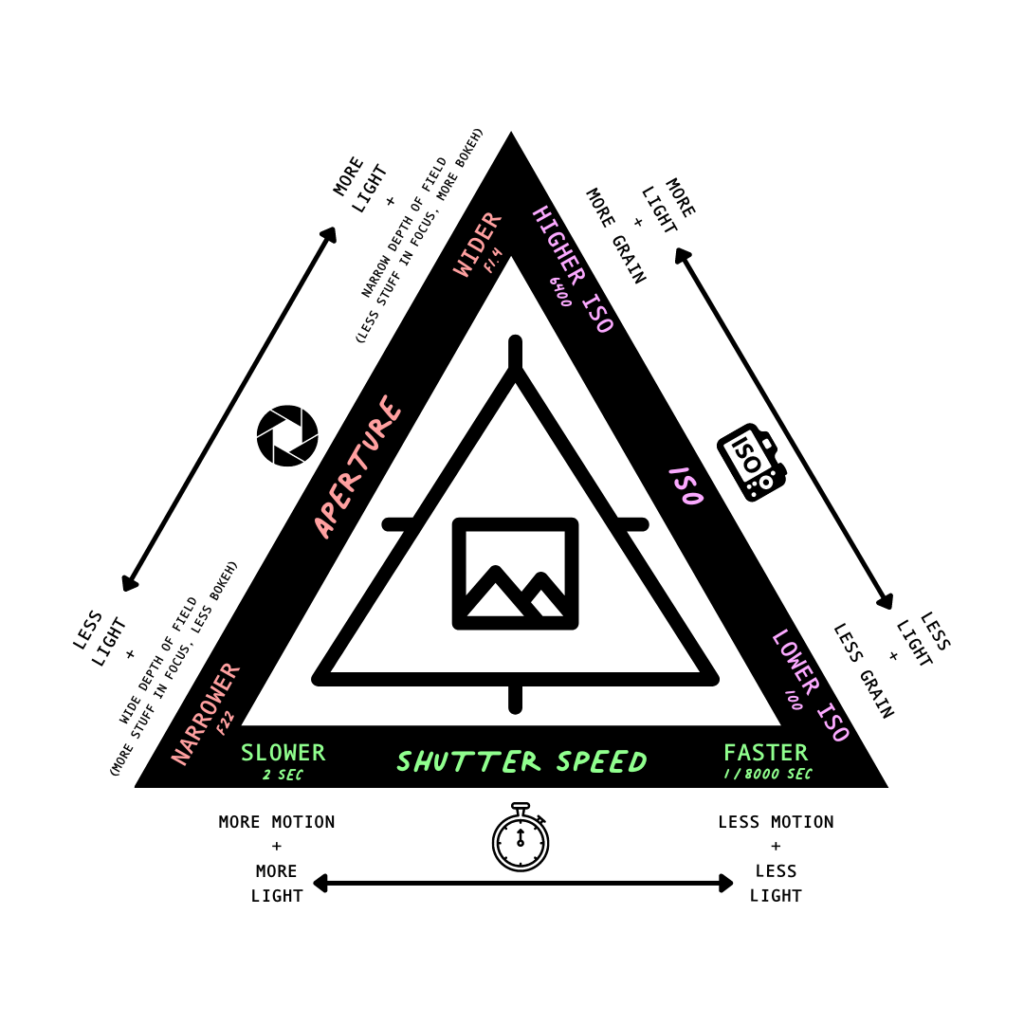
I often get questions from people who want to be where I am at in my career in travel photography. How do you get started? How do you get paid to travel?

There’s a big part of me that thinks I am completely unqualified to dish out advice on this topic. The reason why I am taking it on is because it’s a question I get very often. I’m sure this is because social media makes it seem like I’ve arrived. I don’t feel that way. I am proud of where I am, but I hope that this is the beginning of a very long journey. This is just what I know so far.

I can admit that what I do as a photographer and writer/blogger is fun and interesting, but it isn’t easy or secure. People say they want my job, and my immediate reaction most of the time is, “are you sure?!”

This is a commitment to chaos. It’s a full-time, moving, shaking, uncertain, demanding, daunting, messy life. It’s one that I chose with my full heart, so I completely understand why others might want to choose it too… but that doesn’t mean it is simple.

Though I was always interested in adventure photography, doing it as a career felt very elusive to me, and now I see why. It’s because it is an adventure you build yourself, not a trail you follow. What I hear constantly and consistently from my friends and mentors in this industry, is that there isn’t really a right way to go about things. You just have to start where you are and jump in the deep end without floaties.

My start came when I got fired from my 9-5 abruptly after working in the adventure tourism industry throughout college and for a few years afterward. I decided to put my energy behind this blog, which was previously just a hobby. I posted consistently here and on social media, regardless of whether or not people were reading. For the first couple months, I cut my expenses and lived off savings. After that, I found projects I wanted to get behind and showed why I was qualified to help with them. I compiled my best work so I could be ready to show people if I ever had their attention long enough. I interned, I assisted people I admired (I still do this), I tried to make myself valuable while I was learning. And when necessary, which was often, I house-sat, dog-sat, baby-sat. I worked at a restaurant. I picked up odd-jobs along the way.

This career doesn’t happen overnight. Those success stories do exist, but they’re rare. It takes time, consistency and investment, and you will not see the reward right away. So first, make sure you are doing it for the right reasons. If it’s for fame and recognition, it’s going to get old real fast. You’ll need a strong drive to get you through the moments of standing knee deep in frozen mud at 4am or when you’re sick in an airport far from home. The glamorous adventure of it all wears off eventually, so photography has to mean something more to you. If it does, keep reading.

Editing in a budget hotel room at 1am. Not uncommon.

Editing in a budget hotel room at 1am, charging every item possible. Not uncommon.


YOU HAVE TO START

When you don’t know how to start, ask yourself what your best guess is, and do that. You always learn more doing something than you do sitting around waiting for the answer to appear. Most of the time, you have to invent the answer yourself. So if being a photographer is what you want, start taking photos with the tools you have.

Good news: it’s not really about the gear or whatever formal photography education you may or may not have. Don’t let the idea that you need a traditional background get in your way. Many photographers have never even taken a photography class. Will it help? Absolutely. Should you take a class if you can? Sure! But taking classes will not turn you into a great photographer overnight, and neither will the most expensive gear. Only practice and experience over time will do that.

Learn your camera. Use it in as many situations as possible. Use it on every mode. If and when you get stuck, YouTube is an amazing free resource that makes it incredibly easy to find the answers to many technical questions. If you’re ready to invest some money into your knowledge base, CreativeLive is an incredible resource.

CreativeLive is an online education platform offering tons of classes–– everything from photo editing to confidence to technical aspects of business. I put together a list of my recommendations here.

Getting started can feel messy, but there will never be a perfect way to do it, so do your best with what you have

FIND YOUR UNIQUE VOICE

Figure out what makes you stand out. Do this by experimenting often. Try anything that seems mildly interesting.

Seek the places and people that inspire you, and ask yourself why that is. Tune in to your unique creative voice and follow it where it leads you. Whatever you experiment with doesn’t have to be your thing forever–– you can shoot portraits today and something else tomorrow. You can play with whatever editing techniques feel interesting. The point is to create and refine, eventually getting to a point where your work looks like yours. This is a long and frustrating process, so remember to let it be fun.

Own what you create. Your work doesn’t have to appeal to everyone, and if it does, chances are you are diluting some part of your creative voice. The point of art isn’t to be a crowd pleaser. Say no to the wrong things so you can operate at 100% for the right things.

Always run your own race, never anyone else’s. Even if my exact journey were completely replicable, I wouldn’t tell you to go do exactly what I did to get here, because it wouldn’t be the same. Find your lane and work within it.

MAKE YOURSELF KNOWN

Share your work wherever you can, online and off. Buy a domain and reserve the same name on all social media channels. If that isn’t available, figure out something else you like (I only started as @ErinOutdoors because there are thousands of other Erin Sullivan’s out there). Having a website or blog in addition to social media is always a good idea and separates you from just Instagram.

Social media is a big part of being a photographer today. Make a schedule for posting. Create and share consistently. Set short term and long term goals. Refine & move forward. Pay attention to what is working and do more of that thing.

Figure out how to self-promote. Be confident and know where and when to show/talk about your work. So much of this is about confidence. Notice what you say and how you sound. People don’t hire folks who are “trying to be a photographer.” They hire photographers.

UNDERSTAND THAT THIS IS A BUSINESS

Without business, creative ventures fall apart. Everyone wants to be a travel photographer, so this field is extremely competitive. Those who are successful not only take great photos, but they also have business smarts. They create multiple income streams. They understand what investments are necessary, and what the returns will be on each of them.

Set financial goals and break them down with where you would like that money to come from. Then get to work on each specific goal. Everybody’s breakdown is different. If I ever feel lost with regard to what to pursue next, I look at what people are already asking me for. It can be easier to fulfill a product or service when there is already demand for it.

If you want your photography business to be truly sustainable, consider thinking a few years down the road with what you’d like your ideal life to look like, realistically. Though full-time travel and moving from job to job might be super appealing right now, perhaps in ten years that’ll be really exhausting. It is also worth thinking about where you want your income to come from, and how you can maximize control over these streams.

GETTING CLIENTS

I and many other freelancers have many clients to balance. Getting your foot in the door is a strategic thing sometimes. When I was starting out with brand photography, I worked with smaller brands and start-ups on a trade basis–– they didn’t have a budget and I was looking for experience, so this was mutually beneficial. I helped friends out with their small businesses to build my portfolio. Many folks in the industry are passionately against ever doing work for free. My personal opinion is that it can be a good way to learn and build your portfolio if you are transitioning from hobbyist to professional. Just be aware of how your work is evolving, and when is the right time to stop working in exchange for product so you aren’t taking away paid work from yourself or other photographers.

Do the work you want to get hired for. For me personally, I want a brand or publication to already know who I am when they hire me. I want my body of work to speak for itself. The brands and publications many of us want to shoot for aren’t looking for newbies, and that’s a good thing. People in the industry constantly have an eye out for talent. If they start seeing your name and work over and over again, they might reach out eventually. This isn’t something you should ever count on, but is always something to work toward. It is always OK to wait to reach out to a brand/company until you feel your work is good enough.

If you aren’t shooting directly for brands or publishers, other ways to make money include stock photography, portrait/wedding photography, selling prints, and hosting workshops. Take inventory of your skill set and go from there. Build out your deliverables in a way that provides value to the client, but also maximizes your ability to do the work well.

UNCERTAINTY IS INEVITABLE

You have to be willing to be uncomfortable. This isn’t a job for the faint of heart. It’s really easy to romanticize it when you’re not living it–– but it takes guts and resilience to do this.

If you ask different photographers and writers what their paths were like, I’m sure you will get a wide range of stories and answers, but there are consistent themes around uncertainty, creativity and perseverance. This lifestyle is ripe with unknowns, so if you don’t like those, this career might not be for you. I think that goes for any entrepreneurial venture, but especially this one given all of the dynamic aspects that come with frequent travel.

BE A GOOD PERSON

This is an industry that requires interacting with other people and working on a team. Things go wrong all the time, so you have to be flexible. Being a good person is something you should do for obvious reasons… but it also impacts your business. This industry is small, and people talk. If you are a royal pain in the ass, most of your peers will hear about it. If you gossip about someone in the industry, they will find out about it. Alternatively, if you are fun to be around, helpful, and genuinely interested and supportive of other people’s work, working in this industry is not only enjoyable but it becomes a team effort. This job is way more fun when you have friends that you truly love working alongside–– and when you can genuinely celebrate each other’s successes instead of being bitter or jealous of who got the job.

There are jobs I have gotten and bids I have won because I am extremely flexible and understanding with my clients. I have been assigned to trips because it’s known that I am well-experienced with travel and able to handle dynamic situations. If you are generally a positive person with a good outlook on life, any project will be much more enjoyable than if you are cynical or negative.

GO ON ADVENTURES

Perhaps this is obvious, but if you want to document travel, then you have to travel. If you want to shoot in the outdoors, you have to go outdoors.

There is nothing wrong with you if people aren’t throwing free luxury trips at you from day one. Maybe that is something you will work toward. For now, maybe it looks like planning weekend trips with friends, or getting up in the middle of the night to experiment with astrophotography or long exposures in your city.

There is no right or wrong way to do it, so find inspiration and go.

_DSC4471


Remember that you are not a failure if it doesn’t work right away. I made plenty of mistakes and I am 100% sure I still will.

My personal journey started with working as a wilderness guide and adventure trip leader. I always used photography as a way to capture and share memories from my trips. It wasn’t until the last few years when I started pursuing it professionally–– and it has been full of trade-offs and sacrifices in the name of my craft. There is no way in hell that this is an easy path, and I doubt it ever will be. But I know I am here on this planet to compulsively tell stories. So I do.

Life is the biggest scavenger hunt you will ever go on. You will get clues and you will follow them. They’ll come in the form of teachers, opportunities, rejections, successes, failures, challenges, and anything else you decide to learn from. You will take what you can from each thing and add it to what you already know. You’ll re-work your knowledge, you’ll practice it and then you’ll change it again.

When answering the question of how to become an adventure photographer, I am reminded that I am still figuring out the answer to it myself. But this is what I choose. Actively. Every day.

And in fact, it is the choosing in itself that might be the most important thing we do.

Ending with some words from photographer and filmmaker Andy Best:

Grateful to be back in the Pacific Northwest and thankful my work allows me to travel the globe. Many ask, how? I try to answer as many as I can, I promise you that. Some assume that I must have an inheritance or that I have a golden key. See I feel that @Instagram over the years has created this illusion that one can become a filmmaker or photographer overnight without any effort. Or by following in the steps of others may unlock some sort of fortune or even fame. To those I say good luck, because behind the scenes of this craft is a very uncomfortable world of work, a serious grind, and a lifetime of dedication. And I do mean lifetime. Do not be fooled into thinking that the windows shared on this platform come easy. To that I also say, what do you desire personally on your journey? Are YOU satisfied? Can you rest well knowing the story you’re writing? If you really desire to replicate my journey, prepare yourself for failure, prepare yourself to be comfortable with the uncomfortable, and prepare yourself to give up everything as nothing comes without very serious sacrifices. Only then will you find YOUR golden key. Meanwhile, I’m stoked to be headed home from many nights away from my little family. #wearestillwild #lovethegrind
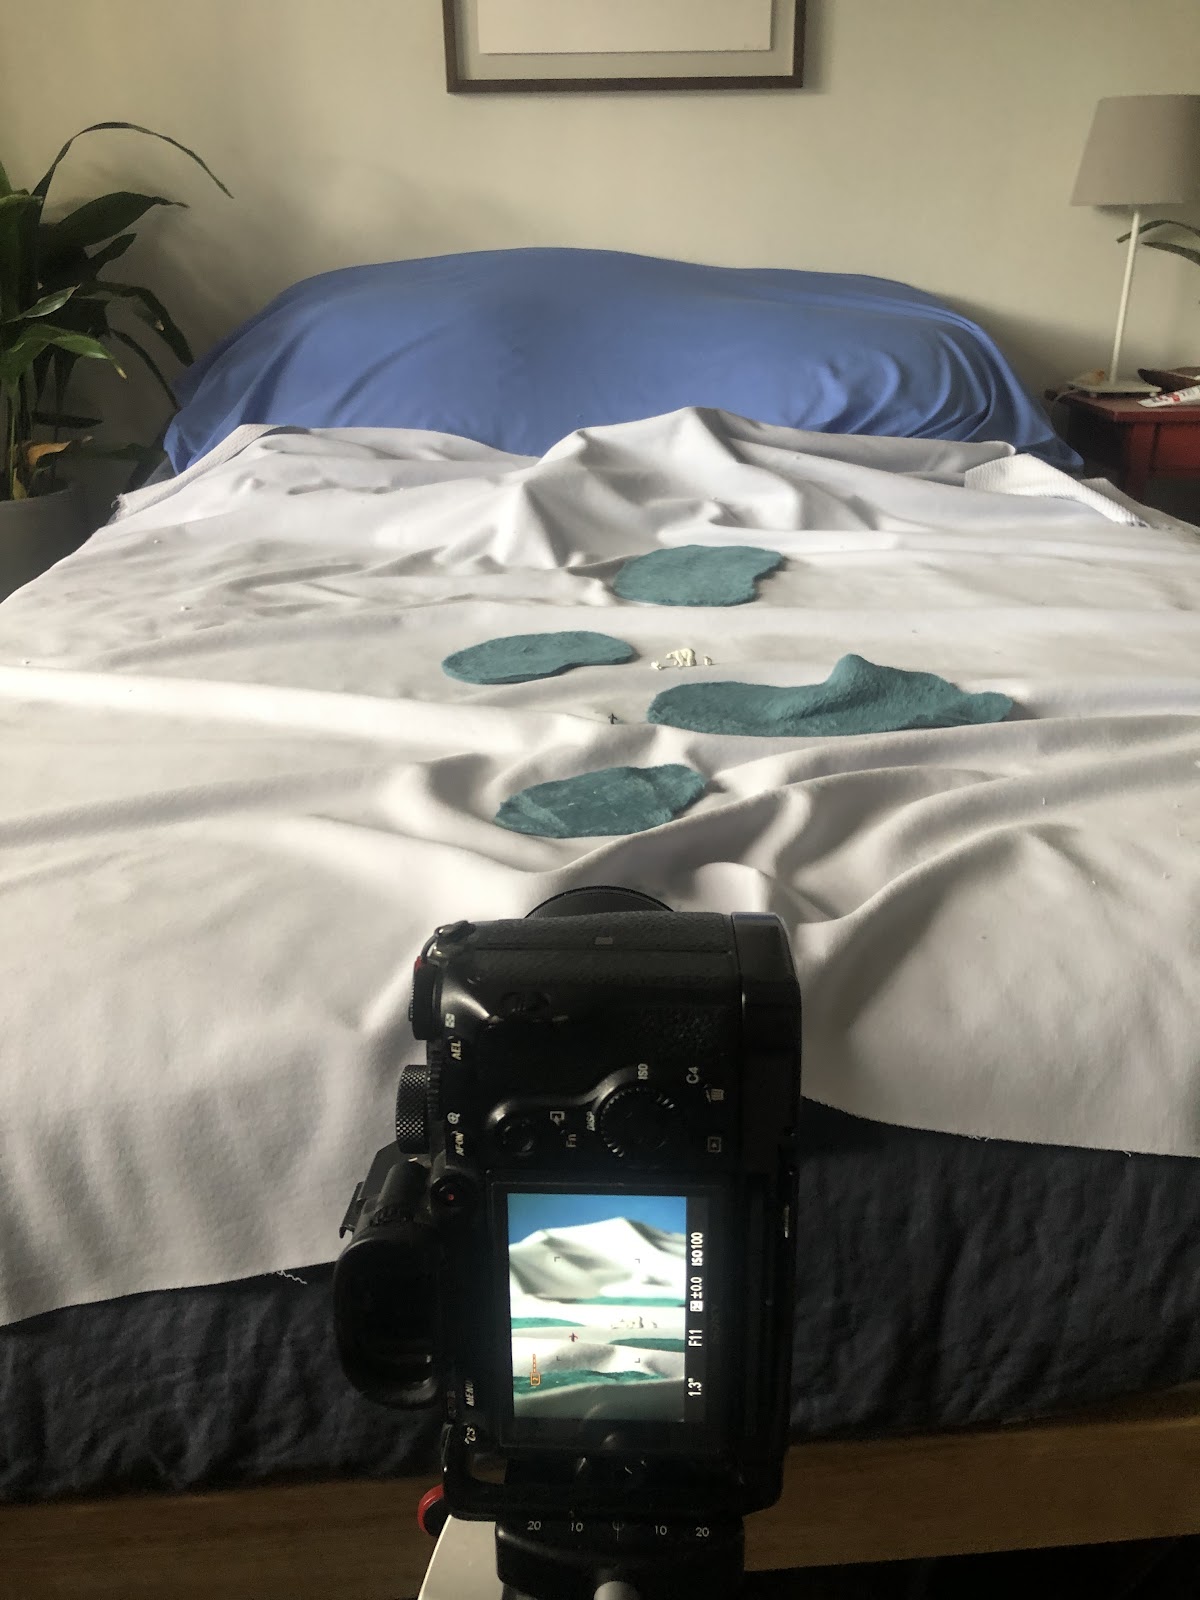
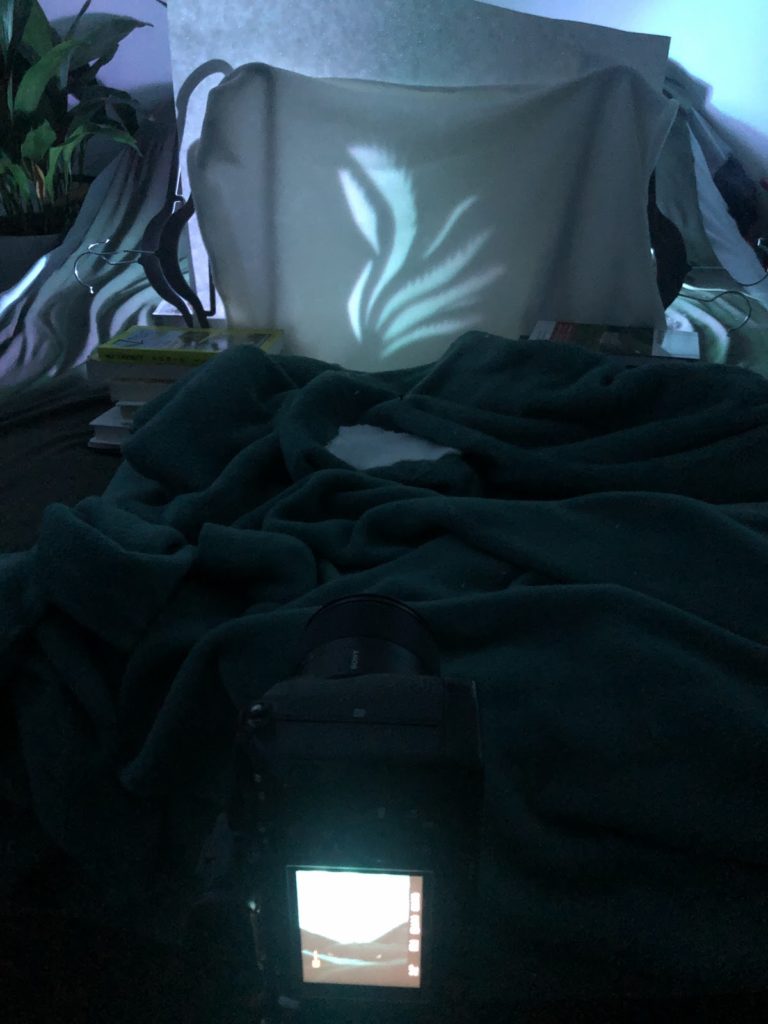
A post shared by Andy Best (@andy_best) on

Similar posts on the blog for you to check out:


Feature photo by Renee Hahnel. Third photo by Colby Brown.