


 copy")

Disclaimer: This post contains affiliate links. That means that if you click through and make a purchase, I may make a commission at no cost to you. Thanks for reading.
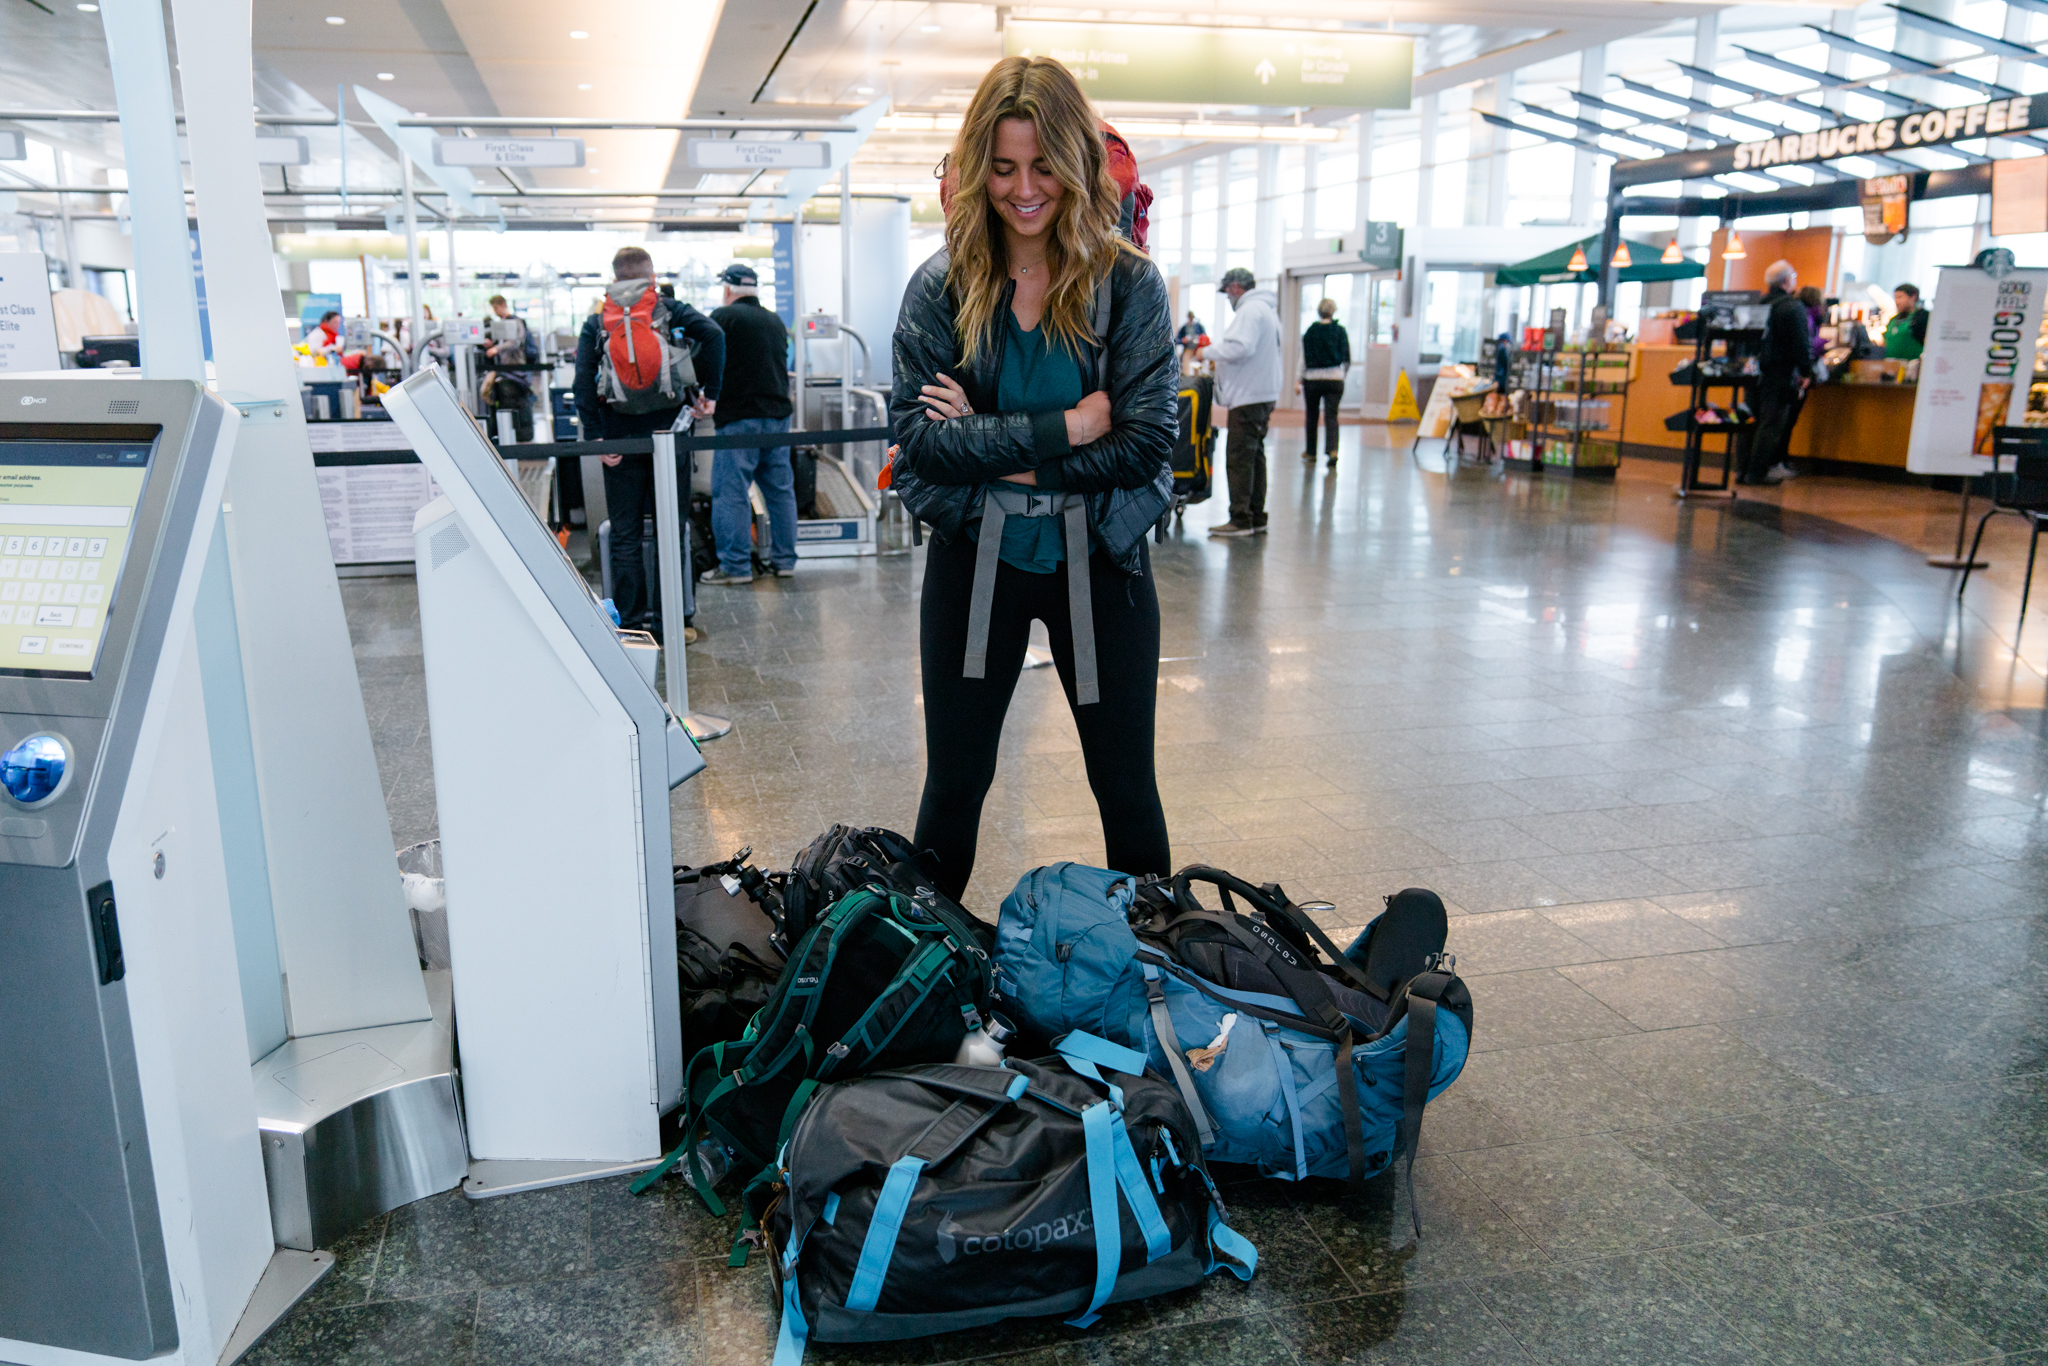
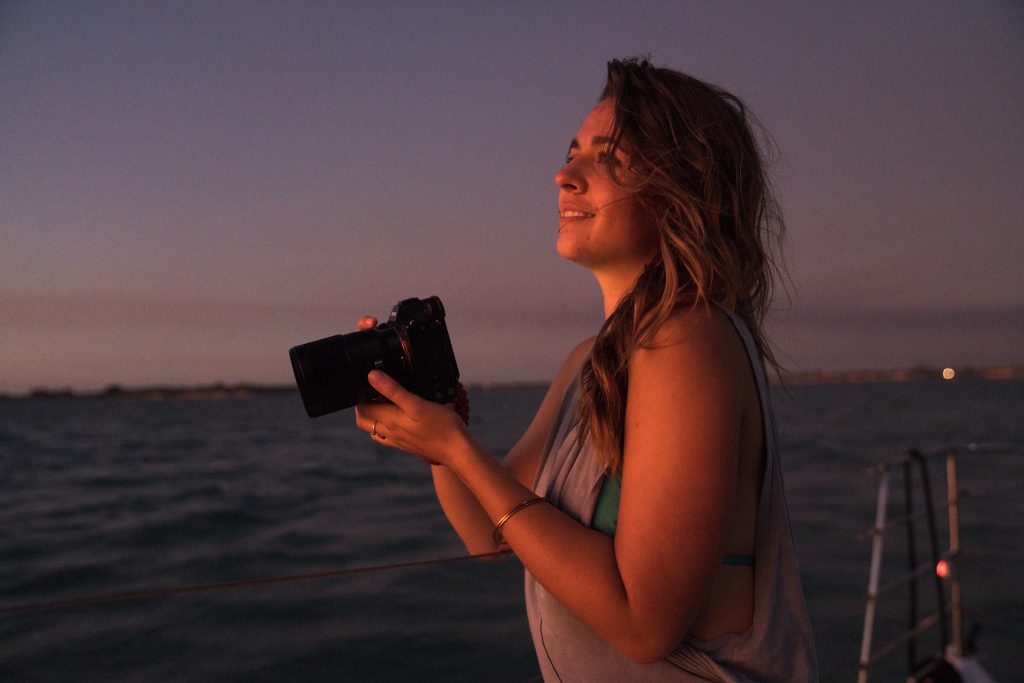
Travel is a big part of my life (and my career), but I didn’t always travel with a camera or lenses. Packing has always been something I enjoy trying to optimize, but adding camera gear into the mix can add some more challenge. How do you pack your camera for travel? How do you know if it’s safe, or if it’s accessible enough? What do you have to worry about when it comes to security?
In this post, I’m sharing my most practical tips for packing your camera for travel. There are many ways to do it. Let’s jump in!
CHOOSING WHAT TO BRING
There are so many great lightweight cameras on the market now, it can be hard to know what to choose! I shoot on exclusively Sony cameras, so that is what I am most familiar with and will be recommending here.
First, you need to consider what kind of trip you are going on. Are you heading on a trip to a resort and staying there for a few weeks? Going on safari? Are you backpacking around Europe for a few weeks, or even months? Or maybe you’re headed into the wilderness? There are so many factors that will help you decide what kind of camera (and what lenses!) will be best for you on your trip.
Weight and size need to be considered, especially if you know you will be carrying your gear on your back (it adds up!). I started shooting with Sony because mirrorless cameras are smaller and weigh less than a traditional DSLR. Sony has been in the mirrorless game longer than other camera manufacturers, and I trust them for the best gear.
When it comes to lenses, consider what you will be shooting. Since weight is a factor, I would recommend bringing zoom lenses, unless you know you are wanting to bring a prime (I sometimes do). For many people, a 16-35mm or 24-70mm lens is all you need. These lenses are wide enough to shoot city scenes and sweeping mountain vistas, are great for the *classic* self-timer You-Looking-At-A-Thing photo. Additionally, they offer a bit of zoom in case you want to get closer to your subject.
Here are a few of my picks:
Best just-the-basics budget combo for travel: Sony a6000 with 16-50mm Lens (kit lens)
$548 • SHOP ON AMAZON • SHOP AT B&H
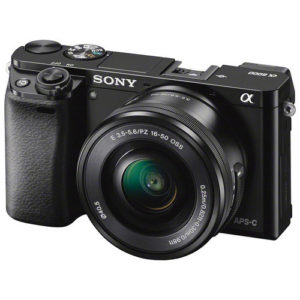
This is the starter camera that I recommend. It’s excellent as a first “real” camera for those wanting to experiment and gain a better understanding on just what all those numbers DO, exactly. This lens is equivalent to a 24-70mm, which is a great range to start out with. This combination weighs a pound. As in, one pound. So… you can definitely fit this in your bag!
Best all-around crop sensor combo for travel: Sony a6500 with 18-105mm Lens
$1,796 • SHOP ON AMAZON • SHOP AT B&H
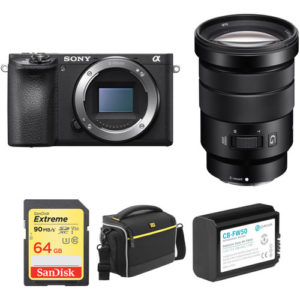
This combination is a step up–– with the a6500, you get updates like built-in image stabilization, a touch screen, more focus points, a microphone port and better viewfinder resolution. The lens gives you more range, so you will have the opportunity for more zoomed-in shots. This camera + lens weighs 1.94lbs, still great for traveling light.
Best all-around full-frame combo for travel: Sony a7III with 24-105mm Lens
$3,296 • SHOP ON AMAZON (CAMERA / LENS) • SHOP AT B&H
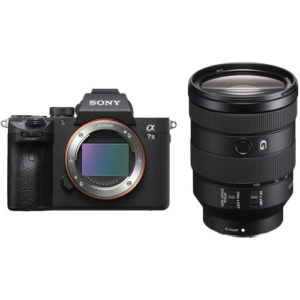
I love this combination for travel! The Sony a7III is one of my favorite pieces of gear right now. It is a powerful camera at an excellent price, and paired with the 24-105mm f4 G-master lens, you have a seriously incredible combination. I can’t recommend a better combo for travelers looking to step up their photo game. The total weight here is 2.89lbs, about half of what a DSLR with a comparable lens would weigh.
If you are planning to take more than one lens, think about what you will be shooting most of the time. I often travel with a 24-70mm f2.8 and a 70-200mm f2.8 because this gives me a wide range of options for focal length. If I know I am going into the backcountry, or if I am wanting to shoot big city scenes or mountains, I will swap out the 24-70mm for something wider, usually my 16-35mm f2.8. And if I know I will be shooting portraits, I will bring a prime lens, my favorite being the Sony 85mm f1.4. Overall, this comes down to your personal preference and the subject matter you will be photographing.
Note for safari: A safari (or any trip where photographing wildlife is a priority) requires some unique lenses, and I’ll do a separate blog post on that. You need to be looking at telephoto lenses starting at 200mm, but preferably more like 400-600mm.
HOW TO PACK
Now that you’ve chosen what you are going to bring, you have to figure out how to pack it safely and efficiently. Here are some options…
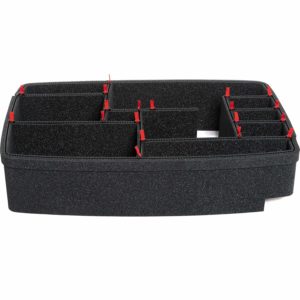
USE AN INTERNAL CAMERA UNIT OR CAMERA CASE
An Internal Camera Unit is essentially a padded case for your camera/lens. It allows you to protect your camera gear without having to get an entirely different bag or backpack. These come in different sizes from different manufacturers.
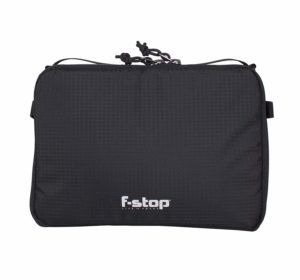
Pictured: f-stop – Shallow Small ICU, $89 on Amazon. Think Tank Photo Digital Holster, $89.75 at B&H.
This is how I carry my camera gear when I go wilderness backpacking. I keep my camera and lenses accessible at the top of my pack, unless I am wanting to shoot while walking.
The downside of using an ICU or case is that this creates one more layer you have to unzip to get to your camera, which can be annoying for some. However, it also creates a barrier against pick-pockets (unless they steal the whole thing… in which case… insurance, my friends). It’s up to you if you think it’d be annoying to have another layer of protection to get to your camera or not.
I have also traveled with photographers who literally store their cameras and lenses in a sock or a beanie at the top of their daypack. I am personally way too clumsy for that, but hey, if it works for some, it’s probably worth mentioning!
Overall, using an ICU or a camera case allows you to stash your camera in whatever bag you are currently comfortable using, whether that is a backpack, an expedition pack, or a purse. It’s a convenient way to make sure your camera is protected and safe.
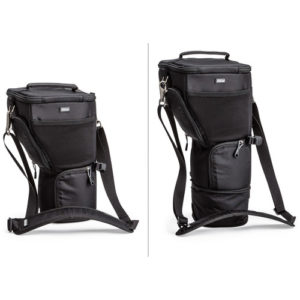
USE A CAMERA BACKPACK
This is what I do on most of my adventure travel style trips. Since I know I will be bringing my camera (and multiple lenses) with me on most days during my trips, I choose to invest in camera backpacks that I love. I like to have a backpack that also fits a layer, my laptop, and a book or journal.
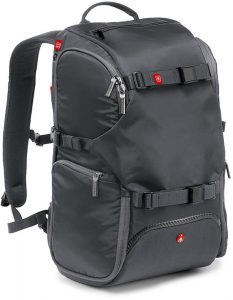
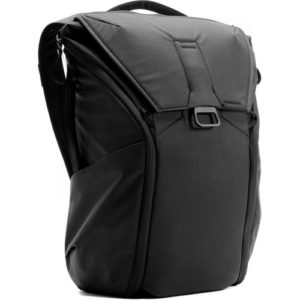
My two most-used backpacks: Manfrotto Advanced Travel Backpack, $99.99 at B&H. Peak Design Everyday Backpack 20L, $259.95 at B&H.
Traveling with a camera backpack allows you to prioritize your camera gear and makes it super accessible to you, since most of these bags have accessibility in mind. When I travel with a camera bag, I know that my gear is safe because the product is made specifically for it.
USE A SHOULDER BAG OR MESSENGER BAG
There are some really great shoulder & messenger bags out there made specifically for camera gear. This option works especially well if you only plan to travel with one camera/lens and would like something a bit lighter or just more discreet.
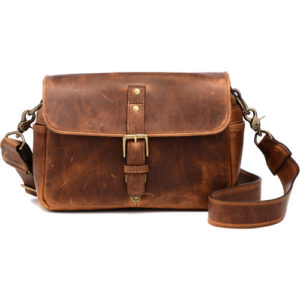
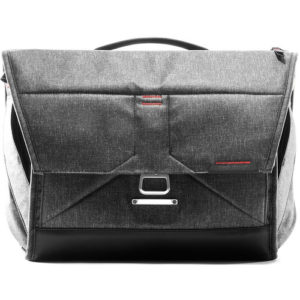
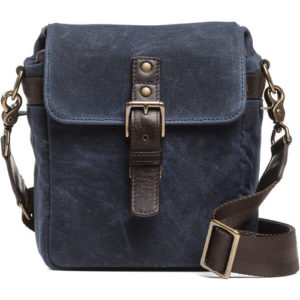
Pictured: ONA Bowery Camera Bag, $249 at B&H. Peak Design Everyday Messenger, $249.95 at B&H. ONA Bond Street Waxed Canvas Camera Bag, $139 at B&H.
These bags are great for easy access, as you’re carrying them on your side instead of your back. They’re easier to keep an eye on if you happen to be on a busy train or out sightseeing, anywhere pickpockets are likely to target tourists. Lastly, you can usually use a bag this size as a “personal item” on flights and they easily fit under the seat in front of you (be sure to check the airline, especially low-cost carriers!).
TRAVEL WITH A PELICAN CASE
If you are traveling with a significant amount of gear, it can be worth it to travel with a pelican case as your carry-on. This means you don’t have to carry all that heavy camera gear on your back, and ensures the gear’s safety, as these cases are very padded and you can lock them. I bring a Pelican 1510 case with me when I know I will need multiple camera bodies and lenses.
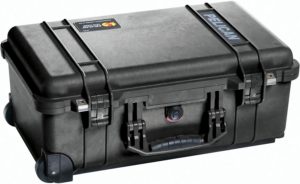
Pictured: Pelican 1510 case, $169.95 at B&H. TrekPak Divider Kit for Pelican 1510 Case, $115 at B&H.
The standard case typically comes with foam that you can remove according to the size and shape of the items you would like to carry. Alternatively, you can purchase a set of dividers to maximize the space in your case.
Though this is arguably the most secure way to travel with camera gear, it is not the most practical for international trips, unless you are specifically on a photography trip! That said, I like using these cases on road trips to keep my gear secure and free of the dust/debris that might sneak in if they were in my backpack all the time.
CAMERA STRAPS & ACCESSORIES
Traveling with the right camera accessories can make a difference! I am a fan of Peak Design’s camera straps because their anchor system makes it easy to detach the straps from my camera bodies for storage or flights. Here is a list of the accessories I bring with me for most trips:
- Peak Design SlideLITE Camera Strap
- Peak Design Leash Camera Strap
- ZEISS Lens Wipes (typically just a few, but depends where I’m going)
- Giottos Rocket Blaster Dust-Removal Tool
- Lens Cleaning Cloth
- LaCie 4TB Rugged Mini Portable Hard Drive
WHAT ABOUT A TRIPOD?
If you are wanting to take photos of yourself while traveling solo, or if you intend on taking photos at night, it’s a good idea to travel with a small tripod. I would look into something that weighs 4 pounds or less. Personally I prefer to shoot hand-held, and will only pack a tripod if I know I’m going on a trip where I will use it!
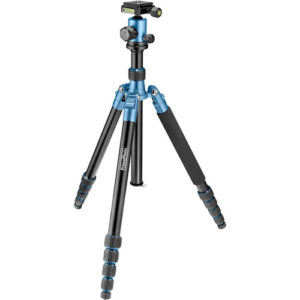
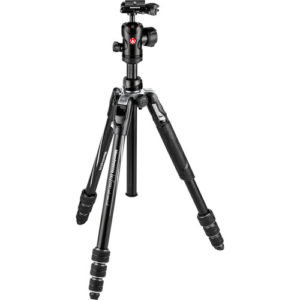
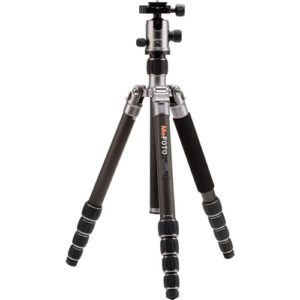
Left to right: Prima Photo Big Travel Tripod, $149.95 at B&H. Manfrotto Befree Advanced Tripod, $189.88 at B&H. MeFOTO GlobeTrotter Carbon Fiber Tripod, $299 at B&H.
PACKING CHECKLIST
- Back up your stuff! Travel with a hard drive or plan to back up important files to the Cloud.
- Pack your camera in your carry-on bag ONLY–– never checked, if you can help it! If you have to check your camera, make sure it’s insured.
- Pack batteries in your carry-on; lithium batteries are not allowed in check-in baggage.
- Get travel insurance! Travel insurance has saved me thousands of dollars over the years. I recommend World Nomads or Allianz. Not all plans will cover property damage or theft, so go over your exact plan with your insurance provider. You can also insure specific products from home. If you make money from your photography gear, you can (and should!) get your stuff insured as a business to protect yourself from loss or theft.
- Pack lens wipes and/or a rocket blower for dust (links above).
- Don’t forget your charger and extra batteries!
- If you are USA-based, look into getting TSA Pre-check so you don’t have to take out all your gear when going through airport security on domestic flights.
Travel offers so many opportunities for photography! I hope this post gave you some more insight and ideas on how to pack your camera for the type of travel that you do. If you pack in a way I haven’t covered here, or have any tips to share, I’d love for you to comment with your suggestion so everyone can see. I’ll wrap this up by saying I hope you use your adventures to get creative and photograph some of the moments from your trip. There are so many opportunities out there!
Was this helpful? Have feedback for me? Let me know in the comments, or shoot me an email at info@erinoutdoors.com. Photos taken by Renee Hahnel & Stevin Tuchiwsky.
Please ignore this text box - Recoleta Font


Geometry Dash is not only a fun game, but also a great brain workout.
There’s something comforting about gently nesting your camera between rolled-up socks in your carry-on—it’s like tucking a favorite memory into a cozy blanket. I’ve found that a padded lens pouch, a ziplock bag for batteries, and a little microfiber cloth tucked in between lenses make all the difference—especially when you’re charging around beautiful new cities. Funny moment: I was organizing gear before a trip while awaiting an amazon flex delivery; realizing that same handiness and careful prep applies both to deliveries and keeping gear ready to capture life’s little wonders was a small, human-sized revelation. Happy shooting—and safe travels!