This conversion is specific to my 2009 Honda CR-V, but principles can be applied to any vehicle.
I want a van. I’m about to head out on a road trip for the next six weeks, and having a van would be perfect. But I don’t have a van. I have an SUV. A Honda CR-V, to be exact.
I really like the idea of being able to have a comfortable bed pretty much anywhere, so I decided to build one in the back of my car. Here is a step-by-step guide to turning your SUV into a camper.
STEP 1
Do you need to take out the back seats? If your back seats fold down flat, skip this step.
If you’re like me, you’ll first watch some YouTube videos on how to remove the back seats from your car. Procure a socket wrench or other tools you might need.
Clean your car. Take everything out. All of the things to the garage! Take the seats out of your car and put them somewhere. The only tool I needed was a socket wrench, and taking out the seats took me all of 15 minutes. Have a victory beer. Or don’t, but I did.
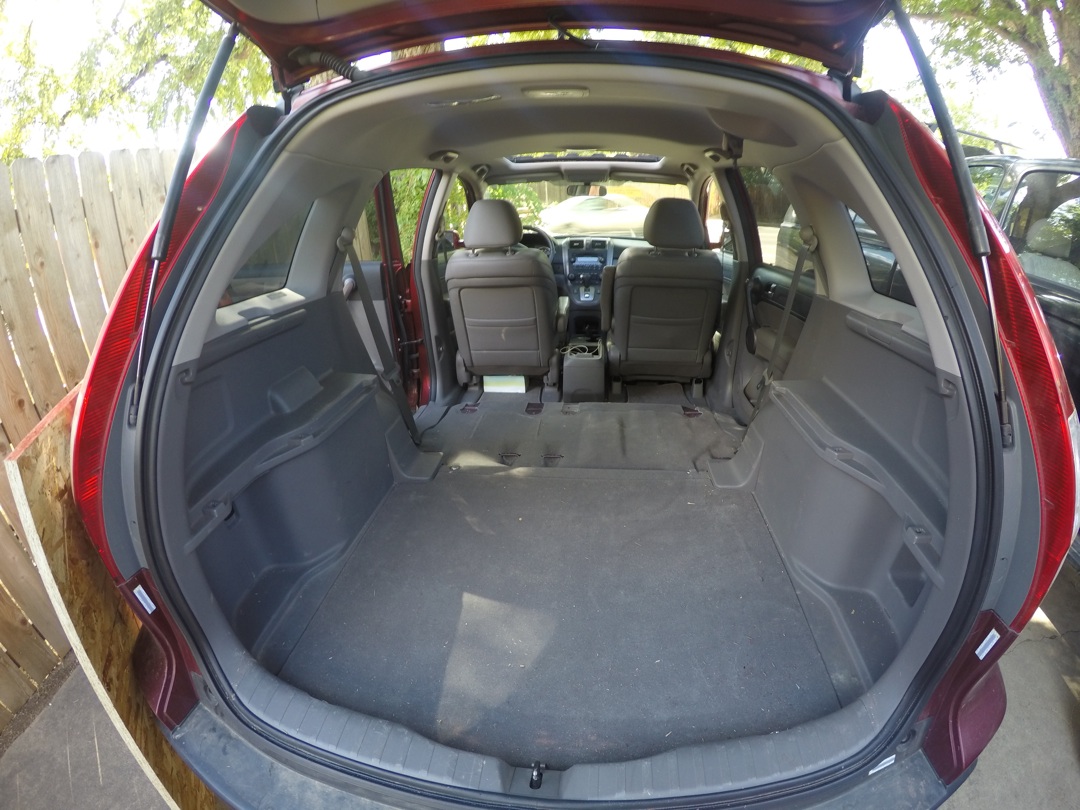
No seats no problem!
STEP 2
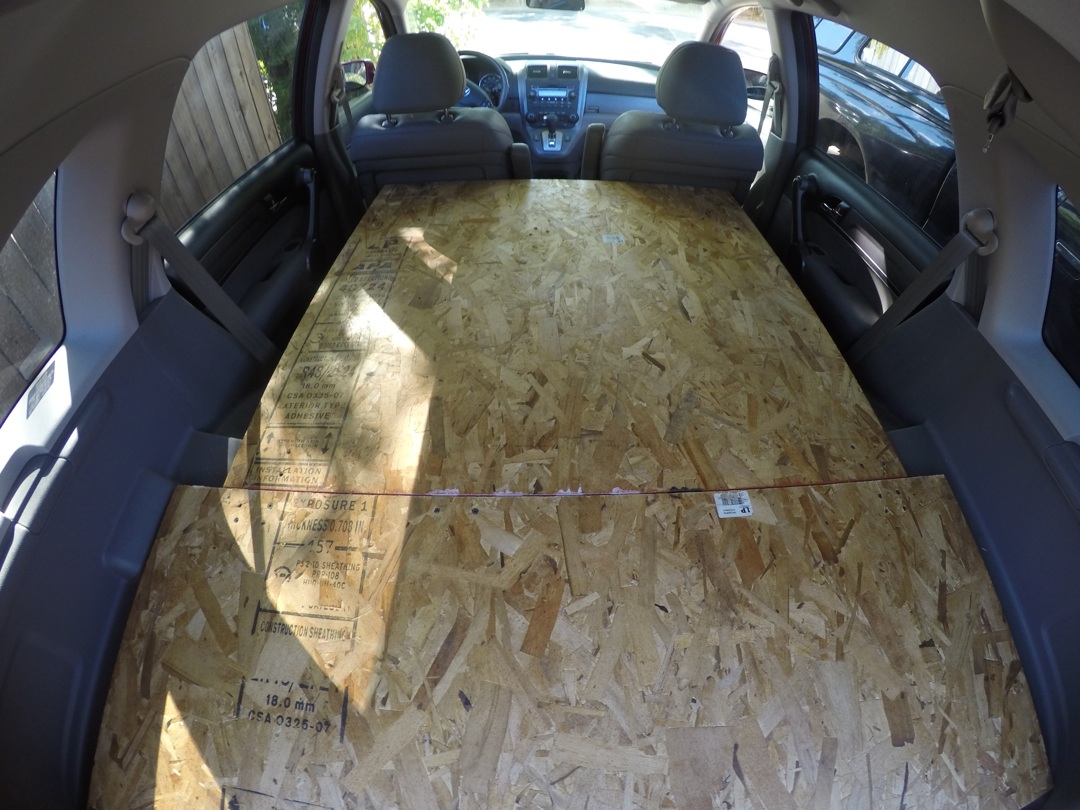
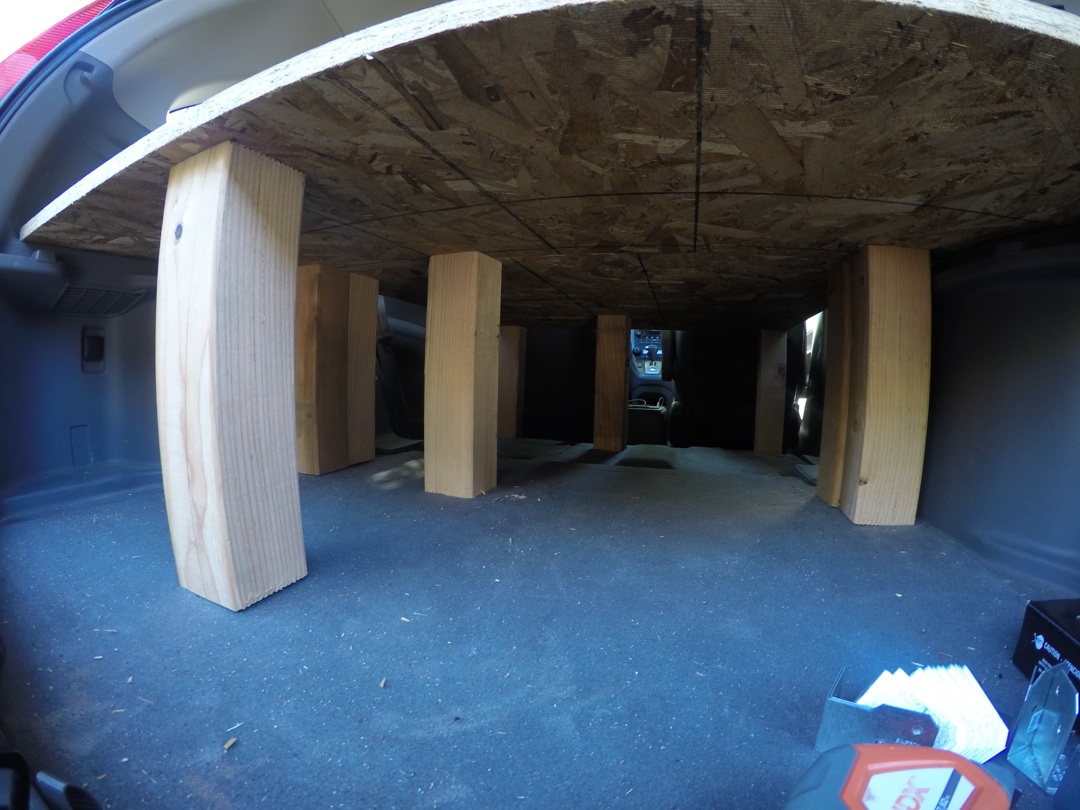
Time to start thinking about your design. My design is a plywood platform in three parts, using 4x4s for legs. I placed the middle legs slightly off center to accommodate a storage bin. Because the floor of my car is uneven, measuring was a bit more complicated than if your car’s floor is completely flat.
Things to consider: How big do you want it to be? Do you want to be able to remove the platform easily? How will you be storing gear? Do you want to access storage from the back and/or sides?
Measure out the dimensions for the wood you are going to need. Having a friend help you with this comes in really handy. Go to Home Depot or equivalent with the measurements and have them cut it. Buy screws if you don’t have them. I used 3/4″ drywall screws.
STEP 3
Assemble the platform.
For me, it was definitely crucial to have someone help get everything in the car (thank you Henry!). We put all the pieces in the car (propped up) and tried to visualize what it would look like nailed together. It became clear that it made sense to actually put everything together inside the car, rather than taking it out and trying to put the pieces back in once assembled.
Platform assembled! Victory. Next, I put another piece of plywood near the front seats, attached with a hinge. This is an easy way to extend the length of your platform when you move the front seats forward. When you want to drive, just flip it back and move the seats.
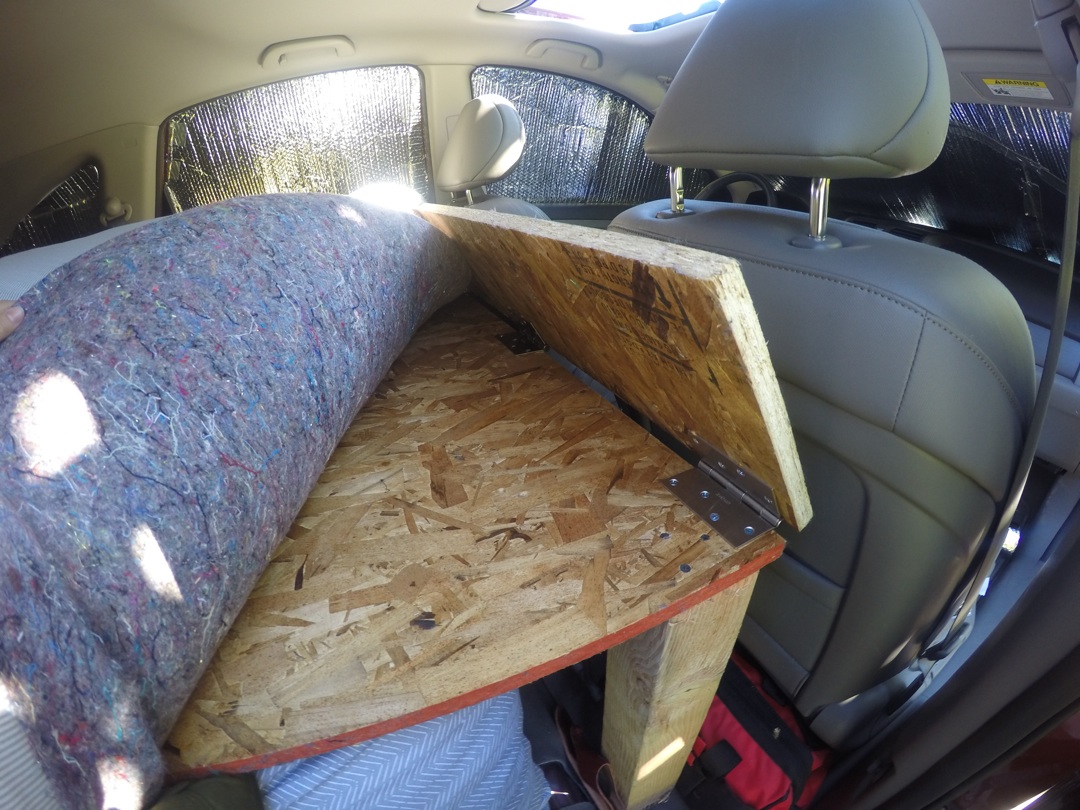
how the hinge works
STEP 4
Before you go any further, vacuum any sawdust and crap out of your car. Next, you can start planning storage and bedding.
I first put a mover’s blanket down on the platform. Alternatively, you can buy carpet and even staple it to the plywood. I wasn’t feeling picky about it.
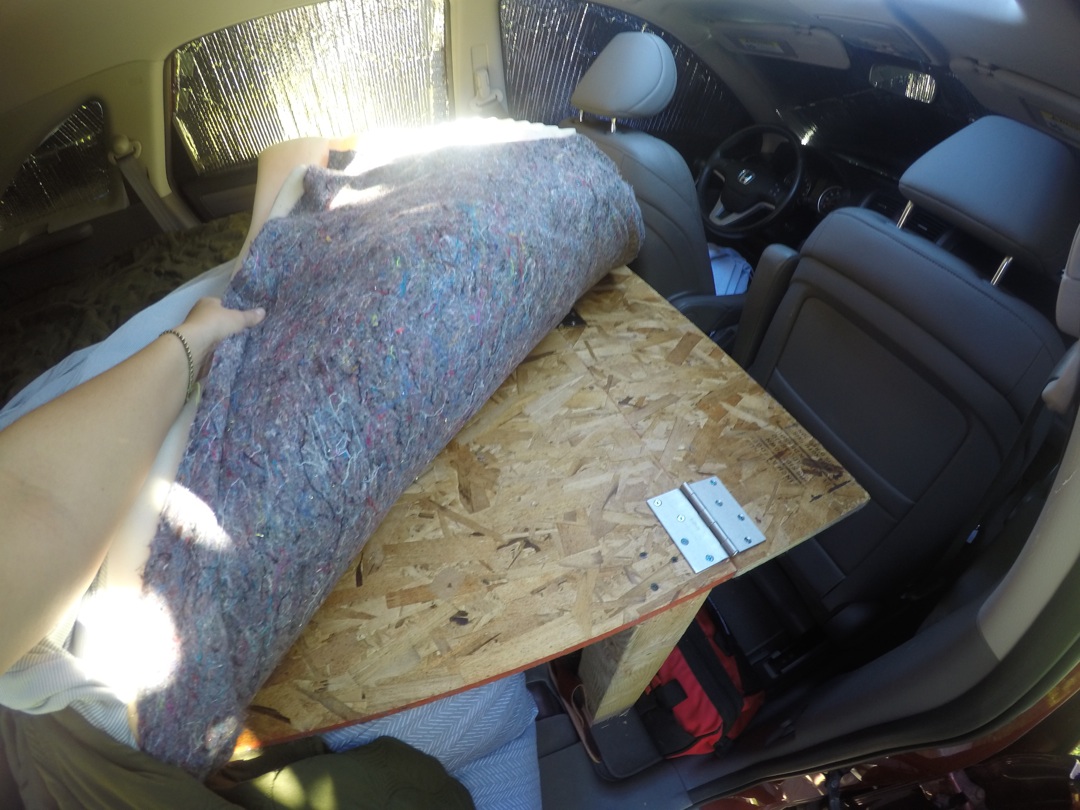
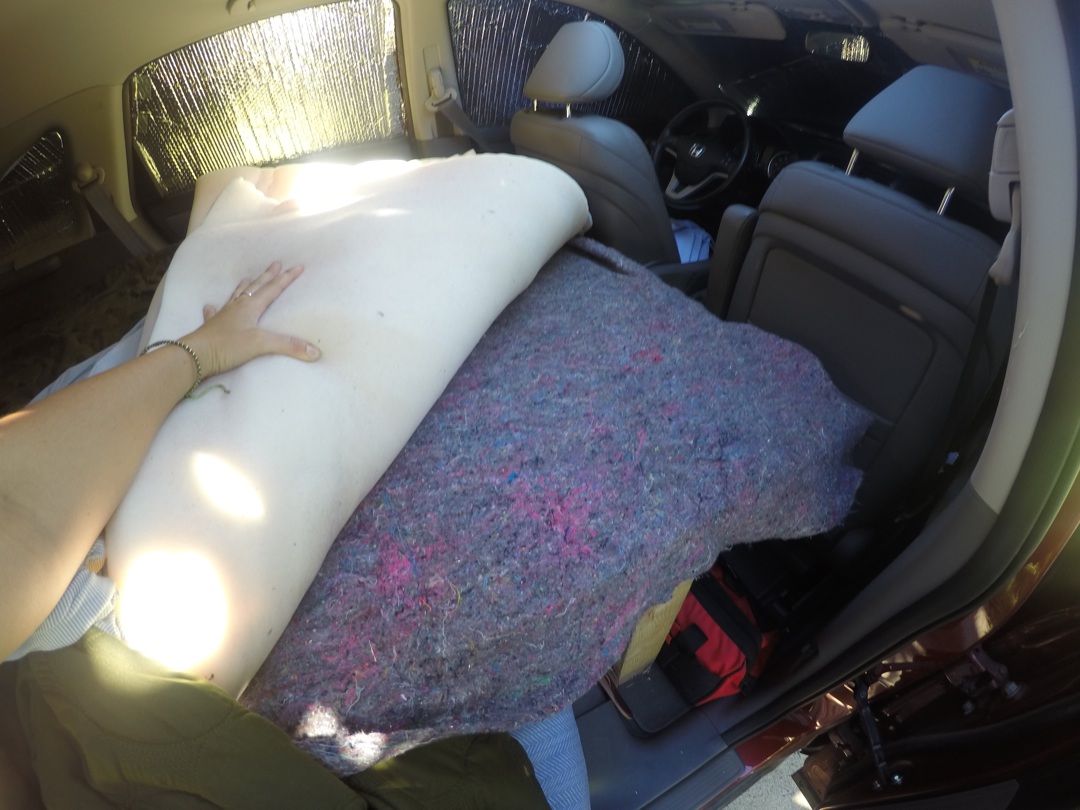
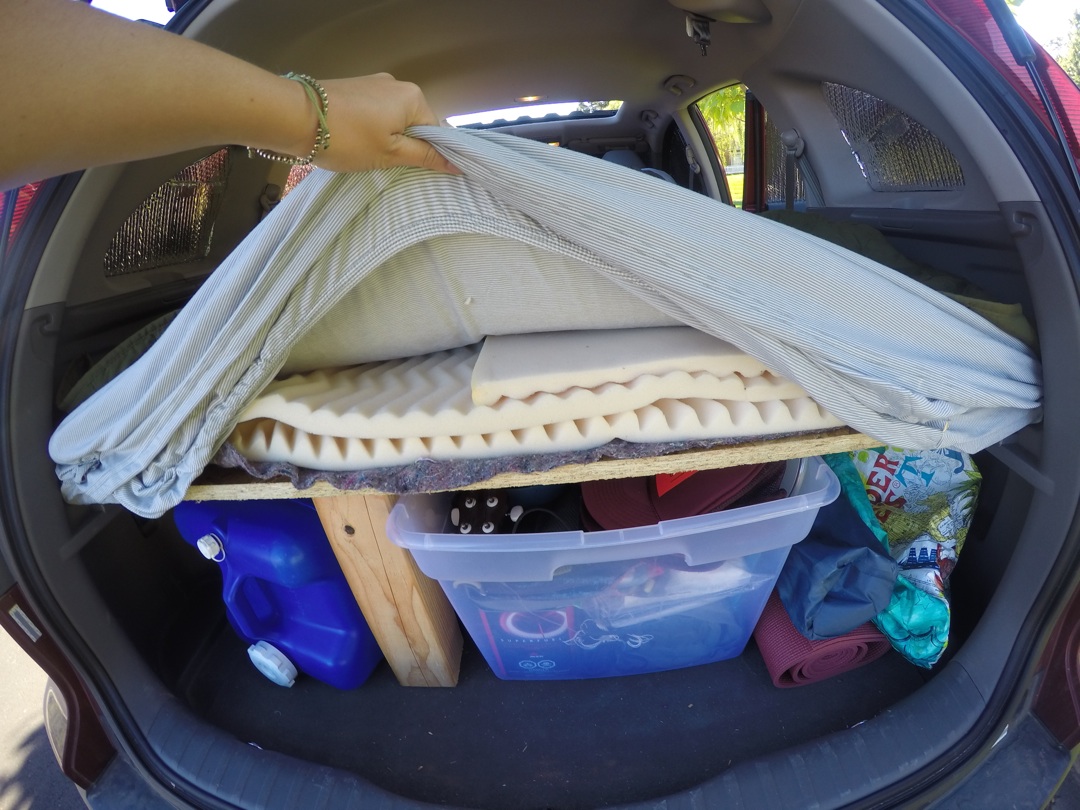
For bedding, I bought two foam mattress toppers (think egg crates) that were on sale and put them on top of eachother. I then covered them with a full size fitted sheet to keep them in place. Sheets, blankets and pillows are up to you, but I wanted to be the coziest person in the world, so I went big on this.
One great thing about having a platform bed is the storage space underneath. Under the platform, I am keeping all of my gear, clothes, food, cooking stuff, a folding table, a camp chair, a cooler and too many pairs of shoes. Figure out a system that is both easy and organized, and one that works for you.
STEP 5
You’re probably going to want some kind of window covering. Curtains are a good option. Instead, I used Reflectix (buy at any home improvement store, comes in a big roll) and cut it to size. This means no curtains swinging around, and no velcro or tape needed. I am really happy with how these turned out– nobody can see in my car, plus the insulation will keep me a bit warmer.
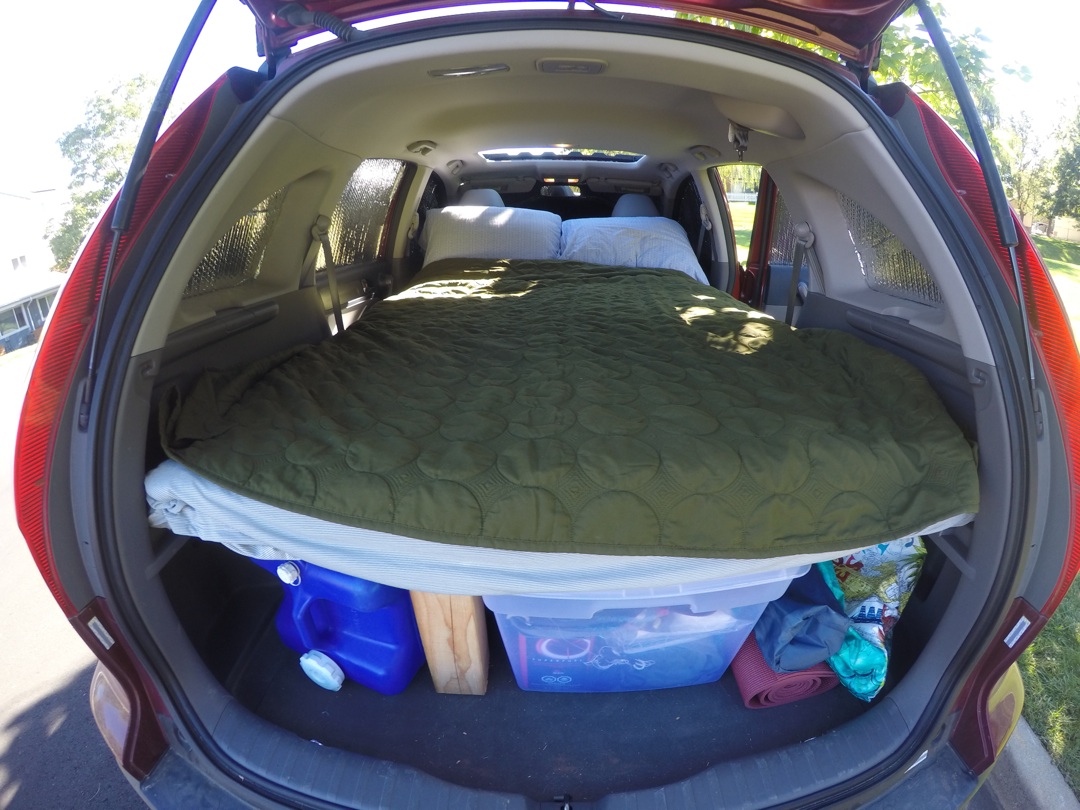
Maybe I can put my car on Airbnb now?
How much did it cost?
- $56 for wood and hardware
- $21 for Reflectix
- $53 for foam
- $71 for bedding and pillows
So in total, this project cost me $201, plus the cost of a cooler, folding table, and some storage bins. If you already have some extra bedding you like, I bet you could easily do this for $120 or less.
What are the dimensions of the platform?
When the hinge is extended, total length is 72″ and width is 41″. Height is 15″ from the very back of the car.
I’m pretty happy with how it turned out. I’m heading out today to start my road trip and I’m super excited! I’m supposed to stay at a friend’s house tonight, but I honestly might just park in her driveway so I can sleep in my new camper.
Questions? Let me know in the comments!
UPDATE: Do you have an SUV or car to camper conversion you would like me to feature on my blog? Shoot me an email at info@erinoutdoors.com. I would love to hear from you!
Please ignore this text box - Recoleta Font






9d4vbp
e236d5
jtilx0
This is such a great guide! I’ve always wanted to convert my SUV for weekend camping trips, and your tips on space-saving hacks and essential gear are super helpful. I can’t wait to try out the sleeping setup you suggested. Thanks for sharing!
6s3wmw
c5aizj
mu7ey5
j7gwyw
4r4du1
gvwcks
uxhvuv
t938m9
pu9dxn
34dj6d